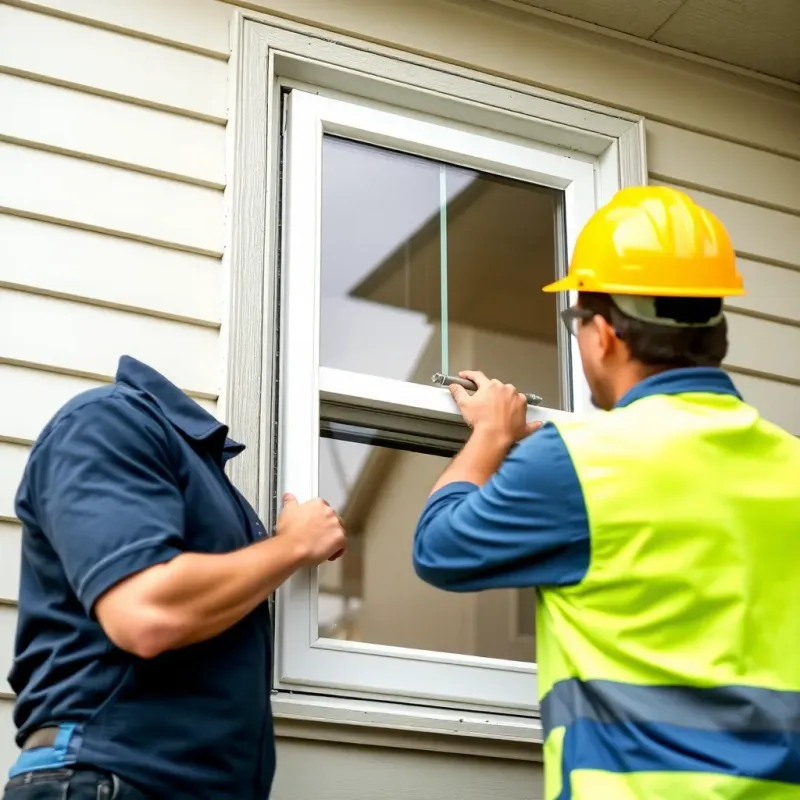
How to Fix Water Damaged Drywall: DIY Repair Guide
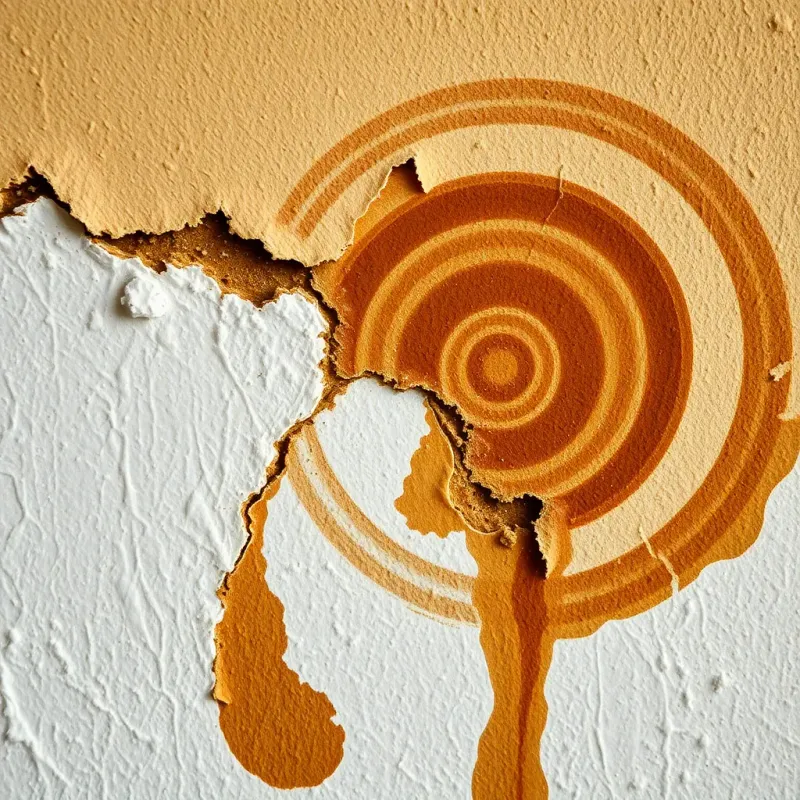
If there’s one repair I’ve done more times than any other in this line of work, it’s fixing water-damaged drywall. It shows up on nearly every single water damage job I walk into—the telltale bubbling paint, the brown stains creeping across the ceiling, the soft spots that crumble when you push on them. The good news? This is genuinely one of the more DIY-friendly repairs you can tackle as a homeowner, as long as you assess the damage correctly and don’t cut corners on the drying step.
I’ve taught plenty of handy homeowners how to do this repair themselves, and I’ve also seen the aftermath when someone tries to rush through it or paints over a water stain without fixing the underlying problem. Trust me, doing it right the first time saves you from doing it twice. This guide covers everything I’ve learned about fixing water-damaged drywall—the same process I use on my own jobs.
Key Takeaway: Never repair water-damaged drywall until it’s completely dry—repairing or painting over damp drywall traps moisture inside and almost guarantees mold growth. If the drywall feels soft or spongy when you press it, it needs to be replaced, not patched.
Understanding Water Damage Severity in Drywall
Before you start any drywall water damage repair work, you must understand the extent of the damage. Not all water damage looks the same, and assessing severity correctly determines whether you can DIY or need professional help.
Minor damage typically includes small stains without structural compromise, slight discoloration, or minor bubbling in paint. These areas usually dry without extensive intervention. Moderate damage involves larger affected areas, soft spots when pressed, or paint bubbling across several square feet. Severe damage means the drywall has become structurally weak, shows visible mold growth, or has been saturated for extended periods.
Press firmly on the affected area with your finger. If the drywall feels spongy or your finger creates an indent that doesn’t bounce back, the damage extends deeper than surface level. This indicates the gypsum core has absorbed significant moisture and may require replacement rather than repair.
Tools and Materials You’ll Need
For Minor Damage (Stains/Bubbling):
- Putty knife (2-4 inches)
- Sandpaper (120, 150, and 220-grit)
- Drywall joint compound (also called spackle or mud)
- Primer (water-resistant, mold-resistant)
- Paint (matching your wall color)
- Caulk gun and caulk (optional, for sealing edges)
- Sponge or cloth
- Safety glasses
- Dust mask or respirator
For Major Damage (Drywall Replacement):
- Drywall sheets (1/2-inch standard for walls, fire-rated for bathrooms)
- Drywall saw or utility knife
- T-square or straightedge
- Drywall screws (1.25 inches)
- Drill/driver
- Tape and joint compound (mesh tape, hot mud or all-purpose compound)
- Taping knives (4, 6, and 10-inch)
- Primer and paint
- Safety equipment (gloves, mask, glasses)
Step-by-Step Repair for Minor Water Damage
Step 1: Dry the Area Completely
Never repair water-damaged drywall while it’s still wet. Follow our guide on how to dry out a room after water damage for detailed drying techniques. Use fans, dehumidifiers, and open windows to circulate air. Most minor damage areas need 24-48 hours of drying. You can accelerate this by aiming a fan directly at the damaged area and using a dehumidifier in the room.
Step 2: Clean the Surface
Remove any mold growth or discoloration with a mixture of one part white vinegar and three parts water. Wipe the area thoroughly and let it dry completely. For stubborn stains, use a soft brush to gently scrub, then wipe clean.
Step 3: Sand the Damaged Area
Use 120-grit sandpaper to sand away any bubbling paint, loose coating, or surface irregularities. Sand in circular motions to create a smooth, even surface for patching. Wipe away all dust with a damp cloth and let it dry completely before moving to the next step.
Step 4: Apply Joint Compound
Using a putty knife, apply a thin layer of drywall joint compound over the damaged area. The compound should be slightly thicker than paint but thin enough to feather out smoothly. Press the compound firmly into any depression or texture differences.
For larger stains (6+ inches), apply multiple thin layers rather than one thick coat. Allow 24 hours between coats. Sand lightly between coats with 150-grit sandpaper to ensure good adhesion.
Pro tip from experience: When applying joint compound, hold your putty knife at about a 30-degree angle and pull in one smooth motion. Most beginners load too much compound on and then spend forever sanding it down. Thinner is better—you can always add another coat, but you can’t un-apply a thick one without a lot of extra sanding work.
Step 5: Prime and Paint
Once the final coat of joint compound has dried and been sanded smooth, apply a coat of water-resistant, mold-resistant primer. This is critical for water-damaged areas, as it seals the repaired section and prevents future moisture problems.
After the primer dries (typically 1-2 hours), apply two coats of paint matching your wall color. Light colors hide repairs better, while darker colors may show imperfections more clearly.
Step-by-Step Repair for Major Water Damage
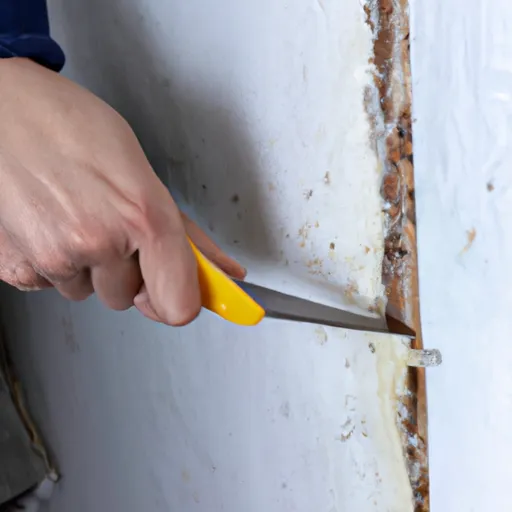
Step 1: Cut Out Damaged Drywall
Using a drywall saw or utility knife, cut out the damaged section. Make straight, clean cuts perpendicular to wall studs to create a rectangular opening. This creates secure edges for installing the patch and ensures structural integrity.
Step 2: Install Drywall Patch
Cut a new piece of drywall to fit the opening precisely. Secure it to the studs with drywall screws spaced every 12 inches around the perimeter and every 16 inches in the field. Screws should be driven slightly below the surface (dimpled) but not broken through the paper.
Step 3: Tape the Seams
Apply mesh drywall tape over all seams where new drywall meets existing drywall. This reinforces the joint and creates a smooth transition.
Step 4: Apply Joint Compound
Using a 4-inch knife, apply the first coat of joint compound over the seams and screw dimples. Feather the edges 6-8 inches beyond the tape. Allow this to dry completely (usually 24 hours).
Apply a second coat with a 6-inch knife, feathering even further. After drying, apply a final coat with a 10-inch knife for a perfectly smooth transition.
Step 5: Sand, Prime, and Paint
Sand the dried compound smooth with 220-grit sandpaper. Prime the entire patch with water-resistant primer, then paint to match your wall.
Ceiling Drywall-Specific Tips
For extensive ceiling damage, see our dedicated water damage ceiling repair guide. Ceiling repairs are more challenging than wall repairs due to gravity and overhead work. Use a drywall lift if replacing ceiling sections—this tool holds drywall in place against the ceiling while you secure it, eliminating the need for helpers.
For stains or minor damage on ceilings, the same repair process applies, but work from a sturdy ladder or scaffold. Apply compound in very thin coats, as thicker coats are more likely to sag under gravity before drying.
Textured ceilings complicate repairs because matching the texture is difficult. If the textured area is small, sand it flat and repaint with a smooth finish. For larger areas, consider scraping the entire ceiling texture and repainting it smooth.
Mold Checking Before Any Repair
Before repairing water-damaged drywall, inspect for mold growth carefully. Mold appears as black, green, or white spots and may smell musty. Never paint over mold—this traps moisture and encourages further growth.
If you see visible mold:
- For small areas (under 10 square feet): Clean with vinegar solution and allow to dry thoroughly before repairs
- For larger areas or heavy mold: Consider professional remediation, as DIY removal risks spreading spores — see our mold prevention guide after water damage
If the drywall was wet for more than 48 hours without drying, replace it rather than repair it—mold may be growing inside where you can’t see it.
Priming and Painting After Repair
The primer step is often overlooked but absolutely critical for water-damaged drywall. Use a water-resistant, mold-resistant primer—products labeled for bathrooms or moisture-prone areas work best. This provides a barrier against future moisture problems.
Apply primer generously and allow proper drying time (usually 1-2 hours). The primer should look like a solid, opaque coat covering the repair completely.
One thing I always tell homeowners is: don’t cheap out on the primer. I’ve seen people use regular primer on water-damaged areas and then wonder why the stain bleeds through three coats of paint. Spend the extra $10-$15 on a quality stain-blocking, mold-resistant primer like Zinsser or KILZ. It makes all the difference in the world, and you’ll only have to paint once instead of three times.
When painting, use high-quality interior paint suitable for the room type. Bathrooms and kitchens should use semi-gloss or satin finishes, which resist moisture better than matte finishes. Apply two coats for best coverage and durability.
When to Call a Professional
Call a professional if:
- The damaged area exceeds 50 square feet
- The drywall feels structurally compromised or unstable
- You discover extensive mold growth
- Water damage is from contaminated water (sewage, flooding)
- You’re uncertain about the damage extent or source
- Ceilings are heavily damaged or sagging
- Electrical issues are present near the water damage
Professional contractors have specialized equipment for detecting hidden moisture, testing for mold, and ensuring proper drying. They also carry insurance if something goes wrong.
Cost Comparison: DIY vs. Professional Repair
DIY repair costs for minor damage typically run $50-$200 in materials (joint compound, primer, paint, sandpaper). Your primary investment is time and equipment, most of which you may already own.
Professional repair costs vary widely based on damage extent and location. Our water damage restoration cost guide breaks down typical expenses. Minor wall repairs range from $300-$800, while larger areas or ceiling work costs $800-$2,500+. Major drywall replacement work can exceed $5,000 for significant damage.
When DIY makes sense: Damage is small (under 20 square feet), drywall is still structurally sound, you have basic tools, and you have time for proper drying between steps.
When professional help makes sense: Damage is extensive, ceilings are involved, structural concerns exist, or you want guaranteed results with warranty protection.
I’ve seen this work time and time again: homeowners who take their time with the drying and patching process—even if it takes a full week of waiting between steps—end up with repairs that are completely invisible. The ones who rush through it in a weekend almost always end up with visible seams, cracking compound, or worse, mold behind the fresh paint. Patience is the real secret ingredient here.
FAQ: Common Questions About Drywall Water Damage Repair
Q: How long does it take water-damaged drywall to dry on its own? A: Small affected areas may dry in 24-48 hours with proper ventilation. Larger areas or areas with poor airflow may take a week or longer. Active drying methods (fans, dehumidifiers) speed this significantly.
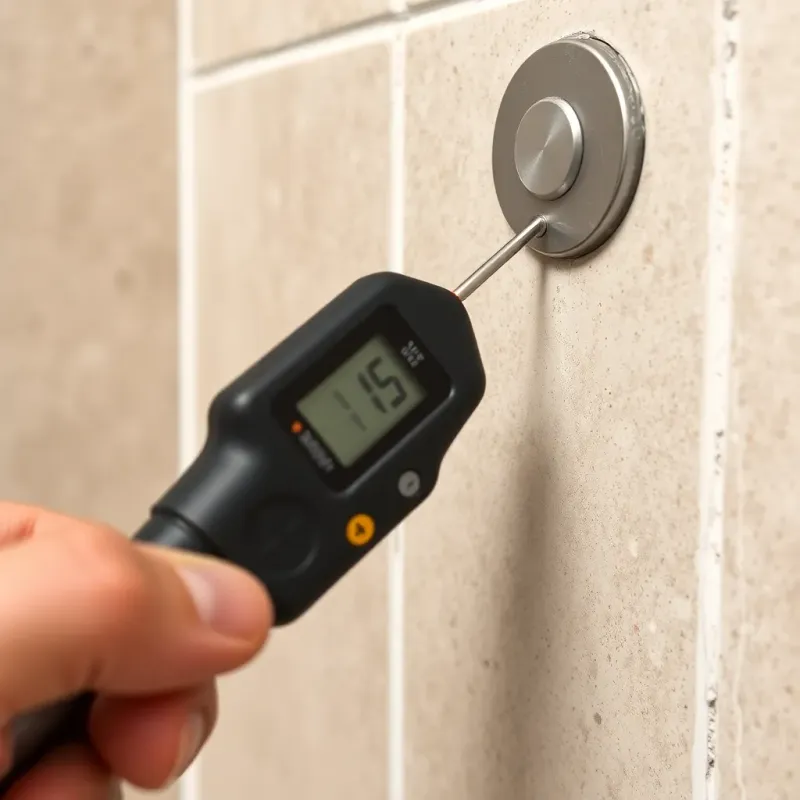
Q: Can I repair water-damaged drywall if it’s still slightly damp? A: No. Repairing damp drywall traps moisture inside, causing mold growth and joint compound failure. Wait until the area is completely dry to the touch and shows no moisture when tested with a moisture meter.
Q: Will paint alone fix water stains on drywall? A: Paint won’t prevent the stain from bleeding through unless you use primer-sealer first. Regular paint has poor sealing properties. Always use a dedicated primer designed for stain blocking.
Q: How can I tell if mold is growing inside the drywall? A: You can’t see inside the drywall visually, but signs include a musty smell, visible mold on edges or back, or water damage lasting more than 48 hours. If concerned, hire a moisture specialist to test with a moisture meter.
Q: Should I replace or repair drywall damaged by clean water versus contaminated water? A: Clean water (pipe burst, rainwater) allows for potential repair if treated promptly. Contaminated water (sewage, flooding) requires drywall replacement—never attempt to repair. When in doubt, replace for health safety.
Disclaimer: This article is for informational purposes only and does not constitute professional advice. Every water damage situation is unique. Always consult a licensed contractor or restoration professional for your specific situation. If you’re dealing with an emergency, contact your local restoration company immediately.