Water Damage Ceiling Repair: Complete Step-by-Step Guide
I’ll never forget the first ceiling repair I tackled back when I was starting out in restoration work. The homeowner had been staring at a small brown stain for months, hoping it would “go away on its own.” By the time I got up there, the drywall was so waterlogged I could push my finger right through it. That experience taught me a lesson I share with every client now: a water-stained ceiling is your home screaming for help, and the longer you wait, the worse it gets.
Whether caused by roof leaks, plumbing issues, or bathroom flooding, water damage ceiling concerns must be addressed quickly to prevent structural damage, mold growth, and safety hazards. This comprehensive guide walks you through identifying ceiling water damage, locating the source, and executing safe, effective repairs — the same process I follow on every job.
Key Takeaway: Always find and fix the water source before repairing the ceiling itself. Patching drywall over an active leak is the most expensive mistake you can make, because you will end up doing the work twice and dealing with mold in the process.
Identifying Ceiling Water Damage Signs
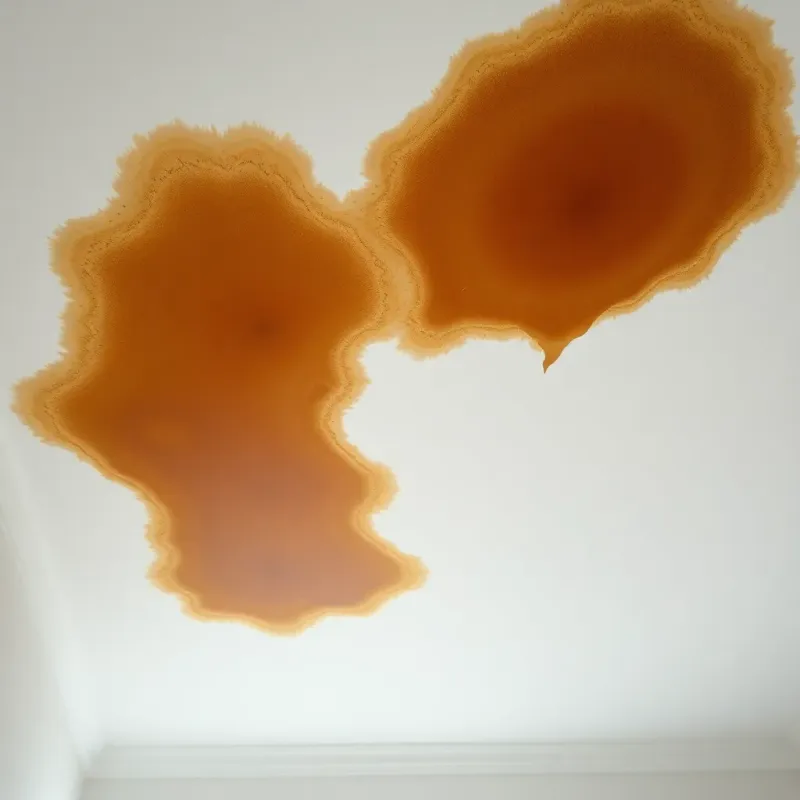
Water stains are the most obvious sign of ceiling water damage. These typically appear as yellowish or brown discoloration on the ceiling surface. Stains indicate that water has penetrated the ceiling and may still be present in the layers above.
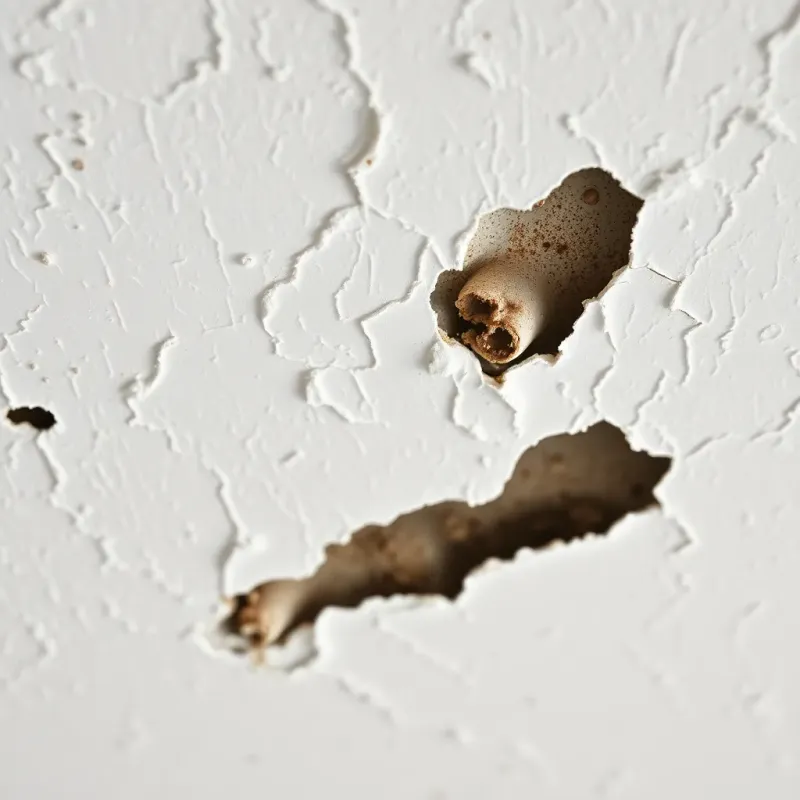
Sagging ceilings signal serious structural concerns. When drywall absorbs large amounts of water, it weakens and loses its load-bearing capacity. A ceiling that sags downward indicates the structure is failing and presents an immediate safety risk.
Bubbling or peeling paint occurs when water gets trapped between the paint and drywall surface. This usually means active moisture is present—either ongoing water infiltration or incomplete drying.
Discoloration patterns around ceiling edges, along joints, or in specific areas help identify water source location. Water typically travels downward and spreads along structural elements like joists and beams.
Mold growth on ceilings appears as black, green, or white fuzzy spots. Mold indicates prolonged moisture exposure and poses health risks. Never ignore visible mold—follow our mold prevention guide after water damage and consider professional remediation.
A musty odor without visible mold suggests moisture is trapped inside ceiling cavities, likely growing mold that you cannot see. Hire a professional to locate and address hidden moisture.
Finding and Fixing the Water Source First
This is the most critical step—repair the ceiling leak, but address the water source above it first. If you fix the ceiling damage without stopping the water source, the problem will immediately recur. From my experience, about half the ceiling repair callbacks I’ve seen over the years happened because someone skipped this step.
For roof leaks, inspect your attic after rain. Look for wet spots on the underside of the roof, along rafters, or on attic insulation. Water typically enters from higher than the visible stain on the ceiling below, so inspect 5-10 feet above the stain area.
For upstairs bathroom or kitchen leaks, check the room directly above the ceiling damage. Look for water around the toilet base, shower/tub edges, or under sinks. Water can travel along pipes or between wall cavities before reaching the ceiling below.
For HVAC issues, check your air conditioning unit or furnace drip pan. Blocked drain lines cause water to back up and leak into ceilings below. Clear drain lines or have HVAC technicians service the system.
For plumbing leaks, trace water pipes running through the ceiling area. Small pinhole leaks in copper pipes create gradual staining before major failure. Consider having a plumber inspect if source isn’t obvious.
Don’t proceed with ceiling repair until the water source is permanently stopped. Temporary fixes like tarps or caulk may slow water flow, but identify and fix the root cause.
Safety Precautions: Ceiling Collapse Risk
Ceiling collapse is a real risk with significant water damage. Before entering any area with ceiling damage, assess structural integrity carefully.
Do not touch or disturb a visibly sagging ceiling—the weight of accumulated water can cause sudden collapse. If a ceiling sags significantly, evacuate the area and contact a professional immediately.
Electrical hazards exist when water contacts ceiling fixtures, electrical boxes, or wiring. Never touch ceiling lights, fans, or wiring in water-damaged areas. Turn off electricity to the affected area at the circuit breaker if possible.
Mold spores become airborne when you disturb water-damaged materials. Wear an N95 or P100 respirator mask if working in areas with visible mold or suspected hidden mold.
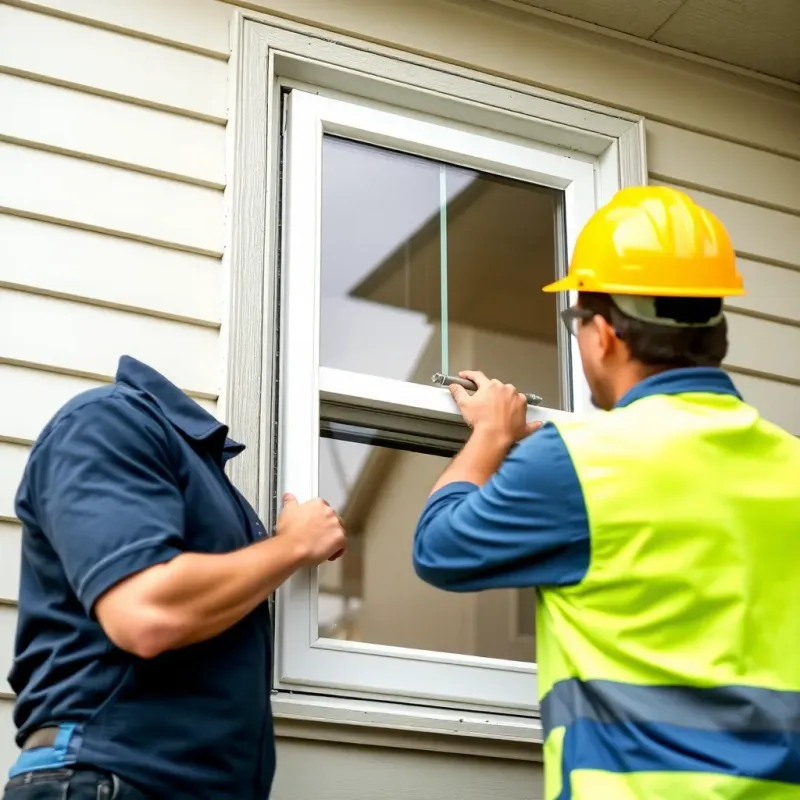
Working overhead is inherently dangerous. Use a sturdy ladder with a helper present. Never overreach or work on unstable surfaces. For ceilings above 8 feet, use scaffolding or rent a drywall lift.
If you observe any of these conditions, stop work and call a professional:
- Ceiling sags visibly or feels unstable
- Visible mold covers significant areas
- Electrical wiring or fixtures are wet
- You feel unsafe or uncertain about structural integrity
- Damage resulted from sewage backup or contaminated water
Step-by-Step Ceiling Water Damage Repair Process
Step 1: Ensure Complete Drying
Before any repair work, the ceiling must be completely dry. This typically takes 3-7 days with active drying methods. Run fans continuously, use dehumidifiers, and open windows to circulate air. Here’s what I always recommend to clients: be patient at this stage. I know it’s tempting to rush into the repair, but mudding over damp drywall is a recipe for peeling, bubbling, and mold growth down the line.
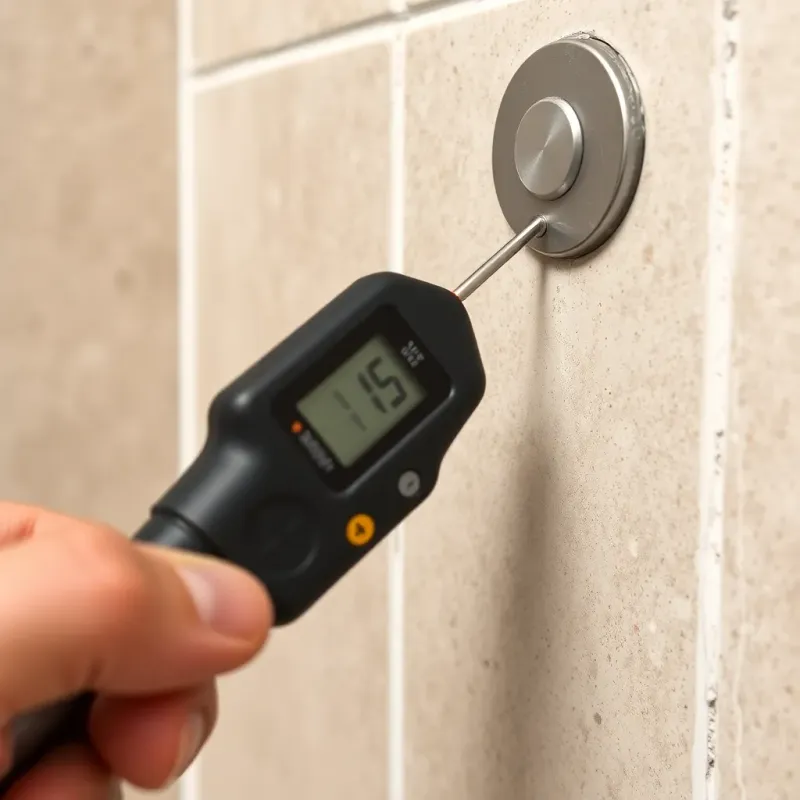
Check moisture levels with a moisture meter if available (target: under 12% moisture content). If uncertain about dryness, wait additional days—attempting repair on damp ceiling materials leads to repair failure and mold growth.
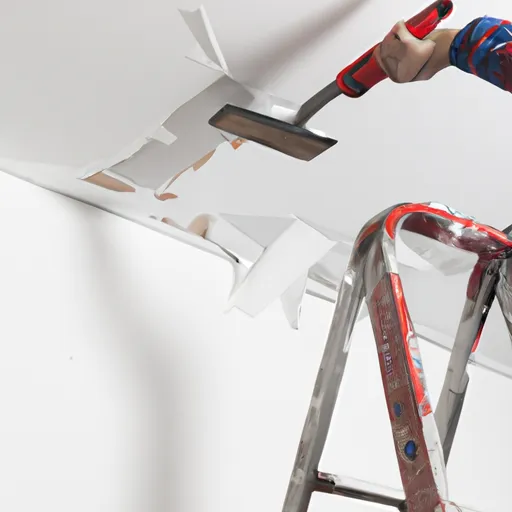
Step 2: Remove Stained or Damaged Drywall
For minor stains on painted ceilings, you may sand and repaint without removal. For bubbling paint, sagging sections, or structural softness, cut out and replace the damaged section.
The techniques for ceiling drywall are similar to wall repairs covered in our water damaged drywall repair guide. Using a drywall saw, mark a rectangular area encompassing all visible damage plus 6 inches of undamaged ceiling on all sides. Cut straight lines perpendicular to ceiling joists. Remove the damaged drywall section carefully.
Step 3: Inspect for Mold and Hidden Damage
With drywall removed, inspect the exposed area for mold growth on joists, insulation, or the back of existing drywall. If mold is visible:
- For small areas (under 10 sq ft): Clean with vinegar solution and allow to dry completely
- For larger mold colonies: Stop work and call professional mold remediation
Check insulation for saturation. If insulation is wet or moldy, replace it. Wet insulation loses its R-value and promotes mold growth.
Step 4: Install New Drywall Patch
Cut new drywall to fit the opening perfectly. Fire-rated drywall is recommended for attic ceilings and bathrooms. Use drywall screws spaced 12 inches apart around the perimeter and 16 inches in the field to attach to joists.
Screws should be dimpled (slightly below the surface) but not broken through the paper. Over-driving screws weakens fastening; under-driving leaves a ridge.
Step 5: Tape and Mud the Seams
Apply mesh tape over all seams where new drywall meets existing ceiling. Using a 4-inch taping knife, apply the first coat of joint compound (also called mud), feathering the edges 4-6 inches beyond the tape.
For second and third coats, use a 6-inch and then 10-inch knife, respectively. Each coat must dry completely (usually 24 hours) before applying the next. Proper feathering is essential—it creates an invisible transition between new and existing ceiling.
Step 6: Sand, Prime, and Paint
Sand the dried compound smooth with 220-grit sandpaper. A trick I learned early in my career: hold a work light at a low angle against the ceiling while sanding. The raking light reveals every ridge and imperfection that you would completely miss under normal overhead lighting. This one technique is the difference between a professional-looking finish and a patch that sticks out like a sore thumb.
Prime the entire repaired area with water-resistant primer designed for moisture-prone areas. Primer prevents future water stains and provides a moisture barrier.
Paint with a ceiling paint color matching your existing ceiling. Most ceilings are painted white or off-white, but match your specific color. Apply two coats for complete coverage.
When Ceiling Needs Full Replacement
Full ceiling replacement is necessary if:
- Damage covers more than 50% of the ceiling
- Structural joists or beams are compromised
- Extensive mold growth is present
- Multiple water damage incidents have occurred
- The ceiling is sagging dangerously
Full replacement involves removing all ceiling drywall, inspecting and repairing joists if needed, installing new drywall, taping, and finishing. This is labor-intensive and typically requires professional installation, especially for ceilings above 10 feet.
Dealing with Textured or Popcorn Ceilings
Textured ceilings complicate repairs because matching the texture is difficult for DIYers. If the texture is small (under 20 square feet), consider removing the texture entirely and finishing with smooth drywall.
To remove popcorn texture, spray it with water to soften, then scrape gently with a putty knife. Vacuum all debris and finish with smooth drywall compound.
If keeping texture, purchase matching texture spray (available at home improvement stores) and practice on scrap material first. Uneven application creates visible inconsistencies.
For large textured ceiling repairs, hiring a professional who has texture-matching equipment is worthwhile.
Cost Estimates for Ceiling Repair
Minor repairs (under 50 sq ft):
- DIY repair: $100-$300 in materials
- Professional repair: $400-$1,200
Moderate repairs (50-200 sq ft):
- DIY repair: $300-$800 in materials plus significant labor
- Professional repair: $1,000-$3,000
Major repairs/full replacement (200+ sq ft):
- Professional only: $3,000-$10,000+
Costs vary by region, ceiling height, texture type, and damage complexity. See our full water damage restoration cost guide for how ceiling repairs fit into overall restoration expenses.
Insurance Coverage for Ceiling Water Damage
Homeowners insurance may cover ceiling water damage depending on the cause. Coverage details vary significantly between policies and insurers.
Typically covered: Sudden, accidental water damage (burst pipe, roof leak from storm, appliance failure)
Typically NOT covered: Slow leaks from ongoing maintenance issues, water damage from flooding, damage from lack of home maintenance
File a claim promptly when damage occurs. Document all damage with photos and provide receipts for mitigation efforts. Insurers often require immediate action to prevent further damage.
Review your policy to understand coverage limits and deductibles. Some policies limit water damage coverage to specific amounts.
Hiring a Professional vs. DIY
Here is a quick comparison to help you decide which route makes sense for your situation:
| Factor | DIY Repair | Professional Repair |
|---|---|---|
| Cost | $100-$800 (materials only) | $400-$10,000+ |
| Time to Complete | 5-14 days (including drying) | 2-7 days |
| Skill Level Needed | Moderate to high | None (they handle everything) |
| Mold Detection | Limited (visual only) | Thermal imaging and moisture meters |
| Warranty | None | Typically 1-5 years |
| Best For | Small stains, low ceilings, no mold | Large damage, high ceilings, mold present |
| Risk of Rework | Higher if inexperienced | Low |
Hire a professional if:
- Damage is extensive or structural integrity is questionable
- Mold is present
- Ceilings are high (above 10 feet)
- You lack tools, experience, or confidence
- Electrical concerns exist
- You prefer a warranty on repair work
DIY is reasonable if:
- Damage is small and clearly defined
- Ceiling is at comfortable working height
- You have confirmed the source is fixed
- No mold is present
- You have basic tools and time for proper drying
Professional contractors bring specialized equipment, insurance, expertise in detecting hidden damage, and warranties. For significant damage, the peace of mind often justifies the cost.
FAQ: Common Questions About Ceiling Water Damage Repair
Q: How long does it take to repair water damage to a ceiling? A: Small repairs take 5-7 days (accounting for drying time between compound applications). Larger repairs or full replacement take 2-3 weeks or longer, depending on complexity.
Q: Can I paint over a water stain without priming? A: Not effectively. Paint alone cannot block a stain from bleeding through, especially if moisture is still present. Always use a water-resistant primer-sealer designed for stain blocking before painting.
Q: What’s the difference between active water damage and old water stains? A: Active damage shows signs of ongoing moisture: soft spots, bubbling paint, musty odor, or visible mold. Old stains are dry, have stable paint, and show no softness. Old stains require less urgency but still need repair to prevent mold in the future.
Q: Is it safe to live in a home with ceiling water damage? A: Small, dry stains are relatively safe for short periods. However, sagging ceilings present immediate collapse risks—evacuate if you observe significant sagging. Extensive mold presents health hazards, especially for those with allergies or respiratory conditions.
Q: Should I replace ceiling insulation even if it looks okay? A: If insulation was wet, it should be replaced. Wet insulation loses effectiveness and is prone to hidden mold growth. Once dry, you cannot reliably determine if mold is growing inside the insulation. Replacement is the safer choice.
Disclaimer: This article is for informational purposes only and does not constitute professional advice. Every water damage situation is unique. Always consult a licensed contractor or restoration professional for your specific situation. If you’re dealing with an emergency, contact your local restoration company immediately.