How to Fix Water Damaged Window Sill and Frame
Window sills and frames are among the most vulnerable components of your home’s exterior. Constantly exposed to rain, snow, temperature fluctuations, and UV radiation, windows take the brunt of weather exposure. When water damage develops in window sills and frames, it can compromise structural integrity, allow water into your home, and create conditions for mold growth. This comprehensive guide covers assessment, repair options, and long-term prevention of window water damage.
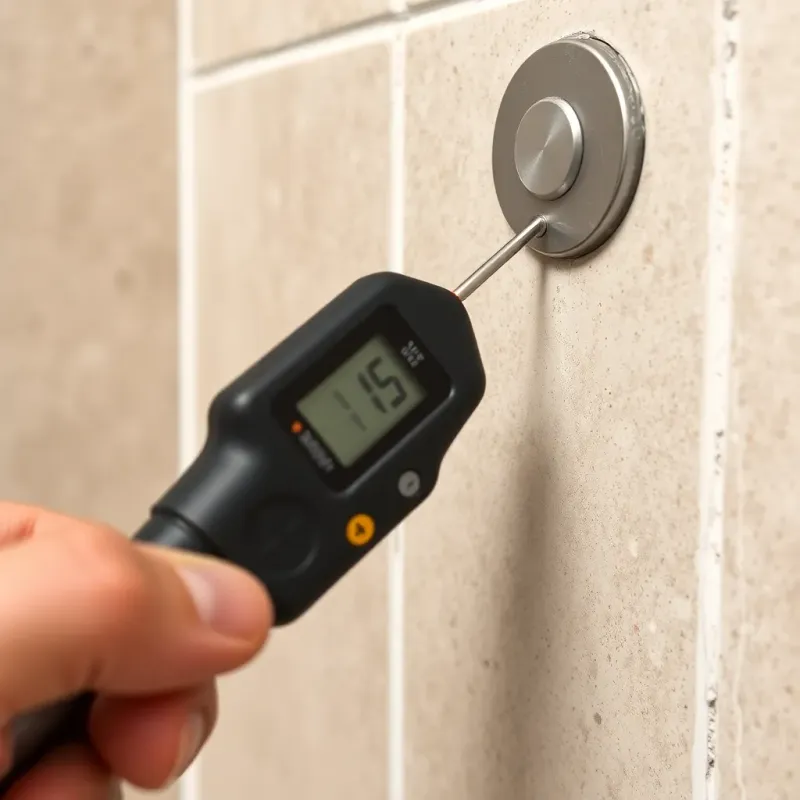
Key Takeaway: Proper assessment is everything—using a moisture meter and probe test to determine whether damage is surface-level or structural will save you from either over-spending on unnecessary full replacement or under-repairing a problem that will quickly return.
Why Windows Are Vulnerable to Water Damage
Window sills and frames occupy a critical position in your home’s defense against water intrusion. These components must be exposed to outdoor weather while creating a watertight seal. This dual requirement creates inherent vulnerability.
Common failure points include:
- Failed Caulk Seals: Caulk around window frames deteriorates from UV exposure and temperature cycling, creating gaps where water infiltrates
- Improper Installation: Windows installed without proper flashing or sealant allow water to migrate around the frame
- Poor Drainage: Sills designed without adequate slope direct water toward the frame rather than away
- Material Degradation: Wood frames absorb moisture and eventually rot. Vinyl frames can crack and create pathways for water entry
- Paint Failure: Peeling paint leaves bare wood vulnerable to water absorption
- Flashing Gaps: Improperly installed or missing window flashing allows water behind the sill and frame
- Blocked Weep Holes: Modern windows include weep holes for drainage. When these become blocked by paint, caulk, or debris, water accumulates
Understanding these vulnerabilities helps you identify problems before they become severe.
Comprehensive Assessment of Window Damage
Proper assessment determines which repair strategy is appropriate: targeted wood filler repair, partial component replacement, or complete frame replacement.
Visual Inspection Process
Examine all visible portions of the window frame, sill, and trim from both inside and outside your home. Look for:
Exterior Signs: Paint peeling or bubbling, wood showing dark staining or discoloration, soft or spongy areas when pressed gently, visible rot with wood fiber exposed, gaps between the frame and wall structure
Interior Signs: Water staining on walls or ceilings adjacent to windows, visible mold or mildew on or near the frame, soft drywall near the window opening, paint bubbling or wallpaper separating, musty odors — learn to recognize signs of hidden water damage in walls before they become severe
Moisture Testing
Use a moisture meter to measure the moisture content of window frames and sills. Wood below 14% moisture content is safe. Readings above 16% indicate moisture that supports rot and mold. Readings above 20% indicate active water saturation requiring immediate attention.
Test multiple locations around the window. Water often penetrates unevenly, with one side of the frame showing severe damage while the opposite side appears normal. Testing at different depths (surface versus core of the wood) reveals the extent of water penetration.
Probe Testing
Use a screwdriver or awl to gently probe suspicious areas. Healthy wood resists probing; the tool will bounce back without sinking. Rotted wood allows the tool to sink easily and may crumble. Probe around the perimeter of the frame, particularly at corners where water accumulation is common.
Inspection of Surrounding Components
Assessment should extend beyond the visible frame. Check:
- Exterior trim and molding for rot or separation
- Caulk and flashing condition
- Sill slope and drainage
- Interior wall damage adjacent to the window
- Presence and function of weep holes
- Condition of glazing compound (on wood windows) or vinyl gaskets (on vinyl windows)
This comprehensive assessment determines if the damage is surface-level (suitable for wood filler repair) or structural (requiring partial or complete replacement).
Assessment-Based Repair Planning
Assessment results guide repair strategy selection.
Surface Damage Only (moisture content 14-16%, minor paint peeling, shallow soft spots): Wood filler repair may be appropriate. The frame is structurally sound despite minor water damage.
Moderate Damage (moisture content 16-20%, noticeably soft wood, probe sinks up to 1/4 inch): Partial component replacement is typically necessary. The affected section must be removed and replaced, but the overall frame may remain functional.
Severe Damage (moisture content above 20%, extensive soft wood, wood crumbles when probed, structural movement visible): Complete frame replacement is required. Attempting lesser repairs results in continuing deterioration and eventual complete failure.
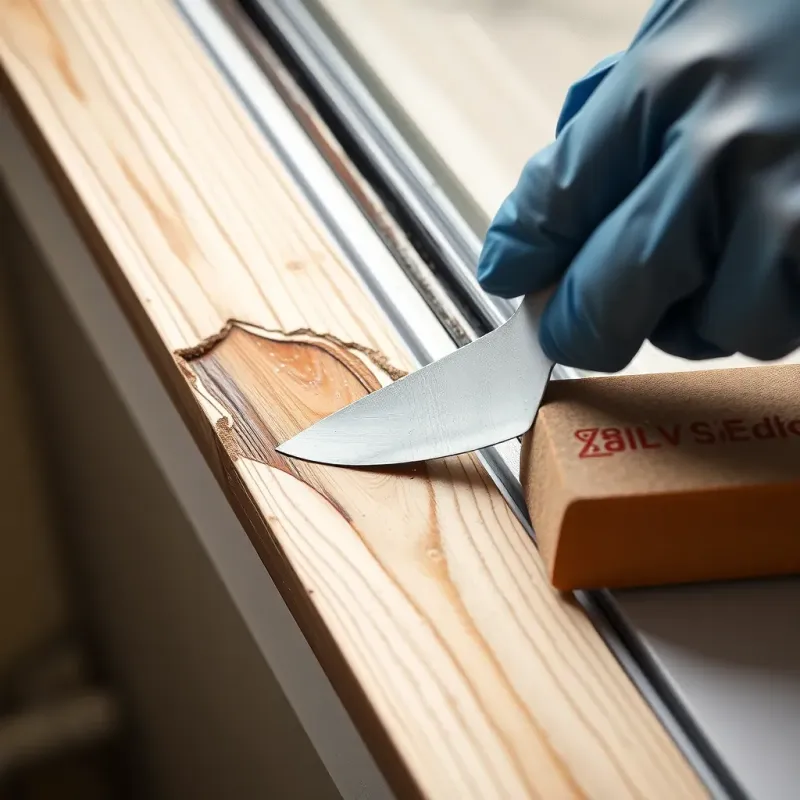
Wood Filler Repair: Surface Damage Solution
For minor water damage limited to surface areas, wood filler provides a quick, economical repair.
Material Selection
Exterior wood fillers perform better than interior products in exposed window locations. Two-part epoxy fillers provide superior durability and can be sanded and painted. Water-based fillers are easier to work with but less durable in harsh weather. Polyester-based fillers fill completely without shrinking and are preferred by many professionals.
Select a filler color matching your window frame wood for easier finishing. Stainable fillers allow color matching after application.
Application Process
Clean the damaged area thoroughly with a chisel or wire brush, removing all loose wood, paint, and debris. The surface should be clean and slightly damp (but not wet) for optimal filler adhesion.
Apply filler according to product instructions, slightly overfilling the damaged area. Use a putty knife to smooth the surface level with surrounding wood. Allow the filler to cure completely (typically 4-24 hours depending on product).
Once cured, sand the filled area smooth, flush with surrounding wood. Sand using progressively finer grits (80, 120, 150, 220) for the smoothest finish. Prime the repaired area with exterior wood primer, then paint with exterior-grade paint matching the frame.
Limitations of Wood Filler Repair
Wood filler repairs are cosmetic solutions appropriate only for minor damage. They don’t restore the structural strength of severely compromised wood. Filler can’t prevent water from reaching the wood below if the underlying waterproofing is compromised. If water damage recurs in a filled area, the repair will fail again.
Use wood filler for touch-up repairs on otherwise sound frames. If assessment suggests deeper damage, plan for more comprehensive repair. Here’s something most people don’t realize: wood filler repairs on window sills that face direct sunlight and rain rarely last more than two to three years, so if your sill is on the south or west side of the house, partial component replacement with rot-resistant wood is almost always the better long-term investment.
Partial Component Replacement: Surgical Repair
When damage is localized to one section of the frame or sill—typically a corner or one side—partial replacement removes the damaged section and restores functionality without replacing the entire frame.
Damage Isolation
Identify the exact boundaries of the damaged area. This is typically a rectangular section including the rotted wood and 2-3 inches of healthy wood on all sides to ensure removal of all water-damaged material.
Component Removal
Remove any trim, glazing, or hardware obstructing access. Cut out the damaged section using a reciprocating saw, handsaw, or chisel depending on the frame design. Make clean, perpendicular cuts perpendicular to wood grain to create maximum gluing surface for the replacement piece.
Replacement Piece Creation
Create the replacement section from pressure-treated lumber or rot-resistant wood species like cedar, redwood, or tropical hardwoods that naturally resist decay. The replacement piece should be cut to exactly fit the opening created by damage removal.
Installation and Securing
Apply exterior wood epoxy to all mating surfaces. Press the replacement piece firmly into place. Use stainless steel fasteners (screws or dowels) to secure the piece, supplementing epoxy’s strength. These fasteners should be spaced 4-6 inches apart.
Finishing
Once the epoxy cures, shape the replacement piece to match the original profile using chisels, files, or sanders as needed. Prime with exterior wood primer and paint to match the existing finish.
When Partial Replacement Works Best
This approach works best when:
- Damage is limited to one corner or one side of the frame
- The damage doesn’t extend completely through the frame thickness
- The remainder of the frame is structurally sound
- The frame can be accessed without removing the entire window
Partial replacement is more economical than complete frame replacement but requires greater skill than simple wood filler repair.
Complete Frame Replacement: The Comprehensive Solution
Extensive water damage, damage affecting multiple frame sections, or water damage to the frame perimeter requires complete frame replacement. This is labor-intensive but provides the opportunity to upgrade to modern materials and improve the window’s performance.
Window Selection
Replacement window selection should consider:
Material: Modern options include wood (classic, attractive, requires maintenance), vinyl (low-maintenance, good thermal performance), composite/fiberglass (durable, paintable, high cost), and aluminum (strong but poor insulation). The choice depends on aesthetic preferences, budget, and performance requirements.
Frame Design: Modern replacement windows feature improved drainage systems, integrated flashing, and better sealing. Frames designed with weep holes and internal drain paths manage water more effectively than older designs.
Insulation: Thermal performance varies significantly. Double-pane insulated glass with low-emissivity coatings dramatically reduces heating and cooling costs compared to older single-pane windows.
Warranties: Quality windows carry 10-20 year warranties. This protects against manufacturing defects and material failure.
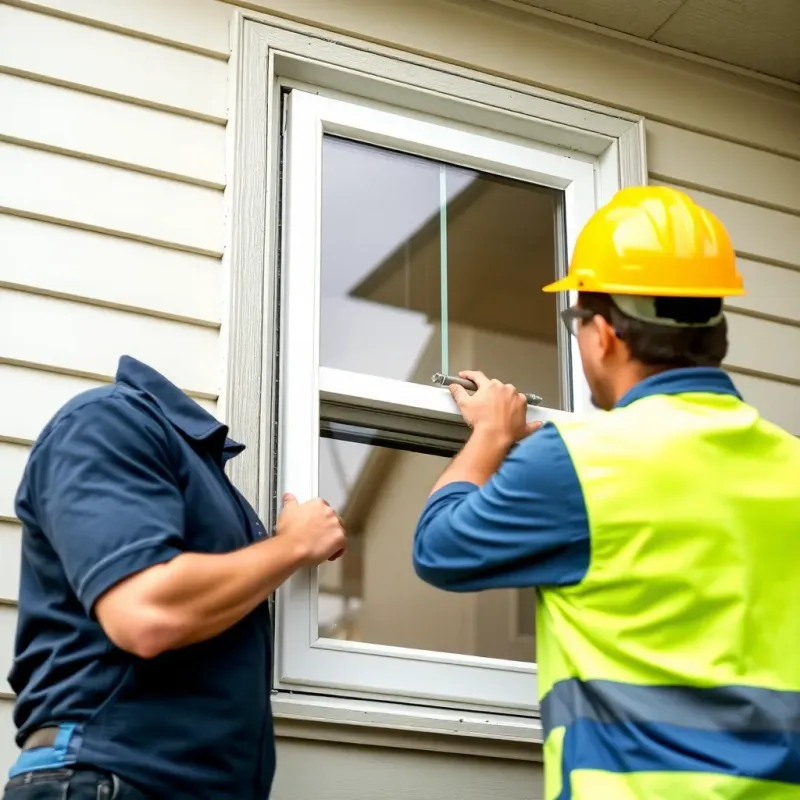
Professional Installation
Window replacement requires careful installation to ensure proper flashing, sealing, and operation. Professional installation typically costs $200-$400 per window but ensures the window functions properly and provides expected performance.
DIY window replacement is possible but difficult. Improper installation causes water infiltration, poor thermal performance, and operational issues. Most warranty coverage requires professional installation.
Flashing and Sealing
Proper flashing is critical to window water management. Install flashing that:
- Wraps around the window perimeter
- Slopes outward and downward for water drainage
- Creates an overlap with the house’s water management system (typically the housewrap or weather barrier)
- Uses proper fasteners and sealants resistant to UV degradation
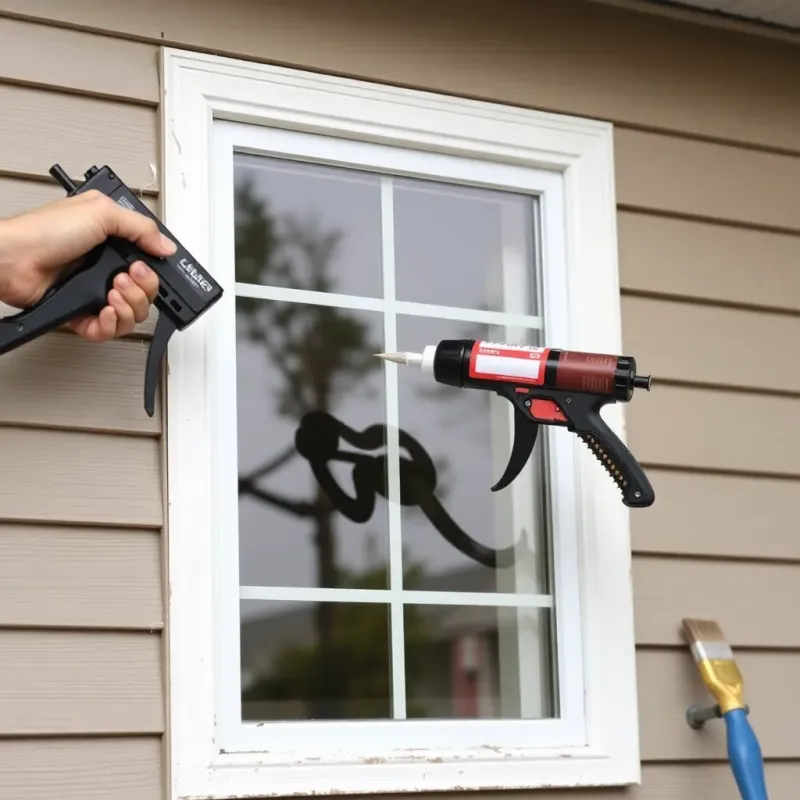
Seal all gaps between the window frame and rough opening with exterior-grade caulk or foam sealant. These gaps are a common source of water infiltration around replacement windows.

Comprehensive Weatherproofing After Repair
Regardless of repair scope, weatherproofing is essential to prevent future water damage.
Caulking Strategy
Inspect and maintain all caulk around window frames. Exterior caulk fails over time from UV exposure and temperature cycling. Recaulk when cracks appear, typically every 5-7 years.
Use high-quality exterior caulk designed for windows:
- Silicone caulk resists movement and lasts 10-20 years but is harder to apply and tool
- Polyurethane caulk provides excellent adhesion and flexibility, lasting 10-15 years
- Acrylic latex caulk is easiest to apply but lasts only 3-5 years before recaulking becomes necessary
Apply caulk in continuous beads at least 1/4 inch wide. Tool the caulk smooth immediately after application to ensure proper adhesion and appearance.
Paint Maintenance
Paint protects wood frames from UV damage and water absorption. Maintain paint integrity by:
- Inspecting annually for peeling, cracking, or chalking
- Repainting exterior wood every 3-5 years depending on paint type and UV exposure
- Using exterior-grade, high-quality paint designed for wood
- Addressing small problems (scraping loose paint, spot priming) before they expand
Sill Slope Verification
Ensure sills slope outward at least 15 degrees (approximately 1/4 inch per foot of width) directing water away from the frame. If sills are level or slope inward, water pools against the frame, accelerating rot.
If sill slope is inadequate, this should be addressed during frame replacement or by installing slope-correcting sealants that raise the interior edge of the sill.
Drainage System Maintenance
Keep weep holes clear of paint, caulk, and debris. These small openings allow water that enters the frame cavity to drain to the exterior. Blocked weep holes cause water to accumulate inside the frame, accelerating rot.
If weep holes are clogged, carefully clean them with a wire or compressed air without damaging the frame.
Prevention of Future Window Water Damage
Long-term prevention requires ongoing attention and maintenance.
Annual Inspection: Check windows annually for signs of water damage, caulk deterioration, or paint failure. Early intervention prevents expensive repairs.
Gutter Maintenance: Keep gutters and downspouts clear. Water overflow from gutters often runs down exterior walls and enters window areas. If your roof is contributing to the problem, see our guide to fixing a leaking roof causing water damage.
Landscape Management: Maintain proper grading around your home’s foundation. Surface water should slope away from the house, not toward it. Divert water away from windows.
Humidity Control: Excessive indoor humidity contributes to moisture problems. Use exhaust fans in bathrooms and kitchens. Maintain indoor humidity between 30-50%.
Prompt Repairs: Address small problems immediately. Recaulk gaps, repaint when paint peels, and repair small water intrusions before they expand into major damage.
FAQ Section
Q: Can I repair a water damaged window sill myself, or should I hire a professional? A: This depends on damage extent. Minor surface damage (limited paint peeling, small soft spots) may be handled with wood filler repair by homeowners. Moderate damage requiring partial replacement or complete frame replacement typically requires professional help. Window work involves working at heights, requires proper tools, and mistakes compromise weatherproofing and thermal performance. Professional assessment helps determine what’s realistic for DIY versus what requires professional expertise.
Q: How long does window frame replacement take? A: A single window replacement typically takes 2-4 hours for a professional installer. This includes removal of the old window, installation of the new frame, flashing, caulking, and sealing. Interior trim reinstallation adds additional time. A typical home with 12-15 windows might take 3-5 days for complete window replacement.
Q: What causes water to leak in around windows? A: Common causes include failed caulk seals, improperly installed flashing, water running off exterior siding into the window area, inadequate sill slope directing water toward the frame rather than away, blocked weep holes, and structural settlement creating gaps between the frame and wall. Professional assessment identifies which factor causes your specific leak.
Q: Will replacement windows stop water from leaking into my home? A: Quality replacement windows with professional installation virtually eliminate water leakage. However, proper flashing and exterior sealing are equally important as the window itself. Window replacement without addressing exterior drainage issues may not solve the problem. Address landscape grading, gutter maintenance, and proper flashing simultaneously with window replacement.
Q: How much does window frame replacement cost? A: Professional window replacement costs vary based on window type, size, and installation complexity. Vinyl replacement windows typically cost $300-$600 per window installed. Wood replacement windows cost $400-$800 per window. Complete home window replacement (12-15 windows) typically costs $5,000-$12,000 depending on window quality and home size. Get multiple quotes for accurate estimates.
Conclusion
Water damaged window sills and frames threaten both your home’s structural integrity and your comfort. Early detection through regular inspection catches problems when repair options are most economical. Assessment determines which repair strategy is appropriate: minor wood filler repair for surface damage, partial replacement for localized damage, or complete frame replacement for extensive water damage.
Regardless of repair scope, comprehensive waterproofing through proper caulking, paint maintenance, and drainage management prevents future water damage. Regular maintenance—annual inspection, prompt caulk and paint repairs—extends window life and protects your investment in your home.
If you suspect water damaged windows, assess the situation promptly. Minor repairs made early prevent the need for expensive frame replacement later. Contact a professional water damage company for assessment if you’re unsure of damage extent or appropriate repair strategies. See our water damage restoration cost guide for typical pricing.
Disclaimer: This article is for informational purposes only and does not constitute professional advice. Every water damage situation is unique. Always consult a licensed contractor or restoration professional for your specific situation. If you’re dealing with an emergency, contact your local restoration company immediately.