Water Damage Behind Shower Wall: How to Find and Fix It
Shower water damage is insidious. Unlike a burst pipe or obvious roof leak, water damage behind shower walls develops quietly, hidden from sight. By the time you notice discoloration or soft spots, significant structural damage and mold growth may already exist behind the tiles. This guide helps you identify hidden shower damage early and implement repairs before the problem becomes catastrophic.
Key Takeaway: The most critical step in repairing shower water damage is identifying and fixing the water source before any reconstruction—otherwise, even a brand-new tile job will fail within months.
Why Shower Water Damage Is So Dangerous
Bathrooms create perfect conditions for water damage. Constant moisture, temperature fluctuations, and high humidity make shower areas particularly vulnerable. Shower enclosures are designed to contain water within the tub or pan, but imperfect grout, cracked caulk, and water penetration through tile create continuous pathways for water to migrate behind walls.
Unlike bathrooms with moisture problems that remain relatively contained, shower damage can affect:
- Structural framing behind the wall
- Drywall and backing boards
- Plumbing pipes within the wall
- Electrical wiring if bathroom outlets are nearby
- Flooring under the shower
- Adjacent walls if water spreads
Water trapped behind shower walls stays wet for extended periods, creating ideal conditions for mold, mildew, and wood rot. This type of damage often affects multiple walls and can spread to neighboring bathrooms or rooms if left unaddressed.
Early Warning Signs of Hidden Shower Damage
Detecting water damage before it becomes severe requires knowing what to look for. Regular inspection of your shower area catches problems early. Use our bathroom water damage prevention checklist to stay ahead of potential issues.
Visual Signs: Look for discoloration, soft spots, or bubbling paint on walls adjacent to the shower. On the exterior wall (outside the bathroom), discoloration or water stains indicate water is traveling through the wall structure. Grout that appears darker than surrounding grout may indicate moisture saturation.
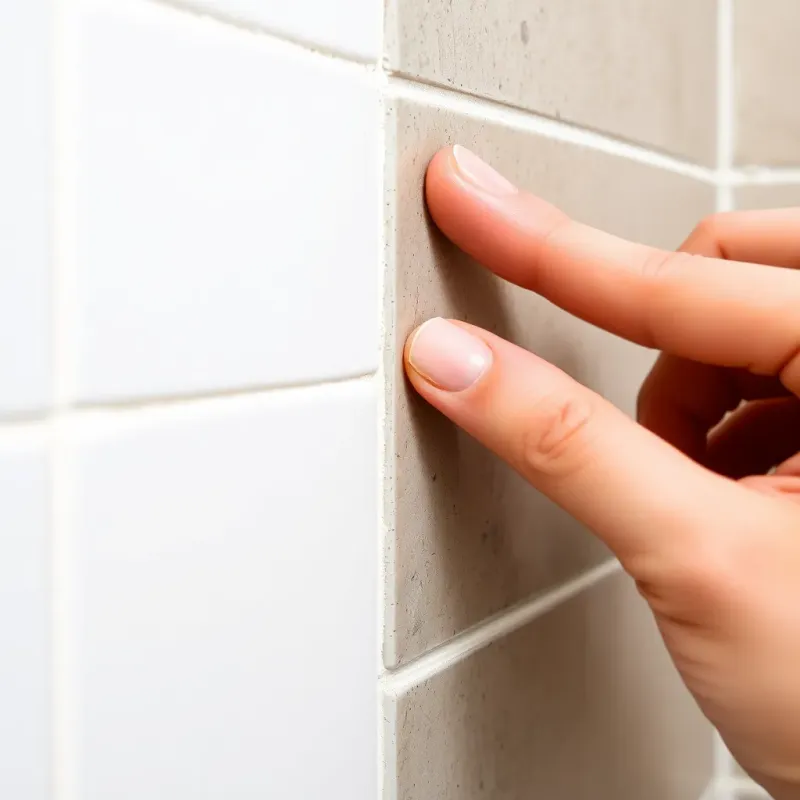
Tactile Signs: Press on drywall in and around shower areas. Soft, spongy, or areas that compress slightly indicate water saturation. The drywall should feel firm throughout. Areas showing give when pressed warrant professional investigation.
Odor Signs: Musty smells in bathrooms or bedrooms adjacent to showers suggest mold growth from moisture retention. Even without visible damage, persistent bathroom odors signal excessive moisture and potential hidden damage.
Structural Signs: If drywall shows visible sags, the wall has absorbed water over an extended period and lost structural integrity. Tiles that are loose or separating may indicate movement in the substrate from water swelling, or lack of proper waterproofing allowing water behind tiles.
Growth Signs: Visible mold (black, green, or gray patches) on grout or tile indicates moisture behind the surface. Mold thrives on organic materials like wood framing and drywall backing, so surface mold is just the tip of the problem.
Systematic Investigation Methods
Once you suspect water damage, systematic investigation identifies the problem’s extent before repair planning begins.
Visual Inspection
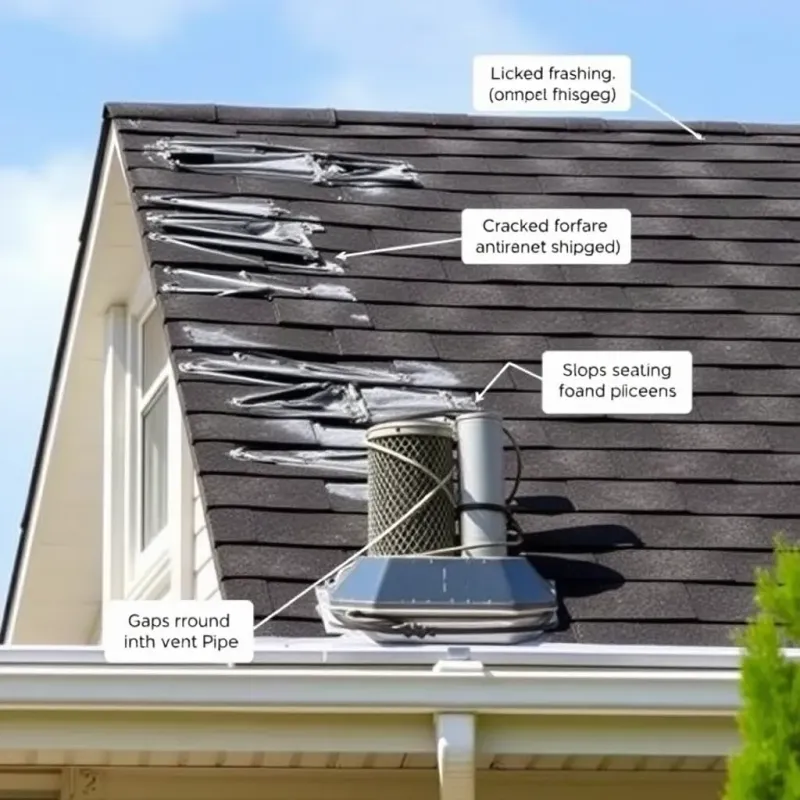
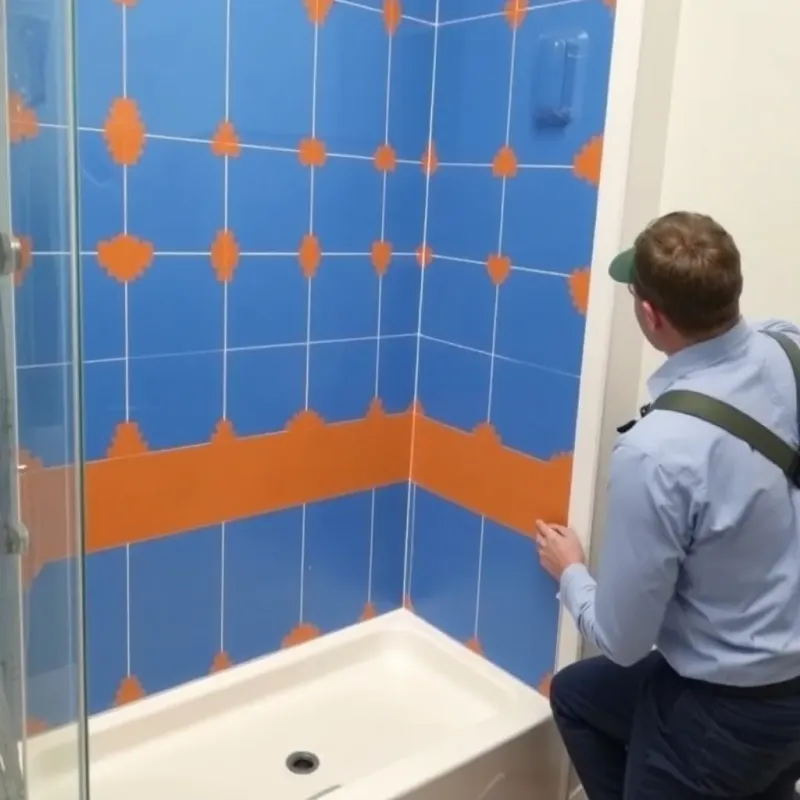
Inspect the shower enclosure thoroughly. Look for cracks in grout joints, separation between tile and substrate, missing or cracked caulk around the tub surround, and deterioration of grout. These breaches allow water to penetrate behind tiles. Check the caulk seal where the shower meets the tub or pan. Even small gaps permit water entry over time.
Moisture Detection
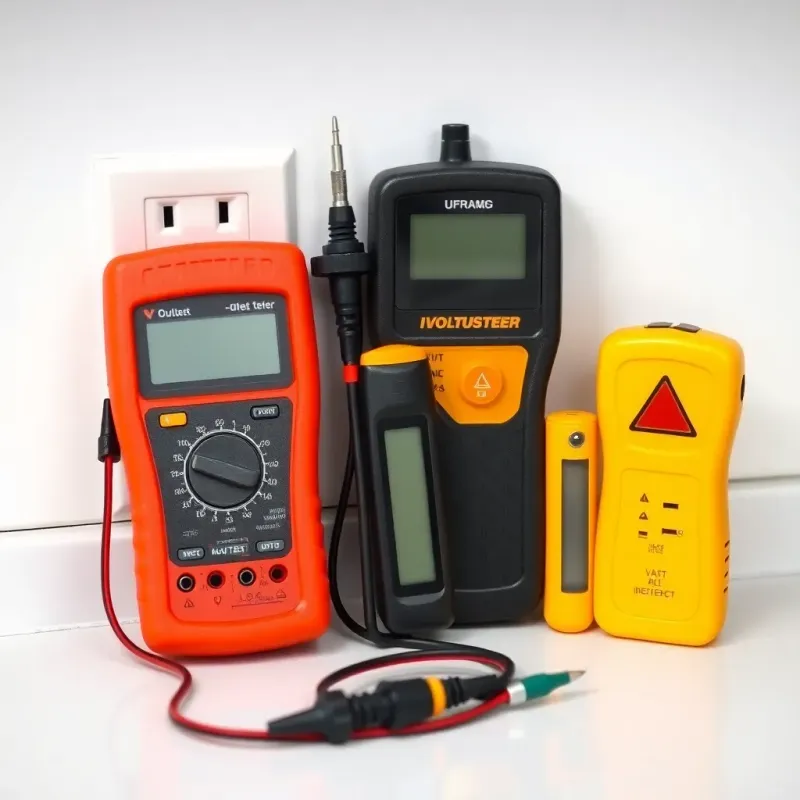
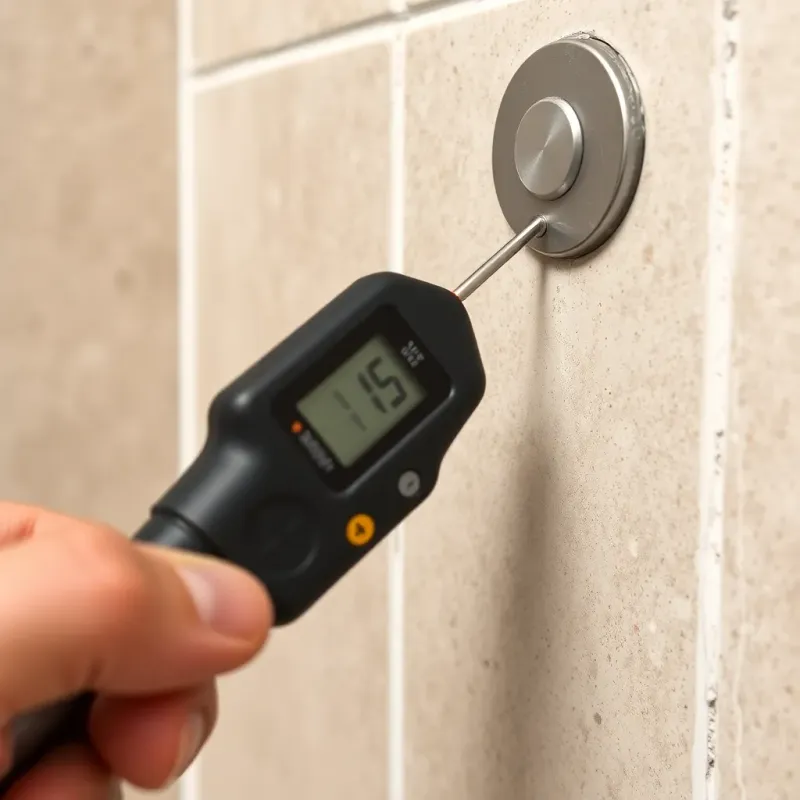
Use a moisture meter to identify damp areas in and around the shower. These inexpensive tools measure moisture content in drywall and wood. Readings above 14-16% indicate moisture levels that support mold growth. Mark areas showing elevated moisture levels for further investigation.
Thermal imaging cameras, available through professional water damage companies, reveal moisture patterns not visible to the naked eye. These cameras detect the temperature variations that occur in damp materials versus dry ones, creating visual maps of water distribution.
Probe Testing
Using a small probe or screwdriver, carefully test the firmness of drywall in and around shower areas. Press gently into drywall seams and corners. If the material compresses, water has compromised structural integrity. In severe cases, a probe will sink several inches into softened drywall.
Behind-the-Scenes Investigation
If surface inspection suggests deeper problems, a small exploratory cut in drywall or removal of a grout line sample allows direct inspection of what’s behind the visible surface. Professional water damage companies often make strategic test cuts to assess the extent of damage before proposing full repairs.
Secondary Inspection of Affected Areas
Water doesn’t stop at shower walls. Investigate the ceiling directly above the shower, walls in the room below if the bathroom is on an upper floor, and baseboards in adjacent rooms. Water migrates along framing members and often travels horizontally across multiple studs and joists before being noticed.

Complete Water Damage Repair Process
Addressing shower water damage requires systematic removal of damaged materials, identification and repair of the water source, and complete restoration of waterproofing. The scope depends on damage severity.
Phase 1: Water Source Identification
Before repairing damage, you must identify how water is entering. Common sources include:
- Cracked or deteriorated grout allowing water between tiles
- Missing or failed caulk around the tub surround
- Water entering through the top of the tub and behind the surround
- Cracks in tile allowing water penetration
- Improper slope in the shower pan directing water toward walls
- Plumbing penetrations not properly sealed
Identifying the source prevents the problem from recurring after repair.
Phase 2: Affected Material Removal
Once the water source is identified, remove all damaged drywall, backing board, insulation, and wood framing that shows rot or significant water saturation. This typically requires removing tile in the affected area, which is labor-intensive but necessary for proper repair.
During removal, inspect all hidden materials. The drywall may feel solid but still harbor moisture. Complete removal of compromised materials, including materials that appear only slightly damp, prevents mold issues after repair.
The removal process also reveals the full extent of damage. Water often travels farther than visual inspection suggests. A wall that appears to have minor damage in one section may have significant damage extending 2-3 feet horizontally along framing members.
Phase 3: Drying Process
After removing damaged materials, ensure the wall cavity dries completely before reconstruction. This may take several days to several weeks depending on humidity levels, outside temperature, and wall construction. Use dehumidifiers, fans, and if necessary, open the wall cavity to promote air circulation. Follow our guide to drying out rooms after water damage for optimal equipment placement.
Rushing this phase leads to trapped moisture and mold problems after the wall is sealed back up. Confirm the area is dry through moisture meter readings and visual inspection before proceeding. After dealing with this issue hundreds of times, the number one reason I see shower repairs fail is that homeowners or even contractors rush the drying phase—sealing up a wall that still has 18% moisture content is a recipe for mold within weeks.
Phase 4: Waterproofing System Installation
Modern shower repair requires comprehensive waterproofing. Install a proper waterproofing membrane behind all tile areas. Options include:
- Liquid waterproofing membranes rolled or sprayed onto substrate
- Waterproofing sheets (like Kerdi board) installed over substrate
- Waterproof drywall or cement board designed for wet areas
- Chloraloy or similar waterproof backing boards
The waterproofing system must extend from the shower pan up to the top of the shower enclosure and should extend 6+ inches into adjacent walls to prevent water migration.
Phase 5: Tile Installation with Proper Waterproofing
Install tile over the waterproofing membrane using thin-set mortar designed for wet areas. Proper tile installation includes:
- Using waterproof thin-set mortar, not dry-set mortar
- Proper spacing between tiles (typically 1/8 inch to 1/4 inch)
- Maintaining consistent grout joint lines
- Using waterproof grout, particularly important in showers
Phase 6: Caulk and Sealant Application
Where tiles meet the tub, floor, or corners, install caulk designed for waterproofing. Silicone or polyurethane caulks provide better long-term performance than acrylic caulks in wet areas. Caulk should be applied continuously with proper width and depth to maintain waterproofing integrity.
Regular caulk maintenance—reapplying every 2-3 years—prevents caulk failure and associated water damage.
Comprehensive Waterproofing Solutions
Beyond addressing existing damage, modern shower repair implements multiple waterproofing layers. This redundancy ensures that if one layer fails, water is still contained.
Waterproof Substrate: Begin with materials specifically designed for wet areas. Cement board, waterproof drywall, or composite boards are vastly superior to standard drywall for shower areas.
Membrane Layer: Install a waterproofing membrane over the substrate. This continuous barrier prevents water from reaching structural framing even if grout or tile cracks.
Grout Selection: Use epoxy or urethane-based grout rather than cement-based grout. These provide superior water resistance and longevity.
Caulk Sealants: At corners, transitions, and penetrations, flexible caulk provides waterproofing where rigid tile cannot bend. Maintain caulk integrity through regular inspection and reapplication.
Shower Pan: Ensure the shower pan has proper slope (typically 1/4 inch drop per foot) directing all water toward the drain. Pans should be separate waterproof systems independent of wall waterproofing.
When to Retile vs. Repair
Deciding whether to fully retile a wall or repair specific areas depends on damage extent and waterproofing system assessment.
Repair Only: If damage is localized to a small area (under 4 square feet) and the surrounding waterproofing system is intact and functioning, targeted repair may be appropriate. Remove damaged tile and substrate, repair the waterproofing breach, and retile only the affected area.
Partial Retiling: If damage affects a larger area or compromises waterproofing integrity, retile the entire wall section containing the damage. Waterproofing systems function as complete barriers; partial repairs to a failed waterproofing system often prove inadequate.
Complete Retiling: Extensive water damage, multiple problem areas, or older shower enclosures with aging waterproofing systems warrant complete wall retiling. This provides the opportunity to install modern, redundant waterproofing systems and ensure long-term durability.
The cost difference between repair and complete retiling is often smaller than expected once labor costs are considered. Complete retiling typically costs 20-30% more than partial repair but provides superior long-term protection.
Prevention and Ongoing Maintenance
Once shower water damage is repaired, maintenance prevents recurrence.
Regular Caulk Inspection: Check caulk lines quarterly. Caulk degrades over time, and water gets behind tile when caulk fails. Recaulk when cracks appear or caulk begins separating from tile.
Grout Inspection: Inspect grout for cracks, missing sections, or deterioration. Small grout repairs are quick and inexpensive. Allowing grout to fail leads to extensive water damage repairs.
Ventilation: Run the bathroom exhaust fan during showers and for 20-30 minutes afterward. Proper ventilation removes moisture and prevents humidity from saturating walls.
Water Pressure Check: Excessive water pressure in supply lines can force water into small gaps and accelerate grout failure. Verify your water pressure stays below 80 psi.
Annual Professional Inspection: Have a plumber or water damage specialist inspect your bathroom annually, particularly the shower enclosure. Catching problems early prevents expensive repairs.
FAQ Section
Q: How much does water damage repair behind a shower wall typically cost? A: Costs vary dramatically based on damage extent. Minor localized repairs might run $500-$1,500. Significant damage requiring drywall replacement and complete retiling of one wall may cost $3,000-$8,000. Full bathroom retiling with waterproofing can exceed $15,000. Professional assessment provides accurate estimates for your specific situation.
Q: Can I just caulk over moldy grout to fix the problem? A: No. Caulking over deteriorated grout or mold doesn’t address the underlying moisture problem. The water will continue migrating behind the caulk and tiles, spreading damage. Proper repair requires removing damaged materials and addressing the waterproofing breach.
Q: How long does shower wall water damage repair take? A: Minor repairs may take 1-2 days. Extensive damage requiring substrate replacement and complete retiling typically takes 5-10 days depending on the area’s size. Drying time between phases must be factored in; the complete process from discovery to full completion may take 2-4 weeks.
Q: Is it necessary to hire a professional for shower water damage repair? A: For anything beyond minor cosmetic issues, professional repair is strongly recommended. Proper waterproofing system installation requires specialized knowledge and materials. DIY repairs often fail because hidden damage isn’t fully addressed. Professionals have specialized equipment to detect hidden moisture and ensure complete drying before reconstruction.
Q: What’s the best way to prevent water damage behind shower walls? A: Proper ventilation, maintaining grout and caulk integrity, and monitoring for early signs of damage are essential. Install quality waterproofing materials during any shower construction or remodeling. Ensure the shower pan has proper slope and that all penetrations (pipes, fixtures) are properly sealed. Regular maintenance and early intervention with small problems prevent expensive water damage repairs.
Conclusion
Water damage behind shower walls develops invisibly but causes serious property damage when left unaddressed. Early detection through regular inspection and awareness of warning signs allows intervention before damage becomes extensive. Complete repair requires addressing both the visible damage and the waterproofing breach that caused the problem.
If you suspect water damage in your shower, don’t delay. Contact a professional water damage company for assessment and moisture detection. Our water damage restoration cost guide covers typical pricing for shower and bathroom repairs. The cost of early intervention is minimal compared to the expense and inconvenience of extensive water damage repairs discovered months or years later after significant structural damage has occurred.
Proper maintenance of grout, caulk, and ventilation prevents most shower water damage. For existing damage, comprehensive repair with modern waterproofing materials provides protection against future problems.
Disclaimer: This article is for informational purposes only and does not constitute professional advice. Every water damage situation is unique. Always consult a licensed contractor or restoration professional for your specific situation. If you’re dealing with an emergency, contact your local restoration company immediately.