How to Repair Water Damaged Electrical Outlets Safely
Water damage and electrical systems should never be approached casually. When water infiltrates your home’s electrical outlets, it creates an immediate safety hazard that demands careful attention and proper handling. This comprehensive guide walks you through identifying water-damaged outlets, implementing immediate safety measures, and determining whether you need professional electrical services.
Key Takeaway: Never use or touch a water-damaged electrical outlet—always cut power at the breaker first, and in most cases, have a licensed electrician inspect the outlet before restoring power, even if it appears dry.
Understanding the Risks of Water Damaged Outlets
Water is an excellent conductor of electricity, making wet outlets potentially deadly. The combination of moisture and electricity creates multiple hazards including electrical shock, short circuits, electrical fires, and damage to your home’s entire electrical system. Even if an outlet appears to be functioning normally after water exposure, internal damage may still exist.
When water enters an outlet, it can:
- Create a pathway for electricity to reach your body during contact
- Cause corrosion on internal copper components
- Trigger electrical arcing inside the walls
- Lead to fires developing slowly over time
- Damage downstream equipment and appliances
These dangers persist even when outlets seem dry to the touch, which is why professional assessment is critical.
Immediate Safety Steps: Your First Response
Do not touch or attempt to use any water-damaged outlet. Your first priority is preventing electrical accidents and containing the moisture.
Step 1: Cut Power to Affected Outlets
Turn off the circuit breaker controlling the affected outlet. If you’re unsure which breaker controls which outlet, turn off the main breaker. This eliminates electrical danger when water is present. Label the breaker you’ve switched off to prevent others from accidentally turning it back on.
Step 2: Prevent Additional Water Entry
If water is actively entering the outlet area, stop the source immediately. Turn off the main water supply if necessary. Dry the surrounding wall area with towels and ensure water cannot continue flowing toward the outlet. Open windows and use fans to promote air circulation and evaporation.
Step 3: Assess the Extent of Water Damage
Examine the outlet and surrounding area carefully. Water may have penetrated into wall cavities behind the outlet, affecting hidden wiring and outlets downstream. Look for discoloration, warping, or swelling on the outlet cover and surrounding wall. Check for water in electrical boxes, conduit, or other components.
Step 4: Ensure Proper Ventilation
Use dehumidifiers, fans, and opened windows to dry the affected area thoroughly. Moisture trapped inside walls can cause long-term damage and mold growth. Maintain good ventilation until the area is completely dry.

When to Call a Licensed Electrician
Professional electrician services are necessary in several situations. You should never attempt repairs yourself if:
- The outlet is connected to critical systems like HVAC, security, or medical equipment
- Water damage extends beyond a single outlet to multiple outlets or large wall areas
- The outlet is in a bathroom, kitchen, or other wet location requiring special code compliance
- Wiring appears damaged, corroded, or discolored
- You smell burning or notice scorch marks around the outlet
- The outlet has been wet for more than 24 hours
- Building codes in your area require licensed electrician involvement
- You’re uncertain about the extent of damage or proper procedures
A licensed electrician can use specialized equipment to detect moisture behind walls, assess internal wiring damage, and ensure repairs meet current electrical codes. In most cases, insurance companies will cover emergency electrician visits for water damage situations.
Inspection Process: What Professionals Check
Professional electricians conduct thorough inspections before recommending repairs. They evaluate:
Visible Components: Outlet covers, faceplates, outlet body, and surrounding wall area for corrosion, discoloration, or damage
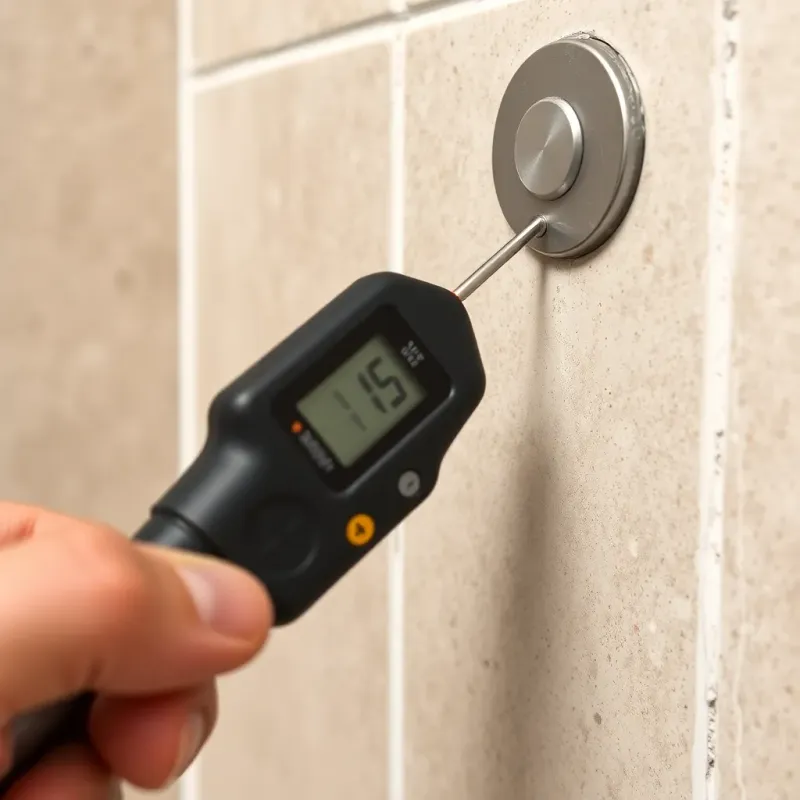
Moisture Detection: Using moisture meters and thermal imaging to identify water inside walls that isn’t visible to the naked eye
Wiring Assessment: Checking wire insulation for damage, conducting, and proper grounding
Code Compliance: Verifying that any replacement meets current National Electrical Code (NEC) requirements for the outlet’s location
Circuit Analysis: Testing the entire circuit downstream to identify additional damage
This comprehensive approach ensures both safety and compliance with building codes.
Step-by-Step Outlet Replacement Guide
If assessment determines that outlet replacement is necessary, here’s what the process typically involves:
Pre-Replacement Preparation
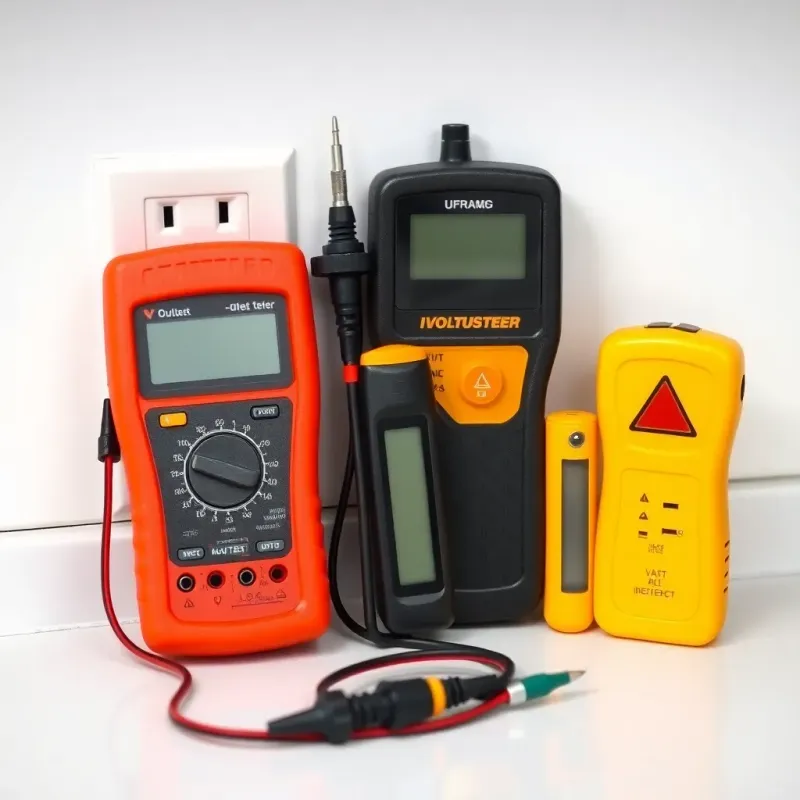
Verify the circuit breaker controlling the outlet is switched off and cannot be accidentally turned on. Use a non-contact voltage tester to confirm no electricity is present at the outlet. Wait until the outlet is completely dry before proceeding with replacement. This may take 24-48 hours depending on moisture levels and ventilation. Never attempt replacement on damp outlets; the combination of moisture and active electrical work increases danger significantly.
Before beginning work, gather the necessary tools: screwdrivers (flathead and Phillips), non-contact voltage tester, wire strippers, needle-nose pliers, and replacement outlets. Having all tools ready prevents extended exposure during the repair process.
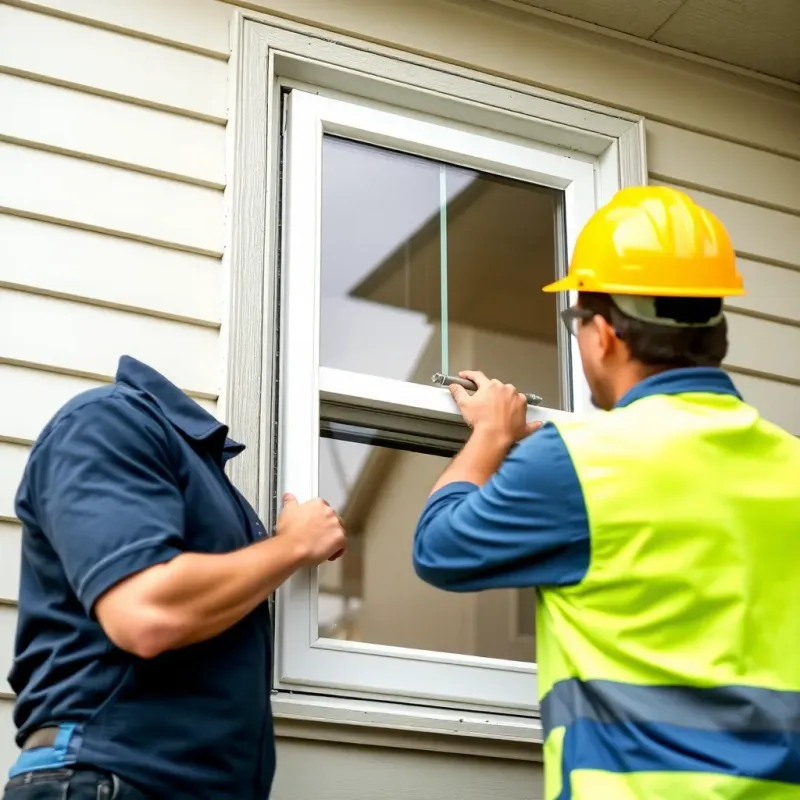
Removing the Old Outlet
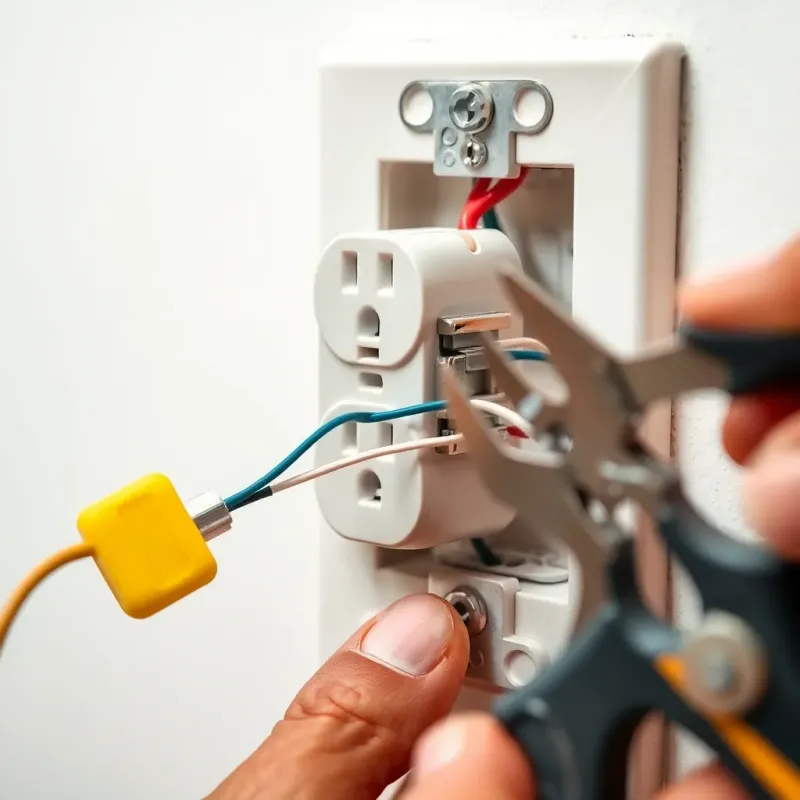
Remove the outlet cover plate by unscrewing it. Unscrew the outlet from the electrical box. Carefully pull the outlet out while being mindful of the wires attached. The outlet will move out slowly; forcing it can damage wires or the electrical box. Using a flathead screwdriver, loosen the terminal screws holding the wires. Note the wire positions carefully.
Wire identification is crucial: the hot wire (typically black) connects to the brass terminals on the right side of the outlet; the neutral wire (typically white) connects to the silver terminals on the left side; the ground wire (green or bare copper) connects to the green terminal at the bottom. Take a photograph before disconnecting wires to ensure proper reconnection. In my experience working with homeowners, the single biggest mistake people make is not photographing the wire positions before disconnecting—this one step can save you hours of troubleshooting later.
Inspecting Wiring and Connections
Examine the exposed wiring carefully. If wiring shows signs of corrosion, discoloration, or damage, the damaged section should be cut off and properly reconnected by splicing (if permitted by code) or replaced entirely. Corroded copper appears dark, flaky, or greenish and indicates oxidation from water exposure.
Cleaning corroded copper requires using fine-grit sandpaper (120-220 grit) to remove the oxidized layer, exposing clean copper underneath. However, severe corrosion with deep pitting typically requires replacement. Attempting to reconnect severely corroded wire risks poor connections that overheat and create fire hazards.
Installing the New Outlet
Connect the hot (black) wire to the brass terminal, the neutral (white) wire to the silver terminal, and the ground (green or bare copper) wire to the green terminal. Tighten all connections firmly using the screwdriver. Wire connections should be snug enough that they don’t pull out when gently tugged but not so tight that wire insulation compresses excessively.
Push the outlet back into the box and screw it in place using the mounting screws. Ensure the outlet sits flush with the electrical box opening. Install the new cover plate by aligning it with the outlet and securing it with the center screw. Finally, restore power by switching the circuit breaker back on and testing the outlet with a plug-in device like a lamp.
Understanding Electrical Code Requirements
National Electrical Code (NEC) and local building codes specify outlet types for different locations, particularly in wet areas. These requirements have evolved significantly, with modern codes emphasizing protection in moisture-prone areas. Replacement outlets must comply with current code standards, not just match what was previously installed.
GFCI Protection: Ground Fault Circuit Interrupter outlets are mandatory in bathrooms, kitchens, laundry rooms, garages, and outdoor areas. These outlets detect ground faults (when electricity finds an unintended path, such as through water or a person) and cut power in milliseconds, preventing electrocution. GFCI outlets must trip in less than 30 milliseconds when a ground fault exceeds 5 milliamps.
AFCI Protection: Arc Fault Circuit Interrupter outlets are increasingly required in bedrooms, living rooms, and other areas to prevent fires from electrical arcing. Arcing occurs when electricity jumps gaps in wiring, creating intense heat that can ignite nearby materials. AFCI outlets detect these arcing patterns and cut power before fires develop.
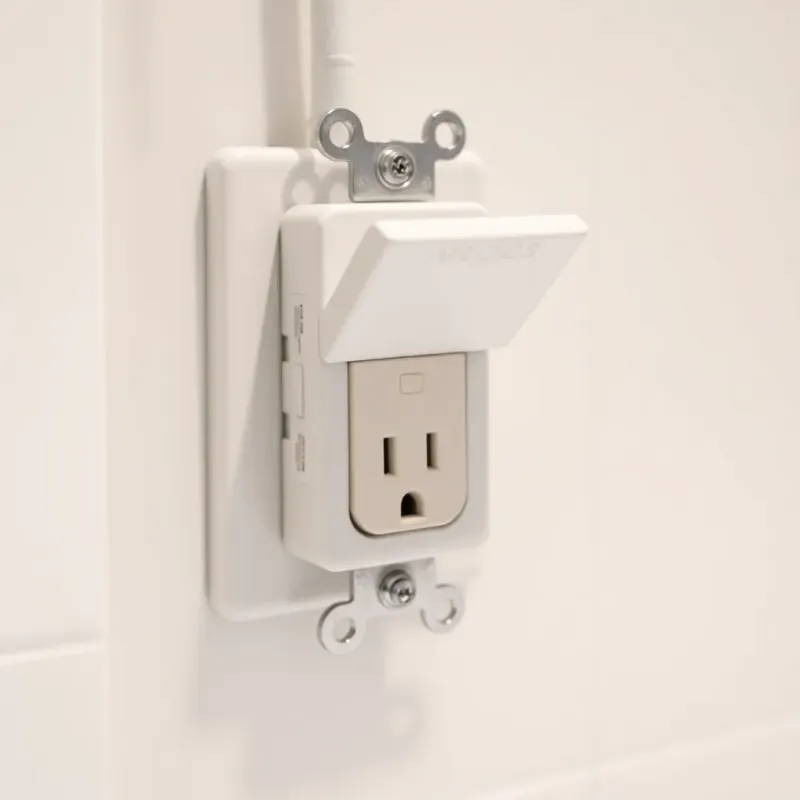
Waterproof Covers: Wet locations require in-use weatherproof covers that protect the outlet even when a device is plugged in. Standard cover plates are inadequate in bathrooms and exterior locations; in-use covers close automatically when devices are removed, maintaining protection.
Proper Grounding: All outlets installed after 1962 should have proper grounding protection through three-prong outlets (grounded) or GFCI outlets. Two-prong ungrounded outlets are no longer permitted in most jurisdictions for new installations, and water-damaged outlets should be replaced with grounded, properly protected outlets.
Installation Height: Building codes specify outlet height requirements. In bathrooms, outlets typically must be at least 12 inches above the flood rim of the sink or tub. In kitchens, outlets should be located above the countertop and installed at 6-inch intervals. These height specifications help prevent direct water splash onto outlets.
Circuit Breaker Compatibility: If your home’s electrical panel uses Federal Pacific Electric (FPE) breakers or Zinsco breakers, circuit replacement should involve professional evaluation of your entire panel. These brands have known safety concerns and may require panel upgrades.
These requirements exist to protect your safety and property. Your replacement outlet must meet all applicable codes in your jurisdiction. When in doubt about code requirements, consult with your local building department or a licensed electrician who understands your area’s specific requirements.
Prevention: Protecting Your Outlets from Future Water Damage
Once you’ve dealt with water damaged outlets, taking preventative measures helps avoid repeat incidents.
Install outlet covers in areas prone to moisture splashing. In bathrooms and kitchens, use waterproof outlet covers that seal when not in use. In any wet location, GFCI outlets provide critical protection if water does contact the outlet. Consider relocating frequently used outlets away from splash zones when possible.
For basement outlets and those near potential flood sources, install outlets higher on the wall and ensure proper grounding. Ground water seepage and flooding represent different challenges than splash damage. In flood-prone areas, ensure all outlets are above the projected flood line or install sump pumps and waterproofing systems to prevent water from reaching that level.
What to Expect From Your Electrician’s Report
A professional electrician will provide documentation including photos of damage, specific outlets affected, extent of moisture penetration, recommended repairs, cost estimates, and timeline for completion. Many reports include advice on preventing future water damage to electrical systems.
Keep this documentation for your insurance claim and for future reference. Your electrician may also recommend whole-house interventions such as installing a smart water shutoff valve, upgrading to smart water monitors, or installing sump pump systems.
FAQ Section
Q: Is it safe to use an outlet that was briefly exposed to water but now appears dry? A: No. Even outlets that appear dry may have internal water or corrosion that creates hazards. Internal damage isn’t visible from the outside. Always have water-exposed outlets inspected by a professional before use, or replace them entirely.
Q: Can I use a hairdryer to dry a wet outlet? A: Do not do this under any circumstances. A hairdryer introduces more electricity to an already dangerous situation and may cause arcing or electrocution. Instead, cut power to the outlet, allow it to air dry naturally with fans and dehumidifiers, and have it inspected before restoring power.
Q: How long does outlet replacement typically take? A: A single outlet replacement usually takes 30 minutes to 1 hour for an electrician, assuming the electrical box and wiring are in good condition. If water damage extends to wiring that requires replacement, the project may take several hours or even require multiple visits.
Q: Will my homeowner’s insurance cover water damaged outlets? A: Most homeowner’s insurance policies cover water damage from sudden, accidental causes like burst pipes or storms. They typically don’t cover damage from flooding or gradual moisture buildup. Review your policy details and contact your insurance company immediately after discovering water damage to initiate a claim.
Q: What’s the difference between GFCI and AFCI outlets? A: GFCI outlets protect against ground faults and electrocution by detecting when electricity takes an unintended path (like through your body to the ground). AFCI outlets prevent electrical fires by detecting arcing faults. Both are important safety features in modern homes, and wet locations specifically require GFCI protection.
Conclusion
Water damaged electrical outlets demand immediate attention and proper handling. While minor surface water may seem harmless, the risks of internal corrosion, electrical hazards, and code violations make professional inspection the safest choice. By understanding the dangers, knowing when to call a professional, and implementing preventative measures, you protect both your home and family from electrical hazards.
When in doubt, contact a licensed electrician. The cost of professional assessment is minimal compared to the risk of electrical fires or injury from attempting unauthorized repairs on water-damaged electrical systems. Review our water damage restoration cost guide for how electrical repairs fit into overall restoration expenses.
Disclaimer: This article is for informational purposes only and does not constitute professional advice. Every water damage situation is unique. Always consult a licensed contractor or restoration professional for your specific situation. If you’re dealing with an emergency, contact your local restoration company immediately.