10 Ways to Prevent Water Damage in Your Home
Water damage is one of the most expensive home problems homeowners face. A single incident can cost tens of thousands of dollars in repairs, replacement, and remediation. Yet the majority of water damage is preventable through proper maintenance and strategic improvements. This comprehensive guide covers ten proven methods to protect your home from water intrusion, internal leaks, and the moisture problems that lead to mold and structural damage.
Key Takeaway: The highest-impact, lowest-cost water damage prevention measures are maintaining functional gutters with extended downspouts and ensuring proper foundation grading—these two steps alone address the majority of preventable water damage.
1. Install and Maintain Gutter and Downspout Systems
Gutters and downspouts are your home’s first line of defense against water damage. These systems capture rainwater from the roof and direct it away from your home’s foundation. Without functional gutters, rainwater cascades directly onto the ground adjacent to your house, overwhelming the foundation’s ability to shed water.
Gutter Maintenance Fundamentals
Clean gutters twice annually (spring and fall) to remove leaves, twigs, and debris. Clogged gutters overflow, allowing water to pour down exterior walls and pool around the foundation. Gutter cleaning is straightforward: use a ladder, gloves, and a scoop to remove debris, then flush the gutter with a hose to verify proper drainage.
Inspect for damage including sagging sections, separation from the fascia, rust on metal gutters, and cracking. Repair small issues immediately before they become major problems. Sagging gutters require reinforcement or replacement. Separated gutters allow water to cascade behind the gutter onto fascia and siding.
Verify proper slope toward downspouts. Gutters should slope 1/4 inch per 10 feet of length. Level sections allow water to accumulate and promote algae growth. Incorrect slope is often the reason gutters appear to overflow even when they’re clean.
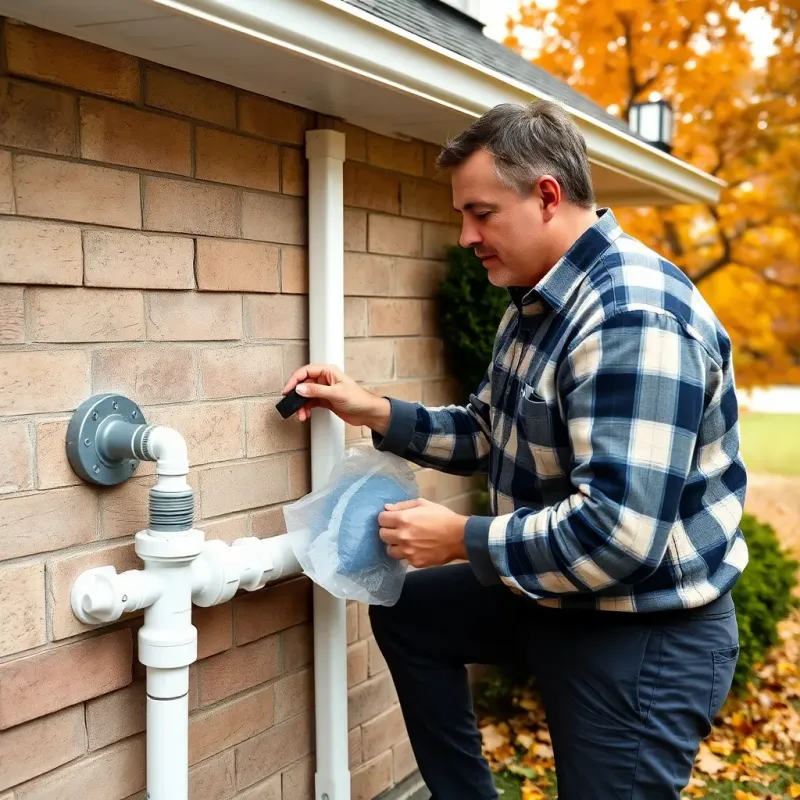
Downspout Positioning
Extend downspouts at least 4-6 feet from the foundation. Water discharged directly at the base of the foundation infiltrates the soil around the foundation, increasing hydrostatic pressure and water infiltration risk. Some downspouts discharge directly at ground level, causing water to pool against the foundation immediately.
Use splash blocks or downspout extensions to increase the distance water travels from your house. Plastic extensions are inexpensive and effective. Better yet, bury downspout extensions in the ground or install underground drainage that directs water to a storm drain or swale several feet from the foundation.
Verify drainage function by watching downspouts during heavy rain. Water should flow freely with no backups. If water backs up in the gutter or overflows, the downspout is likely clogged or inadequately sloped.
2. Maintain Proper Foundation Grading and Slope
Surface water management is critical to preventing foundation water problems. Water should slope away from your house on all sides, preventing pooling around the foundation.
Grading Verification
Walk around your home after heavy rain, observing where water flows. Water should move away from the house toward the street, storm drains, or low spots in your yard. Water pooling against the foundation indicates grading problems.
Proper grading typically slopes 1 inch per foot for at least 5 feet surrounding the house. This may seem subtle, but it’s sufficient to direct water away from the foundation.
Correcting Poor Grading
If water pools against your foundation, add soil adjacent to the house, sloping it away. Use fill that compacts well (clay or clay-sand mix works better than pure sand). Avoid piling mulch against foundation walls; this retains moisture and can cause foundation problems.
For significant grading problems, consider installing surface drainage. A swale (shallow ditch) sloped away from the house can redirect water. French drains or perimeter drainage systems provide more permanent solutions for stubborn drainage problems.
3. Install and Maintain a Sump Pump System
Sump pumps remove water from below the foundation, preventing basement flooding. These systems are essential in areas with high water tables, poor drainage, or history of basement water problems.
Sump Pump Functionality
Water entering the basement flows into a sump pump basin (a pit in the lowest part of the basement). The pump activates when water rises to a preset level, pumping water away from the house through a discharge pipe.
Installation and Placement
Sump pump basins should be located in the lowest part of the basement or crawlspace and should have proper drainage from the surrounding foundation. The system requires a check valve (preventing water from flowing back into the basin), proper discharge piping (extending water at least 4-6 feet from the house), and a backup power system.
Maintenance Essentials
Test the pump monthly by pouring water into the basin until the float trigger activates the pump. The pump should activate smoothly, discharge water, and shut off as the water level drops.
Replace regularly (typically every 5-7 years). Sump pumps are wear items that fail over time. Sudden failure leaves your basement vulnerable during a heavy rain event.
Install a battery backup system so the pump continues operating if power fails during storms. Battery backups are essential; many basement floods occur during the power outages that typically accompany major storms.
Verify discharge is clear and directs water away from the house. Check that the discharge line isn’t frozen (in winter), clogged, or discharging too close to the foundation. In my experience working with homeowners, the most overlooked prevention step is simply testing the sump pump before storm season—I have seen countless basements flood not because the pump was missing, but because it had quietly failed months earlier and nobody checked.
4. Waterproof Your Basement and Crawlspace
Basement waterproofing prevents water from infiltrating through foundation walls and floors, protecting both structure and contents.
Interior Waterproofing
Interior waterproofing starts with a complete floor drain system, capturing water that enters through the foundation and directing it to the sump pump. Perimeter drain channels (installed around the interior foundation perimeter) capture water entering through the base of walls.
Apply waterproofing sealant to foundation walls and floors. Modern interior waterproofing products form a vapor barrier, preventing moisture vapor from rising through concrete. These products vary from paint-on sealers to membrane-based systems.
Exterior Waterproofing
Exterior waterproofing prevents water from contacting the foundation in the first place. Exterior drainage boards installed against the foundation wall direct water downward and away. Foundation damp-proof membranes prevent moisture vapor from entering the foundation.
Exterior waterproofing is more effective than interior approaches but requires excavation of the foundation perimeter, making it more expensive. This is typically done during new construction or during other foundation work rather than as a standalone project.
Crawlspace Encapsulation
Crawlspaces are particularly vulnerable to moisture problems. Encapsulation involves installing a vapor barrier over the crawlspace floor and sealing all vents. This prevents moisture vapor from rising into the house and condenses on the crawlspace surface where it can be drained or managed.
Properly encapsulated crawlspaces are noticeably drier and more comfortable, and they reduce heating and cooling costs by maintaining better temperature control.
5. Install Water Detection and Monitoring Systems
Modern water leak detection systems identify leaks early, before significant damage develops. These range from simple water sensors to sophisticated monitoring systems.
Water Leak Sensors
Inexpensive sensors (typically $15-50 each) detect water at specific locations and alert you when water is present. Place sensors in basements, under sinks, near water heaters, and anywhere water damage is likely.
Sensors either sound a local alarm or send alerts to your smartphone, allowing you to respond quickly. Some sensors can trigger the water main shut-off valve automatically.
Smart Water Monitoring Systems
Sophisticated systems monitor water usage patterns and detect unusual consumption that suggests leaks. These systems provide real-time monitoring and historical usage analysis, helping you identify efficiency opportunities and leak problems.
Smart water shutoff valves combine monitoring with automatic water shut-off. If a leak is detected, the valve can automatically shut off your main water supply, preventing catastrophic flooding. These systems cost $200-400 but can save tens of thousands in water damage.
Water Pressure Regulators
Excessive water pressure (above 80 psi) stresses pipes and accelerates failures. Water pressure regulators maintain safe pressure levels, extending pipe life and reducing leak risk.
6. Regularly Inspect and Maintain Plumbing
Plumbing leaks account for a significant percentage of home water damage. Regular inspection and maintenance catch problems before they become disasters.
Annual Plumbing Inspections
Professional plumbers can identify problems like pipe corrosion, connection leaks, valve failures, and water pressure issues. Annual inspections are particularly important for homes over 25 years old, where pipe degradation accelerates.
Monitor for Signs of Problems
Watch for slow drains, which may indicate pipe blockages that increase pressure and stress on connections. Listen for running water when all fixtures are off—this indicates an active leak. Check water bills for unexplained increases, suggesting hidden leaks.
Shut-Off Valve Accessibility
Locate your main water shut-off valve and ensure it operates smoothly. In a plumbing emergency, immediately shutting off water limits damage. Shut-off valves sometimes corrode and become difficult to operate; exercise them annually to maintain functionality.
Replace Old Fixtures
Older plumbing fixtures (particularly with visible corrosion) are failure risks. Supply line connections with corrosion visible externally often have severe internal corrosion, making failure imminent. Replace deteriorating fixtures and supply lines proactively.
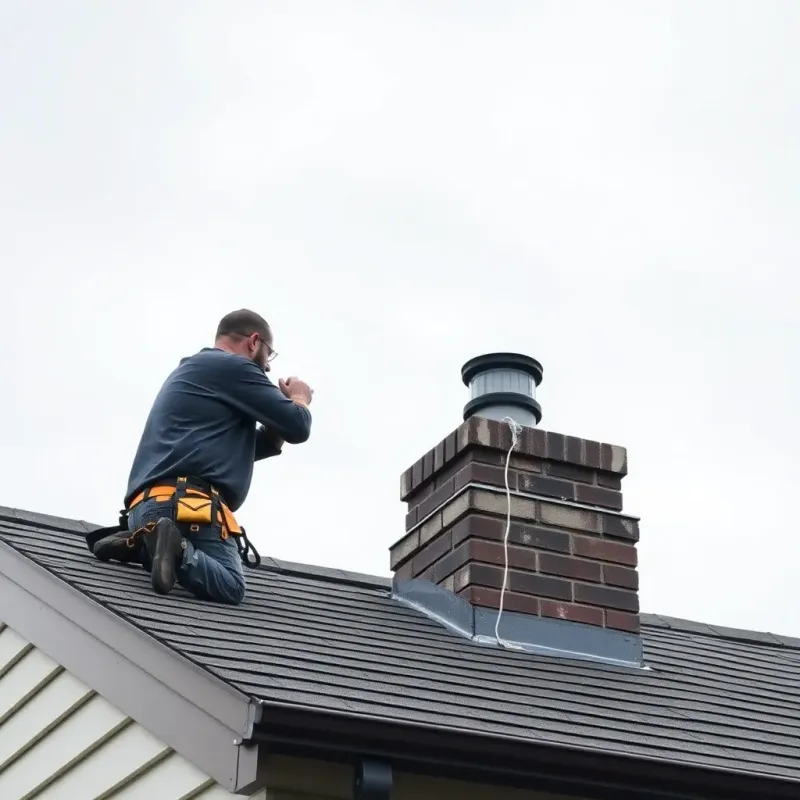
7. Maintain Your Roof and Address Leaks Promptly
Roof leaks are a leading cause of home water damage. Regular roof maintenance and prompt leak repair prevent water from entering your home.
Roof Inspection and Maintenance
Inspect your roof annually (particularly after heavy storms) for:
- Missing shingles that expose the roof structure to water infiltration
- Damaged shingles showing cracks, tears, or curling
- Flashing failures around chimney, vents, and skylights where water commonly infiltrates
- Moss and algae growth indicating moisture retention and potential damage
Professional roof inspections (particularly for homes over 15 years old or those with difficult-to-access roofs) identify problems you might miss.
Shingle Replacement and Flashing Repair
Replace individual damaged shingles as needed. This is straightforward maintenance that prevents water from entering the roof structure. Flashing repair is more critical; most roof leaks originate from flashing failures rather than damaged shingles.
Roof Replacement Timeline
Most asphalt shingles last 15-25 years. Knowing your roof’s age helps you plan replacement before widespread failures develop. Replacing a roof before it fails prevents expensive water damage; replacing after failure occurs often finds interior damage requiring additional repairs.

8. Address and Repair Window and Door Leaks
Windows and doors are common water infiltration points. Regular maintenance prevents leaks that allow water into walls and interior spaces.
Caulking and Weatherstripping
Caulk around window and door frames typically lasts 5-7 years before deteriorating. Recaulk when cracks appear, maintaining a watertight seal. Use high-quality caulk designed for exterior conditions.
Weatherstripping around doors prevents water infiltration around the door frame. Replace weatherstripping when it becomes compressed, cracked, or ineffective at blocking drafts.
Flashing Verification
Windows and doors require proper flashing (metal or membrane) that overlaps the house’s water management system (typically housewrap or building paper). Improperly installed or missing flashing is a common source of water leaks around windows and doors.
If you notice water staining or damage near windows, flashing failure is likely. Professional window or door repair companies can assess whether flashing is adequate and upgrade it if necessary.
9. Maintain HVAC Condensation Drainage
HVAC systems produce condensation that must drain properly. Clogged drain lines can cause water to accumulate inside the unit or in wall cavities.
Drain Line Cleaning
HVAC condensation drain lines should be checked and cleaned annually. Algae and debris accumulate in drain lines, reducing flow and potentially causing backup. A simple flush with a wet/dry vacuum or drain snake maintains function.
Drain Pan Inspection
Inspect the drain pan under the HVAC unit (visible if you access the unit). The pan should be clean and free of debris. If water is present when the system isn’t running, the system may need maintenance.
Secondary Drain Line Installation
Modern HVAC installations typically include both a primary and secondary drain line. If the primary line clogs, the secondary drain activates, preventing water backup into the home. Verify your system has secondary drainage.
10. Install Comprehensive Water Detection and Shut-Off Systems
Advanced whole-home water management systems represent the most comprehensive prevention approach.
Smart Water Shut-Off Valves
Automatic shut-off systems monitor water usage and pressure continuously. When abnormal usage patterns suggest a leak, the system can automatically shut off the main water supply. This prevents catastrophic flooding from burst pipes, failed washing machine hoses, or major plumbing failures.
Integration with Home Automation
Modern systems integrate with home automation platforms, sending alerts to your smartphone when problems are detected. You can remotely view usage history, set usage limits, and authorize manual shut-offs from anywhere.
Insurance Discounts
Many insurance companies offer premium discounts (typically 10-15%) for homes with active water detection and shut-off systems. In many cases, the insurance discount covers system cost within 3-5 years, making the investment economically beneficial beyond the protection benefit.
Seasonal Water Damage Prevention
Water damage risks change seasonally. Address these seasonal concerns proactively.
Spring: Melting snow and spring rains stress drainage systems. Ensure gutters are clean, grading is appropriate, and sump pumps are functioning. Check basement walls for water intrusion after winter snowmelt.
Summer: Heavy summer storms can overwhelm drainage systems. Ensure gutters can handle high-volume rainfall and that downspouts are clear and functioning.
Fall: Clean gutters thoroughly to remove leaves before winter. Check roof for storm damage. Ensure basement windows are sealed and functional.
Winter: Prepare for frozen pipes by insulating exposed plumbing and allowing faucets to drip during extreme cold. Ensure sump pumps won’t freeze. Clear gutters of ice dams that can force water back under the roof.
Cost Analysis: Prevention vs. Repair
The economics of water damage prevention are compelling. Comprehensive prevention costs a fraction of repair.
Prevention Investment: A complete water damage prevention program including gutters, grading, sump pump, waterproofing, leak detection, and smart water shut-off might cost $3,000-8,000 for a typical home. This represents a one-time investment spreading costs over 20+ years of protection.
Repair Costs: Even moderate water damage (affecting 500-1000 square feet) costs $10,000-30,000 in repairs including water removal, drying, restoration, and mold remediation. Severe damage can exceed $50,000-100,000.
A $5,000 prevention investment preventing even one moderate water damage incident more than pays for itself. Prevention also reduces stress, disruption, and the secondary problems (mold, structural damage, displacement during repairs) that accompany water damage.

FAQ Section
Q: What’s the single most important thing I can do to prevent water damage? A: Maintaining functional gutters and ensuring proper downspout placement is the highest-impact prevention measure. More water damage originates from improper roof water management than any other source. A close second is maintaining proper foundation grading. Together, these address the majority of preventable water damage.
Q: Do I need a sump pump if my basement stays dry? A: It depends on your area’s water table and drainage characteristics. Homes in areas with high water tables, heavy clay soil, or history of wet basements benefit from sump pumps even if the basement is currently dry. A professional assessment can determine whether your home is at risk. Installing a sump pump is far less expensive than dealing with flooding after your protection fails.
Q: How often should I have my roof professionally inspected? A: Annual inspections are ideal, particularly for roofs over 15 years old. At minimum, inspect after major storms. Roofs reaching 20 years old should be inspected at least annually, and replacement planning should begin around year 15-18. Early replacement prevents the water damage that occurs when older roofs fail unexpectedly.
Q: Are smart water shut-off valves worth the cost? A: For many homeowners, yes. The system cost ($200-400) is often recouped through insurance discounts within 3-5 years. Beyond the financial benefit, preventing a catastrophic flood (which could cost $50,000+) provides excellent value. These systems are particularly valuable for people who travel frequently or maintain vacation homes.
Q: What’s the most common water damage cause I can prevent? A: Plumbing leaks cause the most water damage, with washing machine hose failures being the single most common issue. Installing braided steel hoses instead of rubber ones, monitoring for signs of leaks, and maintaining regular plumbing inspections catch problems before catastrophic failure. Sump pump failures causing basement flooding are the second most common preventable water damage source.
Conclusion
Water damage is largely preventable through systematic attention to maintenance and strategic improvements. The ten prevention methods in this guide address the most common water damage sources. Implementing even half of these measures dramatically reduces your water damage risk.
Begin with the highest-impact items: ensure functional gutters with proper downspouts, maintain correct foundation grading, and have a professional plumber assess your home’s water management systems. Add detection and monitoring systems for comprehensive protection.
The investment in prevention is minimal compared to the cost, disruption, and stress of dealing with significant water damage. Protect your home proactively with proven prevention strategies rather than dealing reactively with costly repairs.
Disclaimer: This article is for informational purposes only and does not constitute professional advice. Every water damage situation is unique. Always consult a licensed contractor or restoration professional for your specific situation. If you’re dealing with an emergency, contact your local restoration company immediately.