Why the First 24 Hours Matter in Water Damage Emergencies
Water damage is not merely an immediate physical problem—it’s a time-sensitive emergency where every hour dramatically affects the final outcome. The difference between minor restoration and complete rebuilding often comes down to the speed and quality of your response within the first 24 hours.
Key Takeaway: The three most critical actions in the first two hours of a water damage emergency are ensuring electrical safety, stopping the water source, and calling a professional restoration company—delay on any of these dramatically increases both damage and cost.
Here’s why this timeframe is critical:
Structural damage accelerates: Wood begins warping after 24-48 hours of water exposure. Drywall deteriorates rapidly, especially in warm conditions. Steel framing begins rusting. The longer water persists, the more structural compromise occurs.
Mold growth begins quickly: Mold spores can germinate within 24-48 hours of water exposure in moisture-rich environments. What could be a simple water extraction becomes a complex mold remediation project if not addressed immediately.
Secondary damage compounds: Water spreads into wall cavities, attic spaces, and crawlspaces where it’s invisible but deeply damaging. Hidden moisture continues causing damage long after obvious water is removed.
Material replacement needs increase: Materials saturated for more than 48 hours often cannot be salvaged and must be replaced entirely. The cost difference between restoring and replacing can be thousands of dollars.
Contamination spreads: Depending on water source (clean, gray, or black water), contamination can spread and pose health risks.
The National Institute of Standards and Technology (NIST) and water damage restoration professionals universally recommend that professional water removal should begin within 24 hours for optimal outcomes. This guide provides an hour-by-hour timeline to guide your emergency response.
Hour 1-2: Immediate Safety and Stabilization
Safety First Priority
Electrical safety is paramount. Water and electricity are a deadly combination. Your first actions must prioritize electrical safety:
-
Do not enter water if electrical current may be present. If you see sparks, smell burning, or hear unusual sounds from outlets or appliances, stay out and call 911.
-
Turn off electricity at the main breaker if it’s safe to access. If water has reached the breaker box, do not touch it—call the fire department or electrician.
-
Unplug appliances and electronics in the affected area, but only if you can do this safely without contacting water.
-
Avoid standing water if circuit breakers are in or near the water. Water conducts electricity, and ground current from flooded electrical panels can be lethal even without direct contact.
-
Do not use electrical equipment like vacuums or fans until an electrician confirms the area is safe.
-
Turn off HVAC system immediately. Water can damage furnaces, and running the system can spread contamination throughout your home.
Health and Safety Assessment
-
Assess water contamination level:
- Clean water (burst pipes, water heater leak, roof leak): Lower contamination risk
- Gray water (washing machine, dishwasher overflow): Moderate contamination risk
- Black water (sewage, flooding from outside sources): Severe contamination risk requiring special precautions
-
Don your personal protective equipment:
- Waterproof gloves
- N95 or N100 masks (especially for black water or visible mold)
- Boots with good traction
- Long sleeves if possible
- Eye protection
-
Check for hazards:
- Unstable structures (ceiling sagging, walls leaning)
- Broken glass or sharp objects in water
- Chemical spills or hazardous materials
- Gas leaks (smell for rotten egg odor)
- Slippery surfaces that could cause falls
-
Establish an evacuation plan if water is extensive or the situation deteriorates. Know how to exit safely if conditions worsen.
Initial Water Source Control
-
Stop the water source if possible:
- For burst pipes: Turn off the main water shutoff valve
- For AC leak: Turn off the AC system
- For roof leak: Move belongings away from dripping water; place buckets to catch drips and direct water to contained areas
- For appliance leak: Unplug the appliance and turn off supply valves if accessible
-
Locate and document the water source: Understanding where water entered is important for professional assessment and insurance documentation.
-
Do not attempt major repairs. Turn off water or power to stop the source, but leave structural repairs to professionals.
Hour 2-4: Documentation and Initial Water Management
Documentation (Critical for Insurance)
Before you begin removing water, document everything. Insurance claims require photographic evidence, and this documentation protects you in claim disputes.
What to photograph and video:
-
Water damage extent:
- Wide shots showing overall flooding
- Close-ups of water levels on walls (measuring with tape measure in photos helps)
- Wet flooring, carpeting, and materials
- Water flowing or standing in various areas
- Damaged baseboards, walls, and structural elements
-
Affected belongings:
- Furniture in contact with water
- Electronics and appliances in the wet area
- Personal belongings damaged or at risk
- Clothing and textiles
- Important documents or items
-
Water source and cause:
- The burst pipe, cracked AC pan, or other failure point
- Surrounding evidence explaining how water entered
- Multiple angles showing the cause clearly
-
Time and date stamps:
- Include timestamps on videos
- Write the date and time on your notes
- Document when you discovered the problem
- Record when water removal begins
Create an inventory:
- Write down all visible damage
- List major items affected
- Estimate quantities (square footage of flooring affected, how many boxes of items damaged, etc.)
- Save this documentation with your photos
Initial Water Removal (Limited DIY)
If water volume is manageable and electrical safety is confirmed, you can begin limited water removal:
Wet-dry vacuum extraction:
- Confirm electrical safety before using any electric equipment
- Use a wet-dry vacuum rated for water (many standard vacuums are not)
- Increase fan speed as you work; water extraction requires sustained suction
- Empty the tank frequently; full tanks lose suction
- Work systematically, ensuring thorough extraction
Towel and manual removal:
- Use clean towels to absorb water
- Wring towels into buckets and dispose of water properly
- Work from highest areas downward
- Continuous wringing and replacing maintains absorption efficiency
- Labor-intensive but effective for smaller areas
Mop and bucket:
- Useful for final water removal and cleanup
- Use multiple buckets with wringing equipment or mops
- Effective for ensuring flooring is thoroughly dried
Important limitations:
- Do not delay professional extraction waiting for complete DIY removal
- Professional equipment removes water much faster and more completely
- Incomplete extraction leaves hidden moisture causing ongoing damage
- Contact professionals within 2-4 hours; don’t wait
In my experience working with homeowners during water emergencies, the biggest mistake people make is spending hours trying to handle extraction themselves with household towels and a shop vacuum when they should have called a restoration company in the first 30 minutes. Professional truck-mounted equipment can extract in one hour what takes a homeowner an entire day—and the drying results are incomparably better.
Hour 4-8: Professional Contact and Mitigation
Contact Water Damage Professionals Immediately
Call a professional water damage restoration company within 4 hours of discovering water damage. Do not wait until morning if damage occurs at night.
What to look for in a restoration company:
- IICRC (Institute of Inspection, Cleaning and Restoration Certification) certified technicians
- Available 24/7 emergency response
- Experience with your specific type of water damage
- Licensed and insured
- References from previous customers
- Transparent pricing structure
- Equipment visible on their truck (not a franchise with unknown subcontractors)
Information to provide:
- Location of damage and water source
- Approximate square footage affected
- Type of water (clean, gray, black)
- What action you’ve already taken
- Access directions to your home
What restoration companies will do:
- Complete professional water extraction
- Dehumidification and drying
- Mold prevention treatments
- Damage assessment
- Documentation for insurance
- Restoration planning
Document for Insurance
Call your insurance company within 24 hours, preferably immediately after discovering damage. Review our guide on how to document water damage for insurance to maximize your claim:
- Provide your policy number
- Describe what happened - the cause and extent of damage
- Explain what action you’ve taken - water removal, professional contact, etc.
- Ask about claims procedures - what documentation they need, how to proceed
- Request claims adjuster contact - they should visit within 24-48 hours
- Ask about emergency coverage - many policies cover emergency mitigation costs separately
Keep detailed records:
- Date and time of each call
- Names of people you spoke with
- Claim number
- Instructions provided
- Dates when professionals visit
Strategic Water Removal Planning
While waiting for professionals or during early restoration:
Priority areas:
- Remove water from highest-risk areas first (electrical systems, important belongings)
- Work downward from upper levels to lower levels
- Extract from carpeted areas before they absorb excessive water
- Protect belongings not yet wet by moving them to dry areas
- Focus on removing water from enclosed spaces (under baseboards, in walls) where it’s most damaging
Belongings triage:
- Move salvageable items to dry areas
- Separate items that cannot be dried (some electronics, documents)
- Stack salvageable items for protection
- Avoid moving extremely heavy items by yourself; wait for professional help
Hour 8-24: Ongoing Extraction and Drying
Professional Water Extraction (Hour 8 Onward)
When professionals arrive, they bring equipment that far exceeds consumer-grade tools:
Professional water extraction includes:
- Large-capacity wet-dry vacuums extracting hundreds of gallons per minute
- Submersible pumps for high-volume extraction
- Truck-mounted extraction equipment
- Complete extraction of water from flooring and subfloors
- Moisture detection to locate hidden water
Professionals should extract most standing water within the first 4-8 hours, then transition to drying.
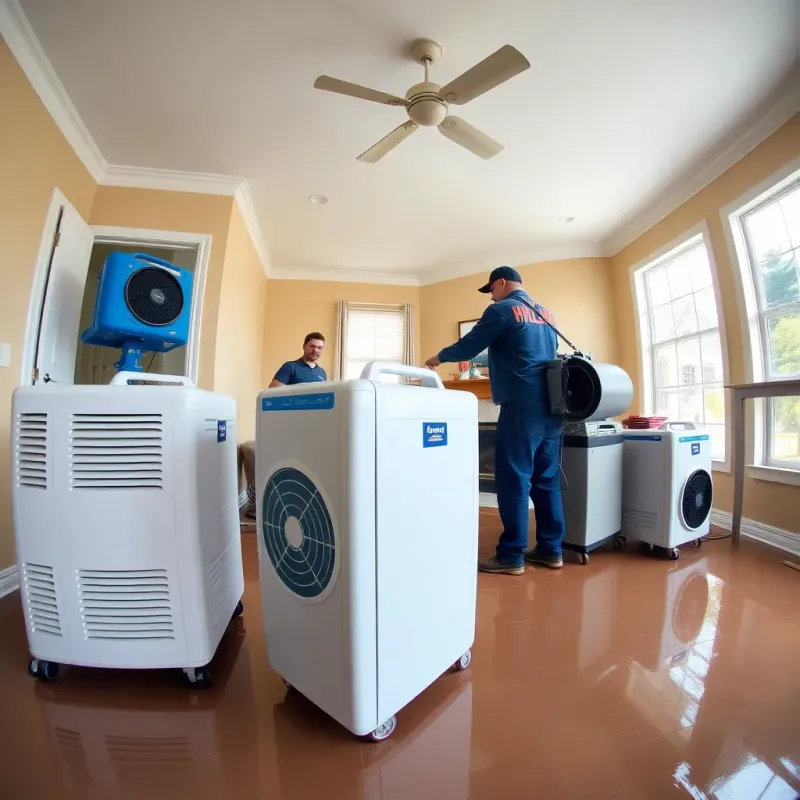
Dehumidification and Air Circulation
Dehumidifiers:
- Industrial-grade dehumidifiers remove moisture from air
- Large-capacity units process hundreds of pounds of moisture daily
- Multiple dehumidifiers work in tandem in large areas
- Continuous operation for 3-7 days typical
Air movement:
- Air movers (large floor fans) circulate air and accelerate evaporation
- Strategic placement maximizes air circulation
- Creates air currents across wet surfaces
- Combined with dehumidifiers, significantly speeds drying
Moisture monitoring:
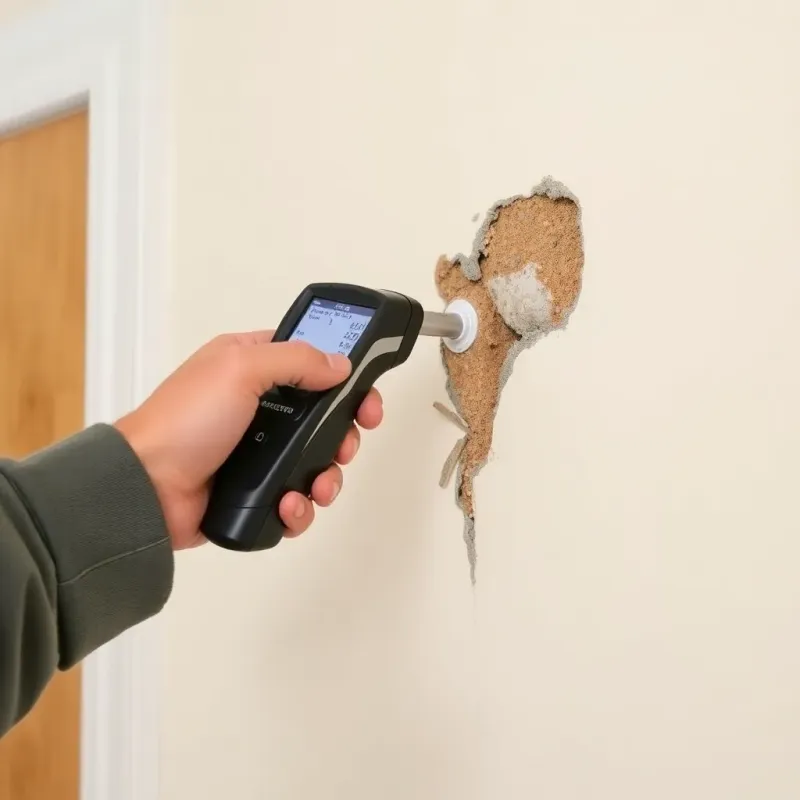
- Professional moisture meters detect moisture in materials
- Drying continues until materials reach normal moisture levels
- Hidden moisture in walls and under flooring is detected and addressed
- Helps prevent mold growth in inaccessible areas
Continued Documentation
Monitor and document the restoration process:
- Take photos daily of drying progress
- Note when equipment is deployed
- Document professional visits and actions taken
- Keep receipts for all expenses (equipment rental, supplies, professional services)
- Record conversations and recommendations from professionals
Mold Prevention During First 24 Hours
Prevent mold growth starting immediately:
- Antifungal treatments: Professionals apply treatments to prevent mold colonization
- Humidity control: Keep humidity below 50% using dehumidifiers
- Temperature: Warm temperatures speed drying but also promote mold; balance is important
- Air circulation: Continuous air movement prevents stagnant moisture where mold thrives
- Complete drying: Ensure all materials dry completely; partial drying leads to mold
If mold appears:
- Do not disturb moldy areas (spores spread when disturbed)
- Contact mold remediation specialists
- May require professional abatement
- Increases restoration costs and timeline

Hour 24+: Comprehensive Assessment and Planning
Detailed Damage Assessment (After 24 Hours)
By this point, professionals should have completed extraction and begun drying. They conduct detailed assessment:
What assessment includes:
- Complete inspection of affected areas
- Documentation of structural damage
- Materials determined salvageable or requiring replacement
- Mold risk assessment
- Restoration timeline estimate
- Cost estimates for repairs
Typical findings in water damage:
- Drywall requiring replacement (if saturated more than 48 hours)
- Subflooring damage assessment
- Structural wood inspection for rot risk
- Flooring damage assessment (carpet, hardwood, tile)
- Insulation saturation requiring replacement
- HVAC system inspection for damage
Insurance Adjuster Inspection
The insurance claims adjuster should visit within 24-48 hours:
Prepare for the adjuster visit:
- Have all documentation ready (photos, videos, inventory list)
- Point out all damage areas
- Provide restoration company contact information
- Answer questions about the incident
- Ask about coverage and claim details
- Clarify next steps in the claims process
Important during adjuster visit:
- Show all damage areas, including those not immediately obvious
- Don’t minimize damage to try to simplify the claim
- Complete transparency leads to proper coverage
- Ask if coverage is approved for professional restoration
- Get estimate of timeline for claim payment
Mitigation vs. Restoration Planning
Mitigation (emergency response):
- Water extraction and drying (completed in first 24-72 hours)
- Mold prevention
- Structural stabilization
- Prevents additional damage
Restoration (ongoing process):
- Rebuilding damaged structures
- Replacing materials
- Painting and finishing
- Electrical, plumbing repairs if needed
- Timeline: 2-6 weeks for typical damage; several months for severe cases
Professional companies handle both, but understanding the distinction helps you plan and budget.
Emergency Water Damage Response Timeline Summary
First 2 Hours
- Confirm electrical safety
- Stop water source
- Don protective equipment
- Assess water source and contamination level
Hours 2-4
- Begin documentation with photos/video
- Start limited water removal if safe
- Move threatened belongings to dry areas
- Contact water damage professionals
Hours 4-8
- Contact insurance company
- Continue professional water extraction
- Monitor and document restoration progress
- Prevent mold through ventilation and treatment
Hours 8-24
- Professional dehumidification begins
- Air movers activated
- Moisture monitoring underway
- Prepare for adjuster inspection
After 24 Hours
- Complete damage assessment
- Insurance claim processing begins
- Restoration planning and timeline established
- Focus transitions from emergency response to recovery
What NOT to Do in Water Damage Emergency
Avoid these critical mistakes:
- Do not delay contacting professionals. Every hour increases damage and costs.
- Do not use standard household vacuums. They can cause electrical hazards or damage the vacuum.
- Do not ignore hidden water. Water in walls and under flooring causes ongoing damage.
- Do not attempt major repairs yourself. Leave structural work to professionals.
- Do not heat the space excessively. This can accelerate mold growth.
- Do not assume water will dry naturally. Without proper dehumidification, moisture remains for weeks.
- Do not minimize damage in insurance claims. Be thorough and honest in documentation.
- Do not throw away potentially salvageable items immediately. Wait for professional assessment.
- Do not ignore contamination risks. Treat all water damage as potentially hazardous until confirmed otherwise.
FAQ About Emergency Water Damage Response
Q: How quickly does mold grow after water damage? A: Mold spores can germinate within 24-48 hours in wet materials. Prevention through proper drying and antifungal treatment is critical during the first 24 hours.
Q: Should I turn off electricity to the affected area? A: Yes, if it’s safe to do so. Turn off the main breaker or specific circuits serving the affected area. Never enter water near electrical equipment.
Q: What type of water damage requires professional mold remediation? A: Any black water damage (sewage contamination) or extensive water damage affecting more than 10 square feet typically requires professional mold remediation.
Q: Will my insurance cover emergency water removal costs? A: Most homeowners policies cover water damage remediation as part of the claim, though deductibles apply. Some policies have separate coverage for emergency mitigation expenses.
Q: How long does it typically take to dry a water-damaged home? A: Typical drying takes 3-7 days depending on the extent of water damage and humidity levels. More severe cases may require 2-4 weeks. Drying is complete when materials reach normal moisture levels (typically 6-11% for wood).
Q: What should I do with wet electronics and appliances? A: Do not attempt to use them until professionally inspected. Water inside electronics can cause immediate or delayed failure and electrical hazards. Allow professionals to assess whether items can be salvaged.
Q: Can wet documents be saved? A: Important documents should be photographed immediately for records. Professional document restoration services can sometimes save wet documents, but timing is critical—contact specialists immediately if documents are important and irreplaceable.
Conclusion
The first 24 hours following a water damage emergency are critical to determining the final outcome. Your immediate priorities—safety, documentation, professional contact, and strategic water removal—directly impact repair costs and timeline.
Quick action separates minor water damage restoration from major reconstruction projects. A water damage incident discovered and addressed within hours might cost $2,000-5,000 in professional restoration. The same incident left unaddressed for 48 hours could cost $10,000-25,000 in repairs as structural damage and mold growth progress.
Follow this emergency checklist from hour one:
- Ensure electrical and personal safety
- Stop the water source
- Document comprehensively with photos and video
- Contact professional restoration companies immediately
- Contact your insurance company
- Support professional water extraction and drying
- Plan restoration with confidence you’ve taken the right steps
When water damage strikes, remember: the hours immediately following discovery are your opportunity to minimize damage and costs. Act decisively, contact professionals quickly, and document thoroughly. Professional water damage restoration companies can work 24/7 emergency response exactly for this reason. Use them as soon as water damage occurs. Your home—and your wallet—will benefit from your rapid response.
Disclaimer: This article is for informational purposes only and does not constitute professional advice. Every water damage situation is unique. Always consult a licensed contractor or restoration professional for your specific situation. If you’re dealing with an emergency, contact your local restoration company immediately.