Introduction
Hidden water leaks are one of the most damaging and costly problems homeowners face. They can silently destroy your home’s structural integrity, promote mold growth, and significantly increase water bills before detection. The average household leak wastes over 10,000 gallons annually. Early detection is critical to minimizing damage and cost.
This guide provides professional-grade techniques to locate hidden water leaks in your home, from simple DIY methods to advanced detection strategies used by water damage specialists.
Key Takeaway: The water meter test is the single most reliable DIY method for confirming whether a hidden leak exists—if your meter advances while all water use is stopped for 30 minutes, you have an active leak that needs immediate attention.
Understanding Hidden Water Leaks
Why Hidden Leaks Are Dangerous
Water damage escalates quickly when leaks go undetected. Moisture promotes:
- Mold and mildew growth (health hazard)
- Structural damage to wood framing
- Foundation settling and cracks
- Drywall deterioration and soft spots
- Electrical hazards and short circuits
- Pest infestations attracted to moisture
Hidden leaks in walls, under flooring, or in crawl spaces can cause damage for months before becoming visible to occupants. Learn the signs of hidden water damage in walls so you can catch problems early.
Common Hidden Leak Locations
Priority inspection areas:
- Walls adjacent to bathrooms and kitchens
- Under bathroom and kitchen cabinets
- Foundation corners and slab perimeters
- Crawl spaces under floors
- Exterior walls at ground level
- Spaces around water heaters
- Interior areas below second-floor bathrooms
The Water Meter Test Method
This fundamental test determines whether water is leaking anywhere in your plumbing system.
Step-by-Step Process
1. Locate your water meter
- Typically found at street level or in a basement/utility room
- Marked with a clear access box or cover
- Contains a dial face displaying water usage
2. Stop all water use
- Ensure no toilets are running
- Turn off washing machines and dishwashers
- Close all faucets and ice makers
- Ask family members to avoid water use during testing
3. Record initial meter reading
- Note all numbers on the dial
- Document the time of day
- Note the position of any red or sweeping indicator (leak indicator)
- Take a photo for reference
4. Wait 30 minutes without using water
- No showers, toilet flushing, or appliance use
- Check that no outdoor watering systems are running
- Ensure sprinklers are turned off
5. Recheck the meter reading
- Record the new numbers
- Compare to initial reading
- Check if the leak indicator has moved
Interpreting Results
No change = No active leak. Your system is currently water-tight.
Meter has advanced = Active leak confirmed. Water is flowing through your system without use. The amount of change indicates leak severity.
Leak indicator moved = Very small leak detected. Some meters have a tiny red or blue indicator that moves with even minimal flow. Movement indicates a leak small enough to miss with visual inspection but significant enough to matter.
Meter running constantly = Major leak. Significant water flow is occurring. This requires immediate professional attention.
Visual Inspection Techniques
Interior Wall and Ceiling Examination
Signs of hidden leaks inside your home:
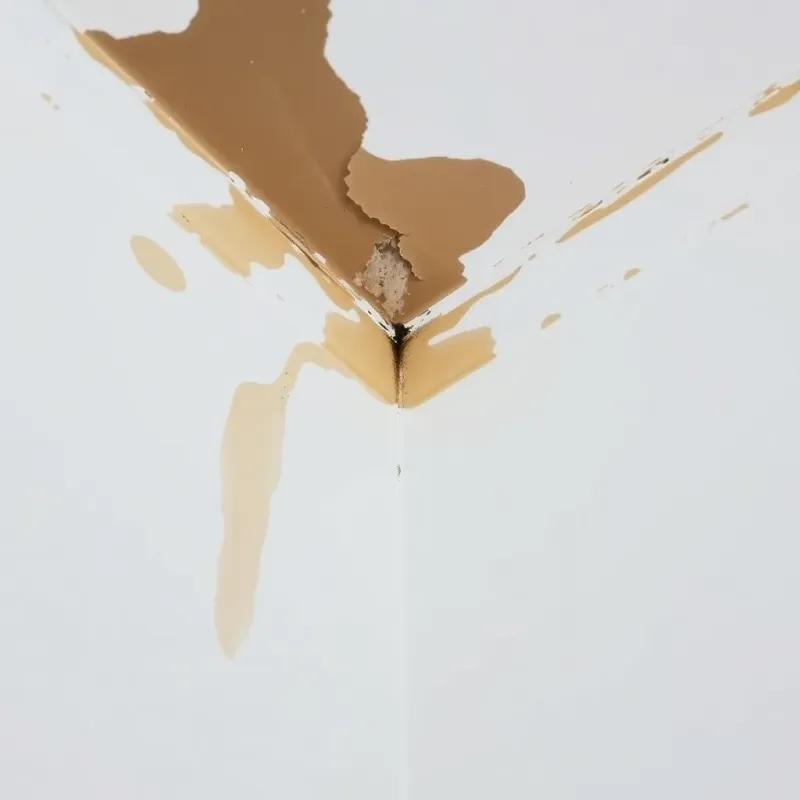
Discoloration patterns:
- Yellow, brown, or dark staining on ceilings or walls
- Staining that spreads over time
- Wet patches that appear despite no visible water source
- Fresh watermarks different from old stains
Texture changes:
- Soft or spongy drywall when pressed
- Bubbling or peeling paint
- Warped or bowed wall sections
- Separation between wall and floor trim
Mold and mildew indicators:
- Black or green spots on walls or ceilings
- Musty odors in specific rooms
- Visible growth along baseboards or trim
- Discoloration often accompanied by health symptoms
Flooring clues:
- Soft or spongy subflooring
- Buckled laminate or hardwood
- Separation between floorboards
- Discoloration on floor surface
- Water rings on furniture positioned against walls
Crawl Space and Basement Investigation
The most common hidden leak location is beneath your home.
Inspection procedure:
- Put on protective gear (gloves, mask, work clothes)
- Bring a flashlight and portable lighting
- Examine all visible pipes for moisture or dripping
- Look for water pooling or wet soil
- Check wood framing for discoloration
- Inspect under plumbing fixtures above
- Note any mold or mildew growth
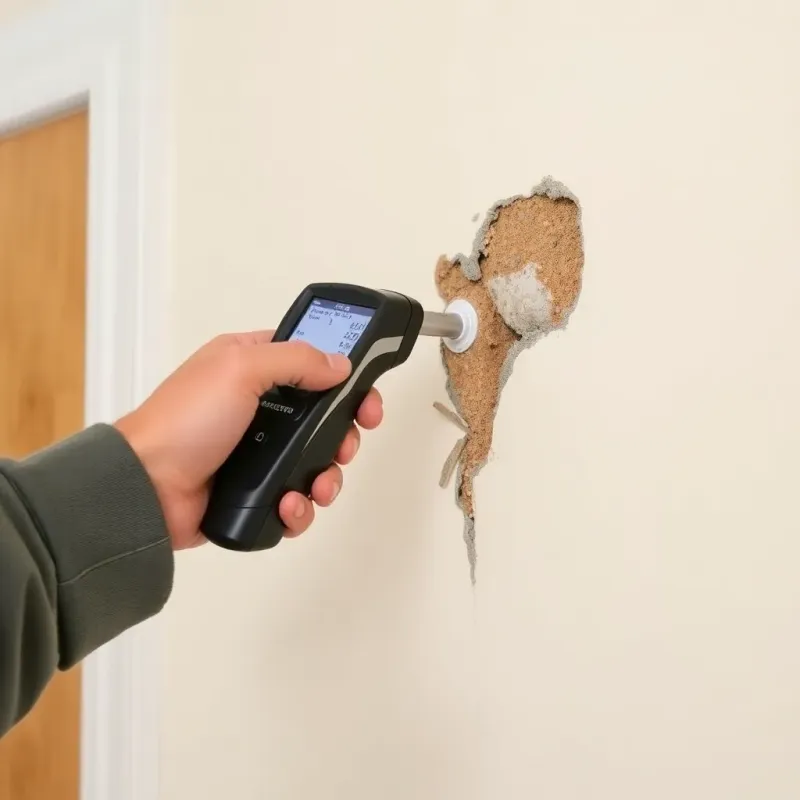
- Use a moisture meter if available
Key indicators:
- Standing water or puddles
- Wet spots on soil that don’t correspond to natural drainage
- Rust staining on pipes or metal components
- Condensation on pipes or ducts
- Evidence of past water damage (staining) that may indicate ongoing issues
After dealing with this issue hundreds of times, here is what I can tell you: most hidden leaks are found within five feet of a plumbing fixture. Before you start tearing into walls, always check under sinks, around toilet bases, and near water heater connections first—the source is usually closer than you think.
Acoustic Detection Methods
Listening Techniques
Professional plumbers use audio detection to locate hidden leaks. You can perform basic acoustic detection yourself.
Simple listening approach:
- Turn off HVAC systems and appliances
- Listen near suspect areas for water sounds
- Water rushing sounds indicate flow
- Hissing suggests pressurized leaks
- Dripping patterns indicate slower leaks
- These sounds are louder in quiet environments
Best listening locations:
- Inside cabinets under sinks
- Near water heater areas
- Along exterior walls in utility spaces
- In basements near main water lines
- Near thermal imaging “hot spots”
Stethoscope Method
For more sensitive detection, use a mechanical stethoscope or homemade listening device.
DIY listening tube:
- Use a plastic tube (1-2 inches diameter)
- Place one end near suspect pipe areas
- Place other end near your ear
- Listen for water sounds within the pipes
- Move systematically along pipe runs
Professional audio detectors:
- Cost $200-$1,000+
- Amplify water sounds significantly
- Help isolate leak location precisely
- Beyond most homeowner budgets but available through professionals
Infrared Thermal Imaging Detection
How Thermal Imaging Works
Thermal cameras detect temperature differences. Leaking water creates cooler zones as it dissipates energy. Professionals use this technology to identify leaks within walls without cutting into drywall.
DIY Thermal Camera Options
Basic thermal cameras: $100-$300
- Limited resolution but functional
- Useful for identifying temperature anomalies
- Requires practice to interpret results correctly
Smartphone thermal attachments: $200-$400
- Mount on smartphone
- Use phone screen for image review
- Reasonably accurate for DIY use
Professional thermal imaging: $300-$800 service call
- High-resolution cameras provide precise images
- Expert interpretation of thermal signatures
- Often combined with visual inspection
- Highest accuracy for difficult cases
Interpreting Thermal Images
Cooler areas (blue/purple) indicate water presence or evaporation.
Temperature changes along walls or floors suggest moisture.
Patterns matching known pipes confirm pipe location and help identify leak zones.
Compare multiple images taken at different times for verification.
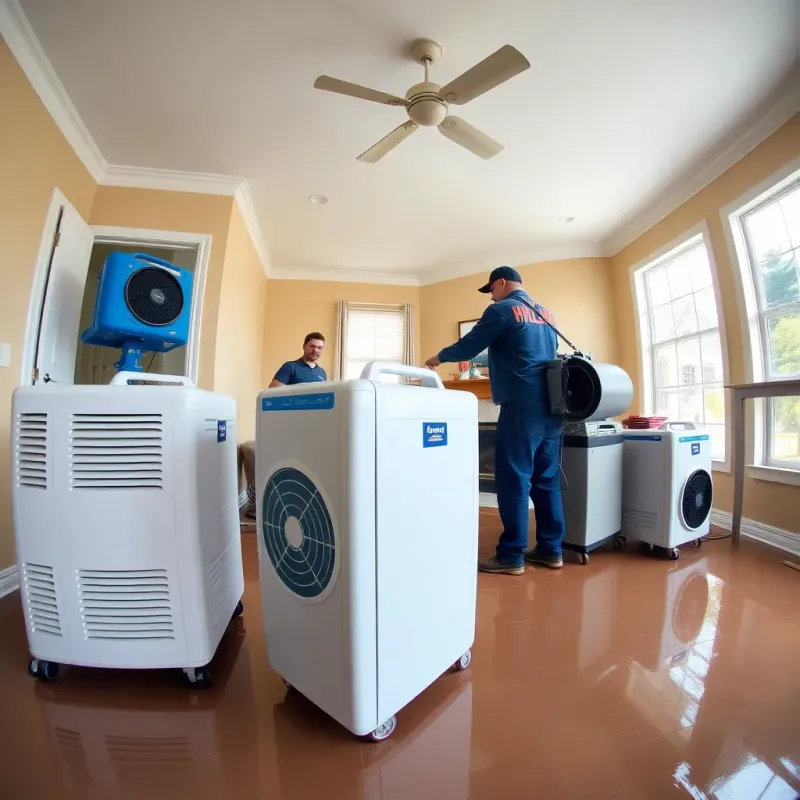
Specialized Detection Services
When to Call Professionals
Hire a leak detection specialist when:
- Water meter confirms leaks but location is unknown
- Visual inspection reveals damage but source is unclear
- Thermal imaging or acoustic methods are inconclusive
- Leak location is in difficult-to-access areas
- Multiple leaks are suspected
- Damage suggests significant hidden moisture
Professional Detection Methods
Advanced techniques professionals use:
Acoustic correlators: Triangulate leak location by analyzing sound waves through pipes. Cost: $300-$500.
Tracer gas detection: Non-invasive method using harmless gases to locate leaks in pressurized lines. Cost: $400-$800.
Infrared thermography: Professional-grade thermal imaging with expert interpretation. Cost: $300-$600.
Dye injection: Colored dyes track water flow to identify leak source. Cost: $200-$400.
Smoke testing: Smoke follows water pathways in pressurized lines. Cost: $200-$400.
Combination approaches: Many professionals use multiple methods for comprehensive detection. Cost: $500-$1,500 depending on scope.
Identifying Leak Sources
Common Culprits Behind Hidden Leaks
Plumbing failures:
- Corroded copper pipes (40+ year old homes)
- PVC joint deterioration
- Pinhole leaks from water chemistry
- Improper pipe support causing stress cracks
- Joint separation from foundation settling
Fixture problems:
- Supply line ruptures under sinks
- Leaking shut-off valves
- Cracked or failing toilet seals
- Water heater tank corrosion
- Dishwasher and washing machine line failures
Structural issues:
- Foundation cracks allowing groundwater entry
- Hydrostatic pressure forcing water into basements
- Poor grading directing water toward foundation
- Compromised sealants around penetrations
- Damaged waterproofing membranes
Roof and exterior:
- Roof leaks traveling down interior walls
- Gutter overflow creating wall saturation
- Failed flashing around chimneys and vents
- Clogged downspouts redirecting water to walls
- Failed caulking around windows and doors
Documenting and Recording Leaks
Creating a Leak Report
Documentation helps repair specialists:
- Note exact location of suspected leak
- Document meter test results with timestamps
- Photograph visible damage with date stamps
- Record any moisture meter readings
- Note seasonal patterns (winter, spring, wet season)
- Document any health symptoms (allergies, mold concerns)
- Timeline of first noticed signs
Share information with:
- Water damage restoration companies
- Plumbers
- Insurance adjusters
- Structural inspectors
FAQ: Finding Hidden Water Leaks
Q: How much can hidden water leaks increase my water bill? A: A small hidden leak (1 drip per second) can add 10-12 gallons daily, increasing bills by $10-$30 monthly. Larger leaks can add hundreds of dollars. Early detection prevents months of waste and high bills.
Q: Can I find hidden leaks without professional help? A: The meter test is excellent for confirming leaks. Visual inspection catches obvious damage. For pinpointing exact locations, especially in walls or below foundations, professional detection is more effective and faster than extensive DIY investigation.
Q: What’s the difference between a leak detection service and a plumber? A: Leak detection specialists focus on locating leaks using specialized equipment. Plumbers repair the actual damage. Many companies offer both services. Some situations benefit from specialists finding the leak before plumbers quote repair costs.
Q: How quickly does water damage spread from hidden leaks? A: Damage progression varies. Small leaks can cause significant mold growth within weeks. Larger leaks cause structural damage within days to weeks. The longer a leak persists, the more extensive and expensive repairs become. Faster detection equals lower costs.
Q: Should I cut into walls if I suspect a leak? A: Only as a last resort. Random cutting damages walls and can miss the leak. Professionals use non-invasive detection first. If inspection is necessary, professionals can target the exact area, minimizing damage.
Q: What should I do immediately after discovering a hidden leak? A: Shut off water to the affected area if possible, or the main valve if you can’t isolate it. Document damage with photos. Contact a plumber and your insurance company. Continue documenting the extent of damage. Avoid using that water source to prevent further damage.
Preventative Measures to Avoid Future Hidden Leaks
Regular Inspection Schedule
Monthly checks:
- Visual inspection under sinks
- Check around water heater
- Listen for unusual water sounds
- Smell for mold or mildew
Seasonal inspections:
- Spring: Check basement for winter water accumulation
- Fall: Inspect roof, gutters, and exterior sealing
- Summer: Monitor bill increases indicating potential leaks
- Winter: Check crawl space for moisture
Maintenance That Prevents Leaks
- Replace water supply hoses every 5 years
- Drain water heater annually to remove sediment
- Install water leak detection systems in vulnerable areas
- Install new caulk around fixtures every 3-5 years
- Seal foundation cracks promptly
- Maintain gutters and downspouts
- Monitor and adjust water pressure (should be under 80 PSI)
- Upgrade old polybutylene plumbing if present
- Regularly test shut-off valves
Conclusion
Finding hidden water leaks requires a combination of observation, testing, and sometimes professional expertise. Start with the water meter test to confirm a leak exists, then use visual inspection and listening techniques to identify the source. When DIY methods aren’t sufficient, professional leak detection services provide cost-effective solutions that identify problems before major damage occurs.
Regular inspections and preventative maintenance reduce the likelihood of future hidden leaks. When you do discover one, rapid action following our emergency water damage checklist minimizes water damage, repair costs, and health risks. By understanding these detection methods, you’re better equipped to protect your home from the silent threat of hidden water leaks.
Disclaimer: This article is for informational purposes only and does not constitute professional advice. Every water damage situation is unique. Always consult a licensed contractor or restoration professional for your specific situation. If you’re dealing with an emergency, contact your local restoration company immediately.