How to Repair Water Damaged Bathroom Tile and Grout: Expert Guide
Bathroom tile and grout are the frontline defense against water damage, yet they’re also vulnerable to deterioration when water penetrates the surface. Water damage in bathroom tile isn’t just an aesthetic problem—it’s a structural issue that can lead to mold growth, weakened substrate, and expensive repairs if left unaddressed. This guide covers identifying water damage, performing professional-quality repairs, and implementing prevention strategies to protect your bathroom.
Key Takeaway: Grout is the weakest link in your bathroom’s water defense system — investing in epoxy or urethane grout during repairs costs more upfront but lasts 10-15 years versus 5-8 years for standard cement grout, saving you from repeated damage and regrout cycles.
Understanding Water Damage in Bathroom Tile and Grout
The Role of Tile and Grout in Water Protection
Bathroom tile serves as a waterproof barrier, but the system only works when grout and caulk maintain their integrity. Grout is porous by nature and can absorb water if not properly sealed. When water penetrates through cracked or deteriorated grout, it reaches the substrate beneath the tile, where it can cause extensive damage to the subfloor, drywall, or framing.
This is why water-damaged tile and grout are critical issues requiring prompt attention. Unlike surface water damage, damaged tile and grout allow water to continuously penetrate into areas you can’t see.
Common Causes of Bathroom Tile Damage
Grout deterioration is the most common cause, resulting from age, poor initial installation, or exposure to harsh cleaning chemicals. Standard grout has a lifespan of 5-8 years before it begins showing significant wear.
Substrate failure occurs when the material beneath the tile weakens from water absorption. Once the substrate deteriorates, the tile loses support and can crack or shift.
Improper installation includes insufficient substrate preparation, using non-waterproof materials, or failing to seal grout after installation. These mistakes compound over time as water exposure accelerates deterioration.
Structural movement happens when your home settles, shifts, or experiences vibrations. This movement can crack grout and cause tiles to shift out of alignment.
Poor ventilation prevents moisture from evaporating, keeping surfaces wet longer and accelerating grout deterioration.
Signs of Tile and Grout Water Damage
Visual Indicators
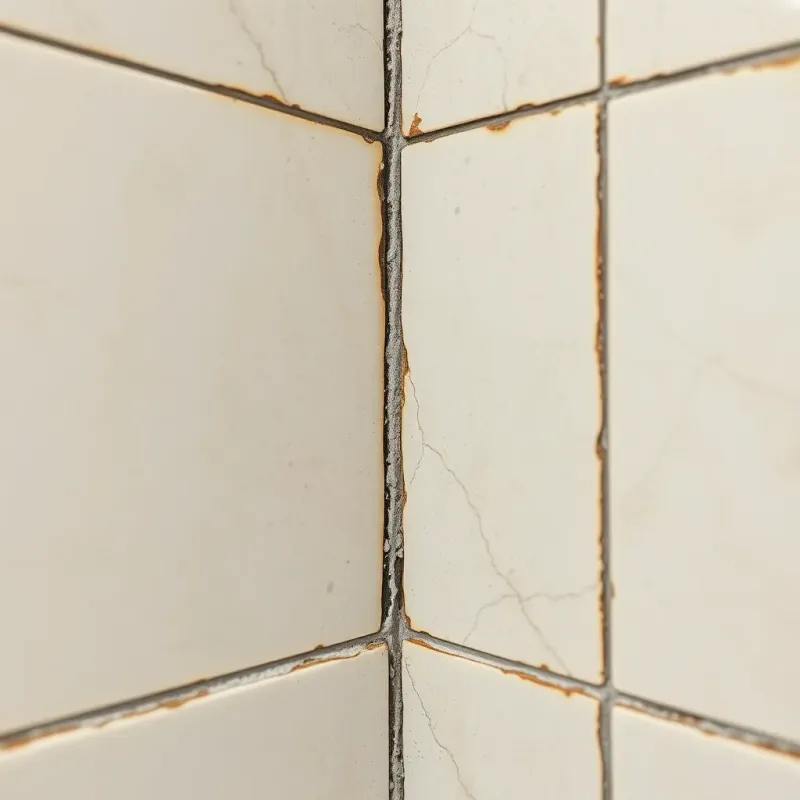
Discoloration is often the first sign, appearing as brown, black, or yellow stains in grout lines. This typically indicates mold or mildew growth.
Cracked or crumbling grout indicates structural failure. If you can scratch grout away with your fingernail, it’s deteriorated significantly.
Loose or shifting tiles suggest substrate failure. Tap tiles gently—a hollow sound indicates water damage beneath.
Soft spots on surrounding walls indicate water has penetrated beyond the tile and is affecting the substrate.
Mold and mildew growth visible on grout or tile surface (usually black, green, or white) confirms ongoing moisture problems.
Hidden Damage Detection
Press gently on the tile. If it feels soft or gives under pressure, water has compromised the substrate. Check the grout by scraping lightly with a utility knife—healthy grout should be solid, not crumbly.
Smell the area. A musty odor indicates active mold or mildew growth, even if not visible to the eye.

The Regrout Process
Regrout is the most common repair for water-damaged grout and is often successful in addressing damage before it reaches the substrate.
Preparation and Safety
Before beginning any regrout work, ensure the area is well-ventilated. If mold is visible, clean it with a solution of one part bleach to ten parts water before starting regrout work.
Wear safety glasses, a dust mask (N95 or better), and gloves during grout removal and regrout work. Grout dust contains silica, which is hazardous to inhale.
Gather your supplies: a grout rake or oscillating multi-tool with grout blade, a grout float, new grout (epoxy or urethane grout is superior to standard grout), a bucket for mixing, and a sponge for cleaning.
Removing Old Grout
Use a grout rake or rotary tool with a grout blade to remove old grout from joints. Work carefully to avoid chipping the tile itself. For badly deteriorated grout, you may need to remove 1/2 inch or deeper to reach solid material.
Remove all loose debris and dust from the joint using a dry brush or vacuum.
Selecting the Right Grout
Standard cement grout is affordable but porous and requires sealing. It’s susceptible to water penetration and staining.
Epoxy grout is water-resistant, stain-resistant, and never requires sealing. It’s more difficult to work with than standard grout, but the superior performance justifies the extra effort.
Urethane grout offers excellent water resistance and flexibility, adapting to slight substrate movement. It’s a good middle-ground option.
For bathrooms, epoxy or urethane grout is strongly recommended over standard cement grout. The extra cost pays for itself through increased durability and reduced future maintenance. From my years in the field, I always recommend epoxy grout for shower floors and lower walls where water contact is constant. It is harder to work with and requires careful cleanup during installation, but the fact that it never needs sealing and resists staining makes it well worth the extra effort.
Applying New Grout
Mix grout according to package directions, aiming for a thick peanut butter consistency. Mix only as much as you can apply within 20-30 minutes, as grout hardens quickly.
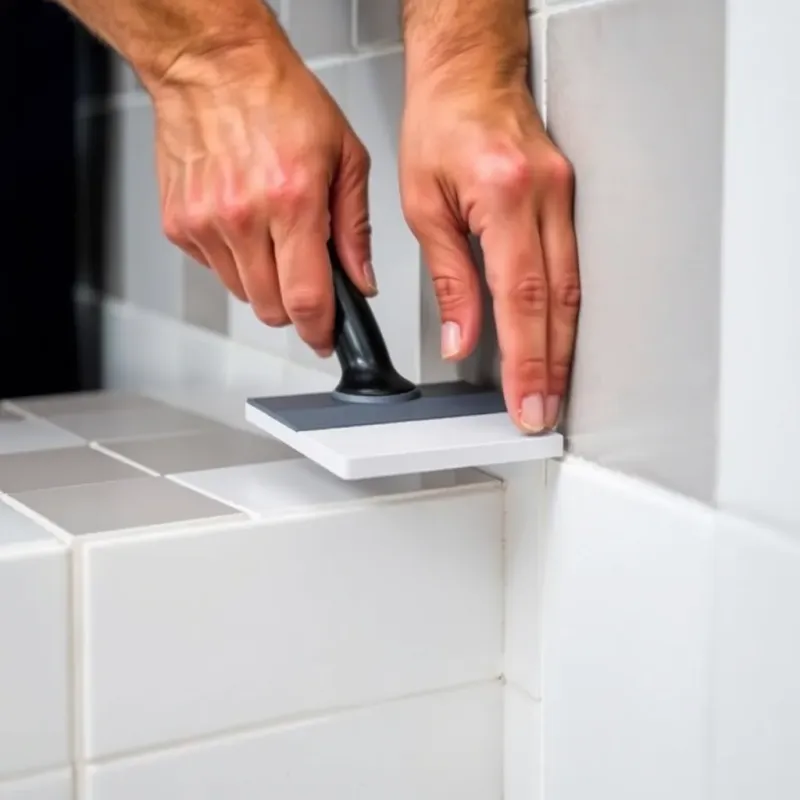
Apply grout using a grout float held at a 45-degree angle, pressing grout firmly into joints. Use diagonal strokes to avoid pulling grout out of joints.
After the grout begins to set (about 15-20 minutes), use a damp sponge to wipe excess grout from the tile surface. Rinse the sponge frequently and wring it out well. The tile should be clean but grout lines should remain full.
Allow grout to cure for 24-48 hours before exposing to water. Different grout types have different cure times, so follow manufacturer recommendations carefully.
Sealing Grout
If using standard or urethane grout, apply a penetrating sealer after the grout has cured completely. Penetrating sealer repels water while allowing grout to breathe, preventing moisture trapping that can cause damage.
Apply sealer according to product directions, typically allowing it to dry between coats. Most seals protect grout for 1-3 years, requiring reapplication periodically.
Replacing Damaged Tiles
When tiles are cracked, loose, or badly stained, replacement may be necessary.
Assessing Damage
A single cracked tile can often be replaced without affecting adjacent tiles. However, if the substrate beneath the tile is soft or damaged, you’ll need to repair the substrate before installing a new tile.
Check tiles for movement by gently pushing them. Tiles that move significantly or have hollow sounds underneath indicate substrate damage requiring repair before retiling.
Tile Removal
Carefully break the damaged tile using a hammer and cold chisel, working from the center outward. Remove all old adhesive from the substrate, creating a clean, flat surface.
If the substrate is damaged, now is the time to repair or replace it. This might involve removing and replacing drywall, cementboard, or treating water-damaged substrate.
Tile Installation
Apply thin-set mortar (cement-based adhesive) to the substrate with a notched trowel, creating ridges that ensure complete contact behind the tile.
Press the new tile firmly into place, checking that it’s level and even with surrounding tiles. Use spacers to maintain consistent grout joint width.
Allow thin-set to cure per manufacturer directions (typically 24 hours) before grouting.
Grouting and Finishing
Follow the regrout process outlined above. Matching grout color to existing grout may require testing samples, as grout colors vary and age over time.
Waterproofing Your Bathroom Tile
Proper waterproofing prevents water from reaching substrate, protecting your investment and your home’s structure.
Membrane Installation
For new tile installation or when regrout isn’t sufficient, waterproofing membranes provide superior protection. These membranes (liquid or sheet-based) create a complete water barrier beneath tile.
Sheet membranes are installed over the substrate before thin-set and tile are applied. They require careful sealing at seams and penetrations.
Liquid membranes are rolled or sprayed onto the substrate, creating a continuous waterproof layer. They’re more foolproof than sheet membranes because there are no seams to seal.
Critical Areas Requiring Waterproofing
The shower/tub surround needs a full waterproofing membrane from the floor to at least 6 feet high, extending at least 6 inches beyond the shower area.
The floor around the tub requires waterproofing and proper slope to direct water toward a drain.
Areas behind fixtures around faucets and showerheads must be sealed to prevent water penetration at penetrations.
Corners and transitions where different surfaces meet require special attention, using flexible sealant rather than grout.
Caulking Strategy
Use waterproof caulk (not grout) in corners, around fixtures, and at transitions between different materials. Caulk remains flexible, accommodating movement that grout cannot.
Reapply caulk every 1-2 years or whenever it begins to crack or separate, as it wears faster than grout.
Addressing Mold and Mildew
If mold or mildew is visible on tiles or grout, addressing it is essential before regrout work begins.
Cleaning Mold
Mix one part bleach with ten parts water in a spray bottle. Spray affected areas generously and allow to sit for 10 minutes. Scrub with a stiff brush and rinse thoroughly with clean water.
For stubborn mold, use a grout cleaner specifically formulated for mold (available at hardware stores). Some contain enzymes that break down mold’s organic structure.
Ensure adequate ventilation during cleaning and wear gloves and eye protection, as bleach is caustic.
Preventing Recurrence
The key to preventing mold is eliminating moisture. This requires:
- Ventilation: Use exhaust fans during and for 30 minutes after showers
- Preventing standing water: Ensure proper slope and drainage so water doesn’t pool
- Regular cleaning: Clean grout monthly with a mild bathroom cleaner
- Keeping surfaces dry: Wipe down shower walls and floors after each use
Prevention Strategies for Long-Term Protection
Installation Best Practices
When installing new tile, use a waterproof substrate like cement board or Schluter systems rather than drywall. These materials resist water penetration, protecting your home’s structure even if grout fails.
Apply waterproofing membrane before thin-set, creating a complete water barrier system.
Maintenance Schedule
Weekly: Ventilate during showers, wipe down wet surfaces after use
Monthly: Clean grout with bathroom cleaner or vinegar solution
Annually: Inspect grout for cracks or deterioration, reapply sealer if used, check caulk integrity
Every 5-8 years: Consider regrout if grout appears worn, even if not actively damaged
Environmental Controls
Use an exhaust fan during and after showers to remove humidity. Leave bathroom doors open when not in use to improve air circulation throughout the home.
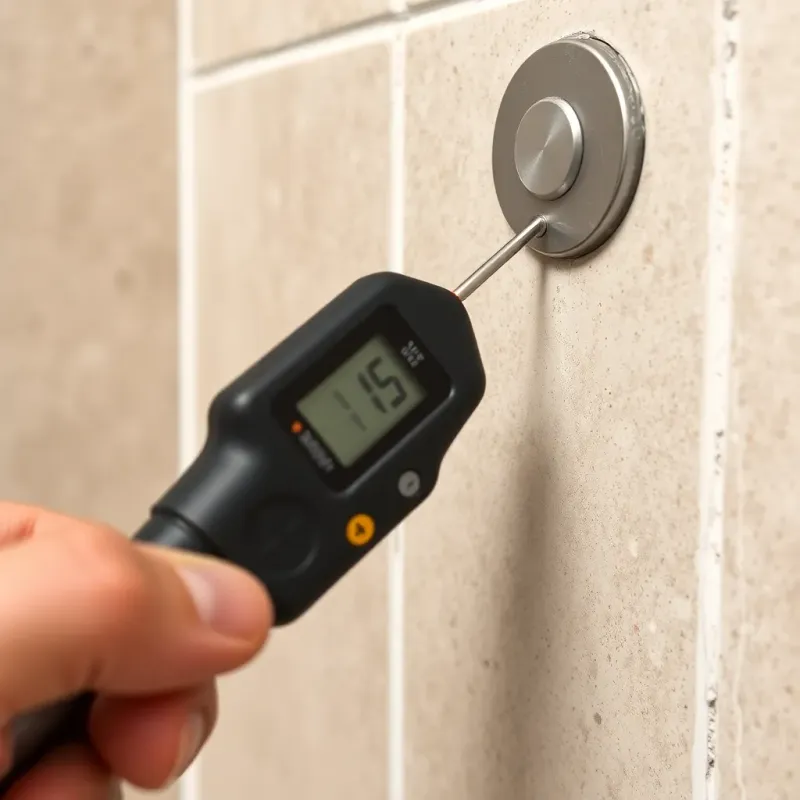
Install a humidity gauge (available at hardware stores) and aim to keep bathroom humidity below 60%. If humidity consistently exceeds this, your ventilation system may need upgrading.
FAQ: Water Damaged Bathroom Tile and Grout
Q: Can I just caulk over cracked grout instead of regrout?
A: Caulk is not a substitute for grout. While temporary caulking can slow water penetration, it will eventually fail as caulk is softer and less durable than grout. Proper regrout is necessary for lasting repair, though caulk should be used in corners and around fixtures in addition to grout.
Q: How long does regrout work last?
A: Properly installed grout with appropriate sealer typically lasts 5-8 years in active bathrooms with daily use. Epoxy or urethane grout lasts longer, potentially 10-15 years, because it’s more water-resistant. Sealer extends life but requires reapplication every 1-3 years.
Q: Is it safe to live in a bathroom with active mold?
A: Exposure to mold can cause respiratory issues, particularly for people with allergies or asthma. While minor mold can be cleaned, extensive mold growth indicates moisture problems requiring professional mold remediation. If mold keeps returning despite cleaning efforts, your ventilation or waterproofing systems may need professional evaluation.
Q: How much does professional tile and grout repair cost?
A: Professional regrout typically costs $5-10 per square foot, or $300-1,500 for an average bathroom — see our water damage restoration cost guide for how tile repairs fit into overall expenses. Tile replacement costs $10-25 per square foot depending on tile cost and difficulty. Full waterproofing and re-tiling costs $2,000-10,000 depending on bathroom size and damage extent.
Q: Can water-damaged substrate be saved, or does it need replacement?
A: This depends on damage extent. Drywall with minor water damage can sometimes dry completely without mold development, but it requires thorough drying and monitoring. Damaged substrate in bathrooms should generally be replaced because it’s difficult to verify mold hasn’t developed inside, and bathroom substrate experiences constant moisture exposure. Learn how to recognize signs of hidden water damage in walls before they worsen. Replacing substrate when water damage is discovered prevents future problems.
Conclusion
Water damaged bathroom tile and grout requires prompt attention to prevent further deterioration and protect your home’s structure. Whether addressing minor grout deterioration through regrout or dealing with more extensive damage requiring tile replacement, understanding your options and implementing proper repairs ensures your bathroom remains watertight and functional.
The investment in quality materials—epoxy or urethane grout, proper waterproofing membranes, and professional installation—pays for itself through decades of durability and reduced maintenance. By combining proper repair techniques with diligent maintenance and environmental controls, you can protect your bathroom from water damage and ensure its longevity.
For extensive damage involving structural substrate failure, consulting with a water damage restoration professional ensures the underlying problems are properly addressed before surface repairs are completed.
Disclaimer: This article is for informational purposes only and does not constitute professional advice. Every water damage situation is unique. Always consult a licensed contractor or restoration professional for your specific situation. If you’re dealing with an emergency, contact your local restoration company immediately.