How to Repair Water Damaged Plaster Walls: Complete Guide
Plaster walls, particularly in older homes, require different repair approaches than modern drywall. When water damage affects plaster, the repair challenges are more complex—requiring understanding of the material’s properties and applying specialized techniques. This guide covers identifying plaster damage, understanding its differences from drywall, executing repairs, and knowing when professional plasterers are necessary.
Key Takeaway: Plaster walls require weeks — not days — to dry completely after water damage, and making repairs before the wall is fully dry traps moisture inside, leading to mold growth and repeated failure of your repair work.
Understanding Water Damaged Plaster Walls
What Is Plaster?
Plaster is a centuries-old building material composed of gypsum, lime, or cement mixed with sand and water, applied over a base layer (called lath) to create a hard, durable wall surface. Plaster differs fundamentally from drywall in composition, installation method, and repair requirements.
Unlike drywall, which is a finished board product, plaster is applied as a semi-liquid material that hardens over time. This creates a monolithic wall surface with different structural properties than drywall’s paper-faced core.
Why Plaster Is Vulnerable to Water Damage
While hardened plaster is quite durable, water damage exploits the material’s vulnerabilities. Plaster is porous and absorbs water readily. When water penetrates plaster, it migrates through the material and the lath base, causing swelling, cracking, and eventual failure.
Additionally, water deteriorates the adhesive bond between plaster and lath. As this bond fails, plaster loses support and can crumble or separate from the base.
Plaster vs. Drywall Damage Differences
Plaster damage from water typically shows as bulging, bubbling, crazing (fine cracks), and crumbling where water pressure pushes plaster away from lath. The damage pattern often follows horizontal lines where water migrates through the plaster.
Drywall damage from water shows as soft spots, discoloration, and complete softening where the paper facing deteriorates. See our drywall water damage repair guide for drywall-specific techniques. Water-damaged drywall loses structural integrity more quickly than plaster.
Repair approaches differ: Drywall is usually replaced rather than repaired because repair is labor-intensive. Plaster can often be repaired successfully with proper techniques.
Moisture sensitivity: Plaster is more forgiving during drying than drywall. It can tolerate slower drying without developing mold as readily. However, plaster drying takes much longer—weeks rather than days.
Assessing Water Damaged Plaster Walls
Accurate assessment determines whether repair or replacement is appropriate.
Visual Inspection
Examine the entire wall surface for signs of water damage including discoloration (water stains), bubbling or bulging plaster, cracks (particularly horizontal cracks), and areas where plaster appears to separate from the base.
Check the baseboards and floor/wall junctions. Water damage is typically worst at lower elevations where water pools.
Press gently on suspect areas. If plaster feels soft or spongy, water has penetrated the material. If you can feel a hollow space between plaster and lath, the adhesive bond has failed.
Determining Moisture Content
Visual inspection alone doesn’t reveal how much moisture the plaster contains. Plaster can look relatively normal while containing significant moisture.
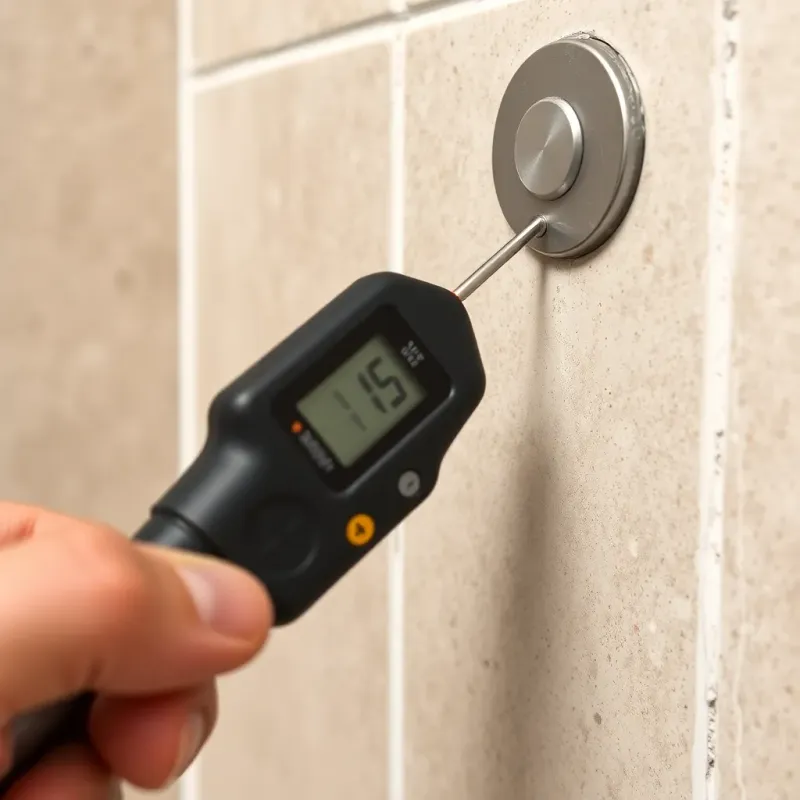
Use a moisture meter (often available at home improvement stores) to measure moisture content. Readings above 15% indicate significant moisture absorption. Readings above 20% suggest extensive water damage.
Allow wet plaster to dry completely before making repair decisions. Plaster drying is slow—sometimes taking weeks for thick sections. Don’t assess repairability until the wall is completely dry.
Pro tip: A moisture meter is your best friend with plaster walls. I have seen homeowners patch plaster that “looked dry” only to have the repair bubble and fail within weeks because the lath behind it was still saturated. Always verify with readings, not visual inspection alone.
Moisture Source Identification
Determine where water came from. Was it from above (roof/ceiling leak), from behind the wall (plumbing), or from external sources (exterior walls)?
Understanding the water source is crucial because you must eliminate the source before repair. Learn to recognize signs of hidden water damage in walls before they become visible. Repairing plaster while water continues infiltrating is futile.
Repair Techniques for Water Damaged Plaster
Preparation: Drying and Cleaning
Before any repair work, plaster must dry completely. This may take 3-8 weeks depending on wall thickness, humidity, and air circulation.
Accelerate drying with:
- Fans: Position fans to circulate air across the wall
- Dehumidifiers: Use commercial dehumidifiers in enclosed spaces — learn how to properly dry rooms after water damage
- Heat: Gently warm the area (not above 80°F, which can cause faster surface drying that traps interior moisture)
- Ventilation: Open windows when outdoor humidity is low to exchange interior moist air with drier exterior air
Once dry, clean loose plaster away. Using a putty knife or scraper, gently remove any crumbling plaster, loose material, or dust. This prevents contamination of repair materials.
Small Patch Repairs
For small holes or damaged areas (less than 6 inches across):
Prepare the surface by removing loose plaster and dust. If the area is very rough, slightly dampen it with a spray bottle (don’t soak it). Damping helps bonding but prevents plaster from drying too quickly.
Fill the area with plaster patching compound (available at hardware stores). Use a putty knife to press the compound into the area, slightly overfilling to account for shrinkage.
Feather the edges by smoothing the patch at the edges so it blends with surrounding plaster.
Allow drying per product directions (typically 24 hours).
Sand smooth using 120-150 grit sandpaper.
Prime and paint to match surrounding walls.
Medium Damage Repairs
For larger areas (6-24 inches) or where plaster has separated from lath:
Remove damaged plaster back to solid material. Use a hammer and cold chisel to carefully break away damaged plaster, working inward from edges.
Expose the lath if necessary. The base should be clean and sound. If lath is damaged or rotted, it may need repair or replacement (this is typically work for experienced plasterers).
Dampen the exposed lath lightly with a spray bottle.
Apply a base coat of plaster patching compound, pressing it firmly into the lath to create mechanical bond. This first coat should be about 1/4 inch thick. Allow to partially set (but not completely dry).
Apply a second coat of plaster to build up the wall thickness. This should fill the area to within 1/8 inch of the final surface.
Apply a finish coat of smooth-finish plaster or joint compound to create a finished surface.
Large Area Repairs and Skim Coating
For extensive damage or to achieve a uniform finished surface, skim coating may be necessary.
Skim coating is the application of a thin layer of joint compound or finish plaster over a larger wall area, creating a smooth, uniform surface. This technique is beyond casual DIY but achievable with practice.
Apply compound with a wide drywall knife (10-12 inches) in smooth, overlapping strokes. The layer should be very thin—aim for 1/16 to 1/8 inch thickness. The goal is smoothness, not filling.
Allow to dry slightly between coats if multiple coats are needed.
Sand smooth with 150-220 grit sandpaper once completely dry.
Prime and paint for finished appearance.

Matching Plaster Finish
Water-damaged plaster often requires finishing touches to match existing walls.
Texture Matching
Plaster walls often have texture applied to the finish coat. Before repairing, identify the existing texture:
- Smooth finish: Troweled smooth with no texture
- Orange peel: Textured spray-applied finish
- Popcorn: Heavy textured finish (less common in modern homes)
- Troweled texture: Created with trowel techniques producing a varied surface
After patching, the repair may be obvious if texture isn’t matched. Fortunately, many plaster repairs use joint compound (drywall mud) which can be textured to match.
If the existing texture is simple (orange peel), you can apply the same texture to the patched area using spray texture kits available at hardware stores.
Paint and Stain Matching
Water damage often leaves stains that remain visible even after repairs. Paint color may have changed over time due to UV exposure and settling, making matching difficult.
For small repairs: Painting only the patched area may be acceptable if the patch is small and in a less visible location.
For larger repairs: Consider painting the entire wall to achieve uniform color.
For stain removal: If stains remain after repair, prime with a stain-blocking primer before painting. This prevents stains from bleeding through paint.
When to Call a Professional Plasterer
Some plaster damage exceeds DIY capability.
Signs You Need a Professional
Extensive damage affecting large wall areas is best handled by plasterers with equipment and experience for larger repairs.
Separation from lath that affects large areas requires professional assessment. If the plaster-to-lath bond has failed over a large area, structural reinforcement may be needed.
Ornamental plaster or historic plaster with decorative elements requires skilled plasterers to maintain historical integrity.
Difficulty matching existing plaster texture or finish quality after DIY attempts suggests professional finishing is needed.
Structural concerns where water damage may have affected the lath, framing, or other structural elements beyond the plaster surface.
Finding Qualified Plasterers
Ask for references from local contractors or restoration companies. Check credentials and verify insurance. Obtain multiple estimates before hiring.
Professional plasterers typically charge $8-20 per square foot depending on damage severity and required finish quality. See our water damage restoration cost guide for how plaster repairs fit into overall expenses.
Preventing Future Plaster Water Damage
Identifying and Eliminating Water Sources
Address roof leaks, plumbing issues, and exterior water intrusion immediately. The best plaster repair cannot succeed if water continues penetrating the wall.
Check gutters and downspouts regularly. Ensure they’re clean and direct water away from the building foundation.
For exterior plaster, ensure grading slopes away from the building to prevent water pooling at walls.
Wall Maintenance
Inspect plaster regularly for cracks, especially in corners and around windows. Seal cracks promptly with paintable caulk to prevent water infiltration.
Maintain paint and protective finishes. Repaint before paint becomes chalky or starts peeling, as these signs indicate the protective barrier is failing.
Interior Environmental Control
Keep humidity levels below 60% to minimize moisture in walls. Use exhaust fans in bathrooms and kitchens. Ensure adequate ventilation throughout the home.
Insulate cold water pipes to minimize condensation.
Exterior Protection
For exterior plaster, ensure adequate exterior finish and waterproofing. If plaster is exposed (not covered by siding or other exterior material), it should be sealed with masonry sealer every 3-5 years.
Maintain caulk around windows and doors. Gaps allow water to infiltrate the wall structure.
FAQ: Water Damaged Plaster Wall Repair
Q: Is water-damaged plaster always mold risk?
A: Water-damaged plaster can develop mold if moisture remains trapped in the material. Plaster that dries completely within a few days typically doesn’t develop mold. However, if plaster remains damp for weeks, mold is likely. Use a moisture meter to verify dryness before concluding mold risk has passed.
Q: How long does plaster take to dry after water damage?
A: Plaster drying is slow. Thick plaster sections may take 4-8 weeks to dry completely even with active drying measures. Thin sections or finish coats dry faster, sometimes in 2-3 weeks. Don’t repair or paint until the wall is completely dry, as moisture trapped under repairs will cause future problems.
Q: Can I use drywall repair techniques on plaster walls?
A: Some techniques overlap, but plaster has different properties requiring adjustments. Plaster patches adhere to plaster better than joint compound. For small repairs, joint compound works, but for larger repairs or structural issues, proper plaster repair compound produces better results. Extensive plaster damage often requires professional plasterers for optimal results.
Q: Why should I repair plaster instead of replacing it with drywall?
A: Plaster offers several advantages: superior durability, better sound dampening, excellent fire resistance, and historical authenticity in older homes. Replacing plaster with drywall requires wall framing adjustments and changes the home’s historical character. For many homeowners, quality plaster repair is preferable to removal.
Q: What’s the difference between patching plaster and finish plaster?
A: Patching plaster is designed to stick to existing plaster and accept finishing coats. It has different adhesion properties than finish plaster. Finish plaster creates the final smooth surface. For repairs, using both materials produces professional results: patching plaster for building up, finish plaster for final smoothing.
Conclusion
Water-damaged plaster walls require patient drying, careful assessment, and appropriate repair techniques matching the damage severity. Small to medium repairs are achievable for homeowners willing to learn proper plastering techniques. Large repairs or historically significant plaster typically benefit from professional plasterers.
The key to successful plaster repair is understanding that plaster is a completely different material from drywall, requiring different approaches and materials. Quality plaster repair preserves the superior properties this traditional building material provides while restoring your walls’ appearance and function.
By addressing water sources, allowing adequate drying time, and using proper repair materials and techniques, water-damaged plaster can be restored to excellent condition, maintaining both the structural integrity and historical character of your home.
Disclaimer: This article is for informational purposes only and does not constitute professional advice. Every water damage situation is unique. Always consult a licensed contractor or restoration professional for your specific situation. If you’re dealing with an emergency, contact your local restoration company immediately.