Introduction
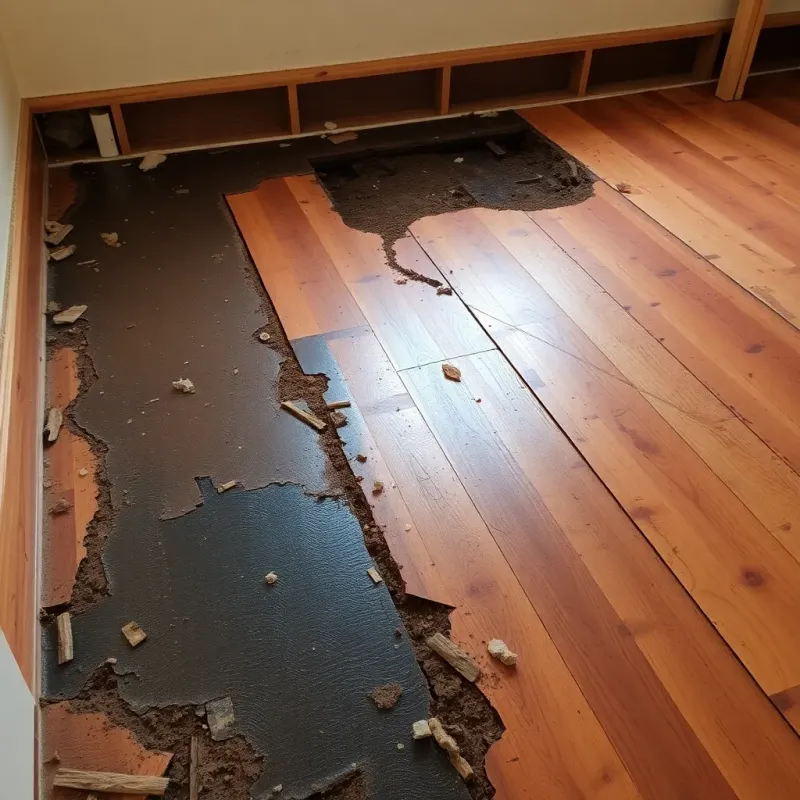
The subfloor represents the foundation of your home’s floor system. Located between floor joists and finished flooring, it bears weight, provides structural support, and serves as a critical barrier preventing water from reaching the framing structure below. When water damage compromises subfloor integrity, it creates cascading problems: weakened structural support, mold growth, pest vulnerability, and potential failure of finished flooring.
Unlike water damage visible in hardwood or laminate finishes, subfloor damage often goes unnoticed until significant deterioration has occurred. This hidden nature makes subfloor damage particularly dangerous. This comprehensive guide walks you through identifying water-damaged subfloors, understanding repair options, and executing successful repairs to restore structural integrity to your home.
Key Takeaway: Subfloor water damage is a structural issue, not just a cosmetic one — if you notice spongy or soft spots when walking, musty odors, or bouncing floors, the subfloor likely needs replacement before any new flooring can be installed.
Understanding Subfloor Construction and Water Vulnerability
Common Subfloor Materials
Different materials have different water vulnerability levels:
Plywood Subfloors (Most Common)
- Typically 3/4 inch to 1-1/8 inch thick
- Oriented-strand board (OSB) or plywood construction
- Glued and screwed to floor joists
- Highly susceptible to water damage
- Swells and weakens when wet
- Can rot if moisture persists
Oriented-Strand Board (OSB) Subfloors
- More economical than plywood
- Even more water-sensitive than plywood
- Swells faster when wet
- Deteriorates more rapidly with prolonged moisture
- Often used in newer construction
Hardwood Subfloors (Older Homes)
- May be solid wood strips
- Prone to cupping, warping when wet
- Susceptible to rot with prolonged moisture
- More repairable than modern materials
- Common in homes built pre-1990s
Concrete Subfloors (Basements)
- Porous material absorbs groundwater
- Develops moisture transmission problems
- Requires proper waterproofing and vapor barriers
- Special repair approach needed
Why Subfloors Are Vulnerable
Subfloor materials face unique water damage risks:
- Located between joists where moisture accumulates
- Often covered by flooring, hiding water damage from view
- Moisture can wick upward from below
- Pipe leaks, roof leaks, and ground moisture reach them easily
- Moisture under flooring prevents drying
- Structural location makes water damage structural damage
- Mold growth thrives in hidden, moist subfloor spaces
Subfloor water damage represents serious structural problems requiring prompt attention.
Identifying Water-Damaged Subfloors
Visual Inspection Signs
Several visual indicators suggest subfloor water damage:
Early Warning Signs:
- Soft or spongy spots when walking on flooring
- Visible discoloration on subfloor surface
- Moisture staining visible around edges or under baseboards
- Warping or slight buckling of finished flooring
- Mold or mildew odors in the room
Advanced Damage Indicators:
- Obvious softness and structural weakness
- Visible rot and deterioration
- Significant mold growth
- Structural sagging
- Floor movement or bounce when walking
- Visible water staining through multiple layers
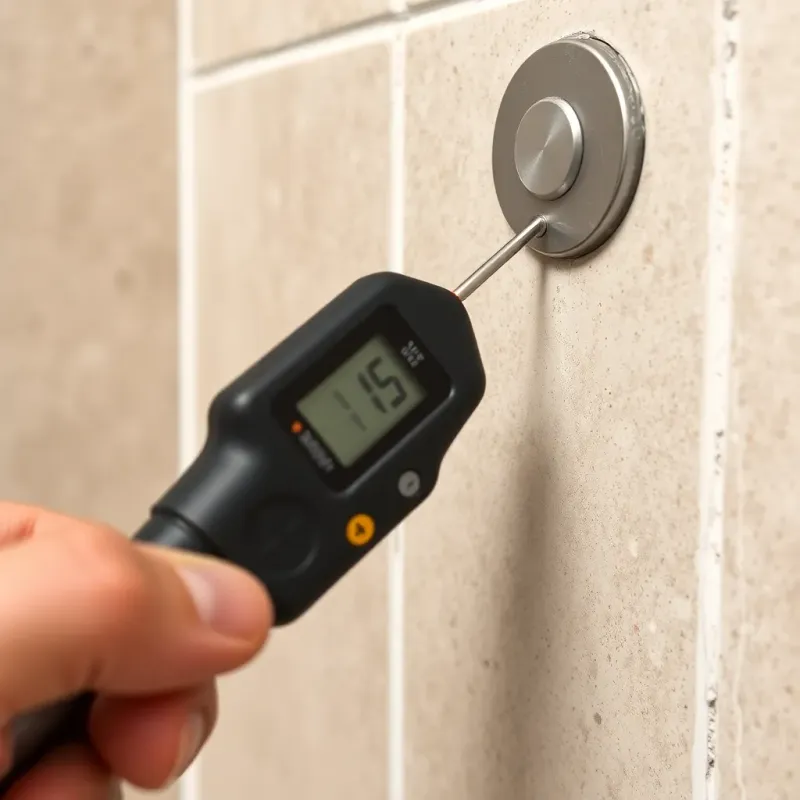
Moisture Testing
Objective moisture measurements confirm subfloor water damage:
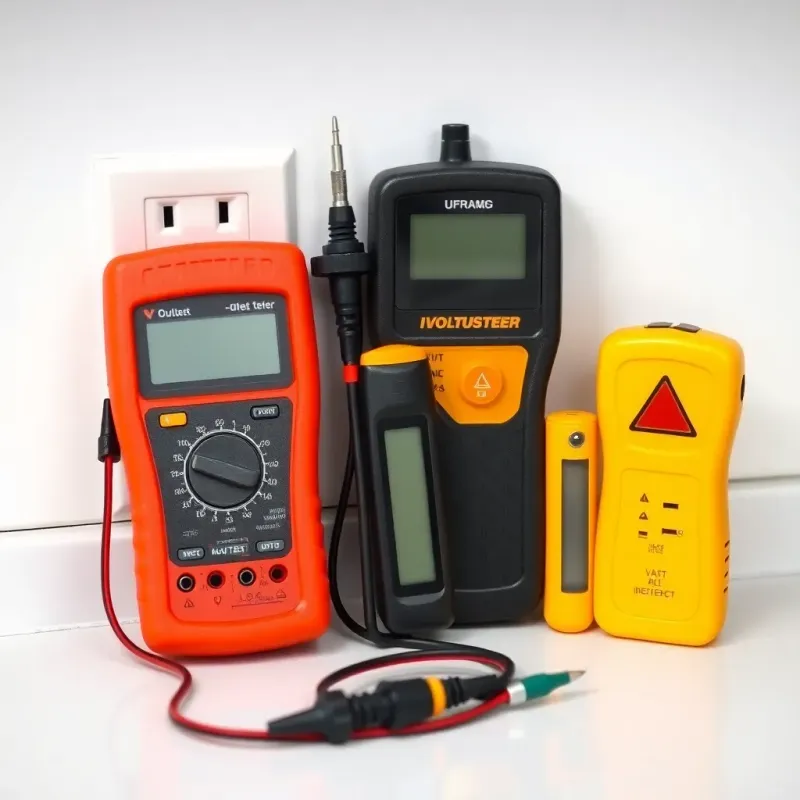
Moisture Meter Testing:
- Readings above 20% indicate significant moisture
- Readings above 25% typically mean replacement is necessary
- Testing multiple locations reveals moisture extent
- Comparative readings show moisture migration
Leak Detection:
- Visual inspection for active leaks from above
- Checking for plumbing leaks near affected areas
- Roof or gutter issues above
- Basement seepage or ground water
- Condensation from HVAC systems
Mold Growth Assessment
Mold growth indicates advanced moisture problems:
Mold Indicators:
- Black, green, or white growth on subfloor
- Musty odors indicating fungal growth
- Health symptoms (respiratory issues, allergies)
- Visible mold extending beyond water damage area
Significant mold contamination warrants professional remediation. Understand mold remediation costs after water damage to plan your budget accordingly.
Step 1: Locate the Water Source
Before repairing subfloor damage, identify and fix the water source. Continuing leaks make repairs impossible.
Common Water Sources
From Above:
- Roof or gutter leaks
- Condensation from HVAC ducts
- Appliance leaks (dishwashers, washing machines)
- Plumbing leaks in walls or ceiling
- Bathroom or kitchen water spillage
From Sides:
- Burst or leaking water supply lines
- Drain line failures
- Foundation cracks allowing water intrusion
- Basement seepage
From Below:
- Basement flooding or standing water
- Groundwater seepage
- Sump pump failure
- Exterior grading directing water toward foundation
Fix the Source
No subfloor repair succeeds while water intrusion continues. Address sources by:
- Repairing leaking pipes immediately
- Fixing roof leaks
- Improving drainage and grading
- Installing sump pumps if needed
- Repairing cracks in foundation
- Installing proper vapor barriers
Step 2: Assess Repair vs. Replace Decision
When Repair is Possible
Minor subfloor damage in specific, limited areas may be repairable:
Suitable for Spot Repair:
- Damage limited to small area (less than 2-3 square feet)
- Moisture readings below 20%
- No visible rot or fungal growth
- Structural joists undamaged
- No widespread soft spots
- Water source identified and fixed
When Replacement is Necessary
Most subfloor water damage requires replacement:
Replacement Necessary When:
- Moisture readings consistently above 20%
- Visible rot or structural weakness
- Mold growth present
- Damage extends over large area
- Structural joists show signs of damage
- Multiple soft spots indicate widespread saturation
- Water damage visible from multiple access points
Step 3: Prepare for Subfloor Replacement
Gather Tools and Materials
Tools Required:
- Circular saw or reciprocating saw
- Pry bar and hammer
- Screwdriver or power drill/driver
- Moisture meter
- Safety glasses and work gloves
- Respirator mask (for mold exposure risk)
- Utility knife
- Measuring tape
Materials Needed:
- Replacement subfloor material (plywood or OSB)
- Subfloor fasteners (screws or nails appropriate for material)
- Vapor barrier material if needed
- Mold treatment products if fungal growth exists
- Primer and sealant for cut edges
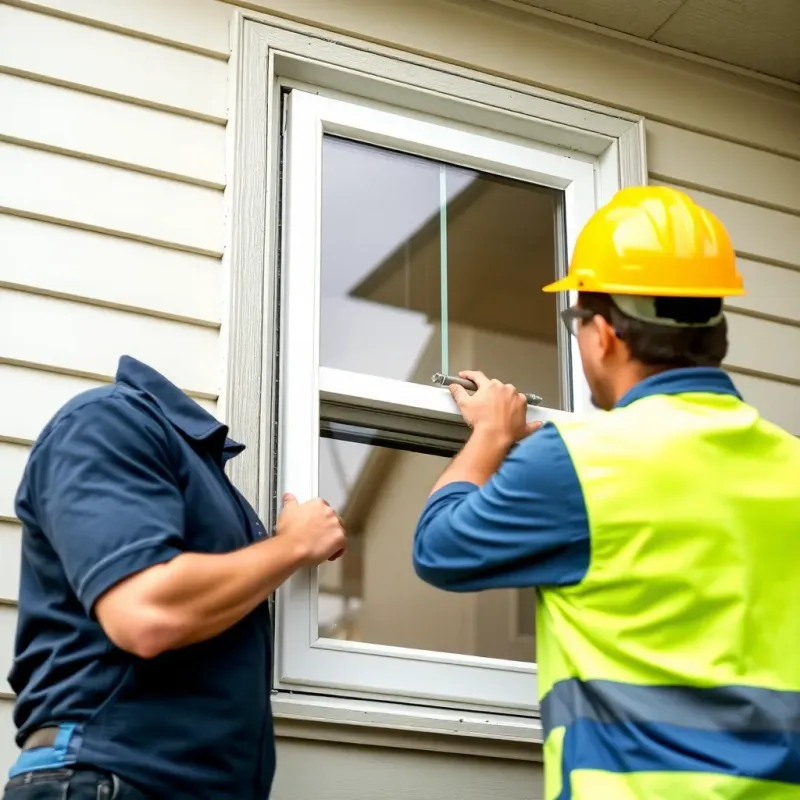
Remove Finished Flooring
To access subfloor, remove finished flooring:
Hardwood Floor Removal (see our hardwood floor repair guide for more detail):
- Carefully pry up boards
- Save for potential reuse
- Remove nails and fasteners
- Inspect subfloor condition during removal
Laminate or Floating Floors:
- Disassemble according to original installation
- Remove from affected area
- Set aside for possible reinstallation
Carpet or Vinyl:
- Cut and remove carpet/vinyl
- Remove adhesive if necessary
- Clean substrate before subfloor work
Ensure Proper Access and Safety
- Provide adequate ventilation
- Use proper lighting
- Ensure structural safety before beginning
- Have escape route in case of emergency
- Use appropriate personal protective equipment
Step 4: Remove Water-Damaged Subfloor
Cut Out Damaged Area
Pro tip: Always cut your subfloor removal lines so they fall on the center of a joist. This gives you a solid nailing surface for both the existing subfloor edge and the new replacement panel, and it prevents the seam from becoming a weak point that flexes underfoot.
Mark and cut away damaged subfloor section:
- Identify damage boundaries - Mark where damage ends and good material begins
- Plan cut lines - Cut along support joist lines when possible for structural integrity
- Make cuts - Use circular saw or reciprocating saw to remove damaged subfloor
- Leave supporting joists intact - Ensure joists remain undamaged for new subfloor support
- Check for additional damage - Inspect joists and area under removed subfloor
Inspect and Treat Joists
Examine support structure carefully:
Joist Assessment:
- Check moisture levels in joists
- Look for rot or deterioration
- Apply structural treatments if joists show moisture
- Replace joists if they show rot or weakness
Joist Treatment:
- Allow joists to dry completely before closing
- Apply wood preservative to exposed joist ends
- Ensure joist top is dry before new subfloor installation
Remove All Debris
Clear the area thoroughly:
- Remove all pieces of damaged subfloor
- Clean out debris and moisture
- Sweep area clean
- Allow to dry if moisture is present
Step 5: Dry the Area
Before installing new subfloor, ensure thorough drying:
Drying Process:
- Provide ventilation to area
- Use fans to create air circulation — see our room drying guide for detailed techniques
- Deploy dehumidifiers if available
- Monitor moisture levels with moisture meter
- Joists and area should be below 15% moisture content
Timeline:
- Small areas may dry in 24-48 hours
- Larger areas may require 5-7 days
- Check moisture before proceeding with installation
- Rushing installation over moist subfloor causes new problems
Step 6: Install New Subfloor
Install Vapor Barrier (If Needed)
Modern construction often includes vapor barriers:
- Install moisture barrier per building codes
- Overlapping seams appropriately
- Prevents moisture from below reaching new subfloor
- Critical for basement or ground-level installations
Prepare Replacement Material
New subfloor must be acclimated:
- Acclimate material - Allow 24-48 hours in space humidity
- Measure precisely - Ensure new material fits correctly
- Score and cut - Use circular saw for straight cuts
- Pre-drill if needed - Reduces splitting with fastening
Install New Subfloor
Proper installation ensures durability:
Installation Steps:
- Position new subfloor panels - Stagger seams from original layout if possible
- Align with joists - Panels must sit fully supported on joists
- Use appropriate fasteners - Screws or nails per manufacturer specifications
- Fastening pattern - Typically 8-12 inches apart along joists and 12 inches along interior
- Maintain gaps - Leave 1/8 inch gaps at room perimeter for expansion
- Check level - Ensure new subfloor is level with surrounding areas
- Cut openings - For pipes, vents, or other penetrations
Seal Cut Edges
Protect subfloor edges from moisture:
- Apply primer and sealant to all cut edges
- Creates moisture barrier protecting the cut
- Critical for longevity of installation
Step 7: Verify Installation Quality
Structural Testing
Before reinstalling flooring:
- Walk on new subfloor to verify stability
- Check for squeaks or movement
- Confirm adequate support across all areas
- Verify no bouncing or flex
Moisture Verification
Ensure subfloor is fully dry:
- Take moisture readings across new subfloor
- Should be below 15% before flooring installation
- Check underneath if accessible
- Allow additional drying if needed
Step 8: Reinstall Finished Flooring
Once subfloor repair is complete and verified, reinstall finished flooring:
Hardwood Flooring:
- Allow boards to acclimate
- Install using appropriate fastening method
- Sand and refinish if needed
- Ensure proper expansion gaps
Laminate or Other Flooring:
- Install underlayment per manufacturer specs
- Allow material acclimation
- Follow manufacturer installation instructions
- Ensure proper seam and expansion gap management
When to Call Professional Help
Complex Situations Requiring Professional Expertise
Contact licensed contractors when:
- Multiple joists show water damage or rot
- Structural integrity is questionable
- Mold contamination is extensive
- You’re uncertain about structural safety
- Repair would affect load-bearing walls
- Subfloor extends over crawl space with complex conditions
- Insurance claim is involved
Professional Assessment Benefits
Professionals provide:
- Structural engineering assessment
- Proper mold remediation
- Structural repairs if joists are damaged
- Insurance documentation
- Warranty on completed work
- Guaranteed quality results
FAQ: Water Damaged Subfloor Repair
Q: How much does subfloor water damage repair cost? A: Small spot repairs may cost $500-1,500. Larger replacements range from $1,500-5,000+ depending on area size, material access, structural complexity, and regional labor costs. Get professional estimates for accurate pricing.
Q: Can I repair subfloor myself or should I hire a professional? A: Small spot repairs in accessible areas may be DIY-manageable for experienced homeowners. However, structural damage, large areas, mold contamination, or complex situations require professional help. When in doubt, consult professionals.
Q: How long does subfloor replacement take? A: Small repairs typically take 1-3 days. Larger replacements may require 3-7 days depending on area size, access, and drying time. Timeline varies based on extent of work and material drying requirements.
Q: Will my homeowner’s insurance cover subfloor water damage? A: Most policies cover sudden, accidental water damage like burst pipes. However, gradual leaks and flooding are often excluded. Review your policy and contact your insurer for specific coverage details.
Q: What causes subfloor water damage most often? A: Common causes include burst or leaking water supply lines, roof leaks, bathroom leaks, basement seepage, appliance malfunctions, and improper grading directing water toward the foundation. Identifying the source is crucial before repairs begin.
Conclusion
Water-damaged subfloors pose serious structural threats that require prompt identification and repair. The key to successful subfloor restoration is identifying damage early through regular inspections, understanding the water source, and choosing appropriate repair or replacement options.
While some subfloor water damage repairs may be manageable DIY projects for experienced homeowners, many situations benefit from professional expertise. Structural integrity is not an area for cutting corners or learning through trial and error. When in doubt about the safety or complexity of subfloor repairs, invest in professional assessment and work.
By addressing subfloor water damage promptly and properly, you protect your home’s structural integrity, prevent mold growth, and ensure your home remains safe and sound for years to come.
Disclaimer: This article is for informational purposes only and does not constitute professional advice. Every water damage situation is unique. Always consult a licensed contractor or restoration professional for your specific situation. If you’re dealing with an emergency, contact your local restoration company immediately.