Introduction
Most homeowners don’t realize they have a roof leak until water is dripping into their bedroom. By that time, significant structural damage has already occurred—often costing thousands more to repair than early intervention would have cost. The key to protecting your home is recognizing early warning signs before water damage spreads throughout your attic and living spaces.
This comprehensive guide reveals the subtle indicators that your roof is leaking, helping you catch problems while repairs are still manageable and affordable.
Key Takeaway: Your attic is the single most revealing place to detect a roof leak early—a twice-yearly attic inspection with a flashlight can catch water stains, soft wood, and mold growth months before damage becomes visible on your ceilings below.
Understanding Roof Leak Risk
Why Early Detection Matters
A single small roof leak can cause catastrophic damage if left unaddressed:
Timeline of damage progression:
- Days 1-7: Water enters attic space, soaks into insulation
- Weeks 1-4: Moisture promotes mold growth, spreads through attic
- Weeks 4-12: Structural wood begins deteriorating, rafters weaken
- Months 3-6: Damage extends into walls, electrical systems become hazardous
- 6+ months: Structural compromise becomes severe, repair costs multiply
A leak costing $200-$500 to repair when first detected can escalate to $5,000-$15,000 after months of damage.
Common Roof Leak Sources
Primary leak locations:
- Roof penetrations (vents, chimneys, skylights)
- Valleys where roof sections meet
- Damaged or missing shingles
- Deteriorated flashing around pipes and vents
- Gutter and fascia issues
- Ice dams in winter climates
- Foundation of dormers and additions
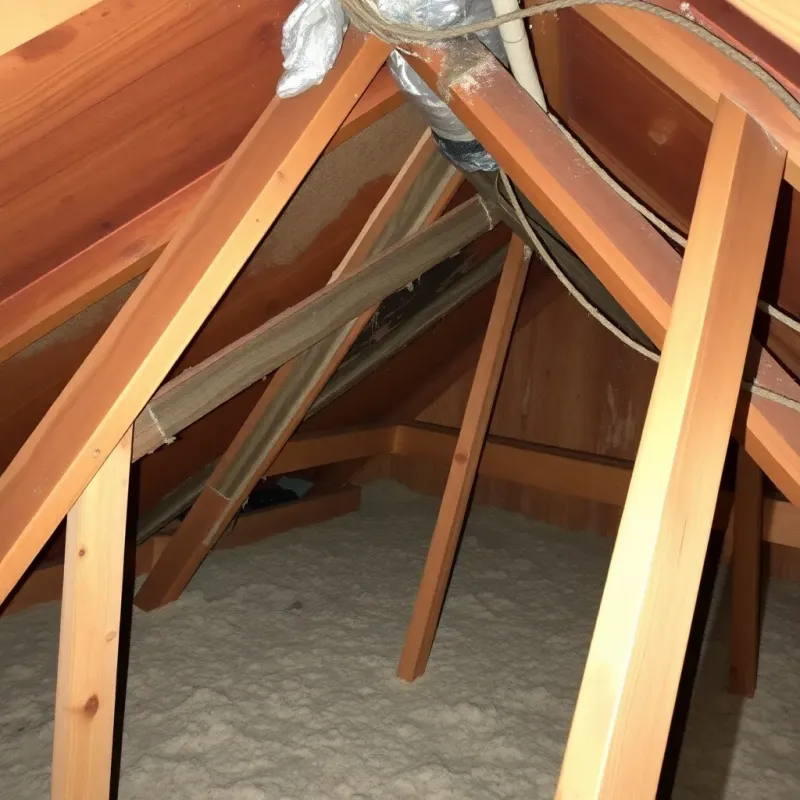
Attic Inspection: The Most Revealing Evidence
Your attic provides the clearest evidence of roof leaks. Inspect it at least twice yearly—spring and fall.
What to Look For in Your Attic
Water staining patterns:
- Look for dark patches on roof sheathing or rafters
- Tan or brown discoloration indicates past or active leaks
- Fresh water marks appear darker and wetter than old stains
- Water typically flows downward, so stains below problem areas
- Stains appearing in winter suggest ice dam issues
- Summer stains often indicate ventilation or flashing problems
Wood condition changes:
- Touch exposed rafters and sheathing for soft spots
- Deteriorated wood feels spongy or crumbly
- Rot appears as darkened, weakened wood
- Mold creates dark or green staining with fuzzy appearance
- Press with a screwdriver—solid wood resists, rotted wood accepts penetration
Insulation damage:
- Wet insulation loses R-value and promotes heat loss
- Look for dark, damp patches in otherwise light insulation
- Mold growth appears as discolored patches
- Compressed or matted areas indicate water exposure
- Discoloration spreading through insulation suggests ongoing leaks
Mold and mildew indicators:
- Black, green, or white growth on wood surfaces
- Fuzzy appearance distinct from dust
- Musty odors concentrated in attic areas
- Health symptoms (coughing, allergies) worse in affected homes — follow our mold prevention guide if you discover growth
Safe Attic Inspection Process
1. Prepare for safety:
- Wear a respirator mask (mold concerns)
- Use work gloves and protective clothing
- Bring powerful flashlight or portable lighting
- Set up stable stepping (attic trusses only, never drywall)
- Have phone accessible for emergencies
2. Begin at attic entry:
- Allow eyes to adjust to darkness
- Scan for obvious water damage
- Note general attic ventilation and condition
- Check for previous water damage evidence
3. Systematically inspect areas:
- Check underside of roof sheathing
- Examine top of interior walls
- Inspect around chimney penetrations
- Look along valleys and dormers
- Examine around vent pipes and vents
4. Focus on problem areas:
- Prioritize recent stains
- Trace stain patterns toward source
- Check areas where leaks are most likely
- Document findings with photos and measurements
5. Verify ventilation status:
- Look for proper soffit intake vents
- Ensure ridge vents are open and unobstructed
- Check that attic air can flow freely
- Poor ventilation often precedes leaks
Exterior Warning Signs
Shingle and Flashing Inspection
What to check during exterior roof inspection:
Shingle condition:
- Curling or buckling shingles trap water
- Missing shingles expose roof decking
- Cracked shingles allow water penetration
- Bald patches where granules have worn away
- Shingles darker in some areas (moss or mold growth)
- Shingles lifting at edges or corners
Flashing failures:
- Separation between flashing and shingles
- Cracked or corroded metal flashing
- Missing caulk or sealant around flashing
- Rust streaks indicating corrosion
- Flashing gaps where water enters
Here’s something most people don’t realize: the vast majority of roof leaks do not come from damaged shingles—they originate at flashing failures around chimneys, vents, and skylights. When inspecting your roof, spend 80% of your time examining these transition points rather than the shingle field itself.
Valley issues:
- Debris accumulation trapping water
- Visible gaps between valley metal and shingles
- Rust streaks or discoloration in valleys
- Accelerated shingle wear in valley areas
Chimney and vent surroundings:
- Missing caulk around chimney base
- Deteriorated mortar in chimney brick
- Boots loose or deteriorated around vents
- Stains on outside of chimney indicating water intrusion
Gutter and fascia problems:
- Clogged gutters overflow onto fascia
- Separated gutters creating water spillage
- Damaged fascia board (wood rot)
- Water stains on exterior walls below gutters
- Sagging gutters holding water pools
Checking from Ground Level
Safe exterior inspection without roof access:
Use binoculars to examine roof details from ground level. Look for:
- Obvious shingle damage
- Missing or loose flashing
- Debris accumulation
- Visible sagging or depressions
- Gutters pulling away from fascia
- Water stains on exterior walls
Interior Warning Signs
Ceiling and Wall Indicators
Primary interior indicators of roof leaks:
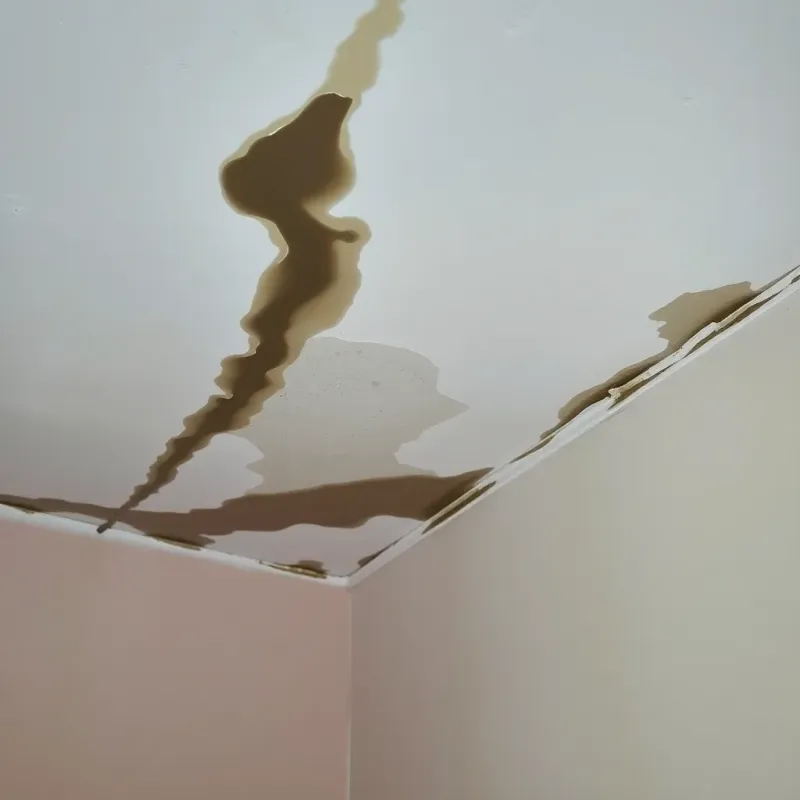
Ceiling stains and discoloration:
- Brown, yellow, or dark patches on ceilings
- Ring patterns indicating multiple leak occurrences
- Fresh-looking stains versus old discoloration
- Stain patterns spreading horizontally (indicates active leak)
- Stains appearing after heavy rain (confirms leak location)
Drywall and paint problems:
- Peeling or bubbling paint
- Wallpaper separation from wall
- Soft or spongy drywall when pressed
- Visible warping or bowing
- Separation between ceiling and walls
Moisture in living spaces:
- Condensation on windows in winter
- Musty odors in upper-level rooms
- Increased humidity despite dehumidifiers
- Visible mold growth on ceilings or walls
- Water rings on light fixtures or ceiling fans
Compromised insulation visible from interior:
- Water stains spreading through attic
- Visible mold in attic (seen through access areas)
- Deteriorated fiberglass appearing compressed
- Odor of wet insulation
- Wet or damp areas above suspended ceilings
Seasonal Roof Leak Patterns
Winter Leak Indicators
Ice dam formation:
- Occurs when warm attic melts snow near roof edge
- Creates ice ridge that traps water
- Backup forces water under shingles
- Results in interior leaks despite roof integrity
- More common in improperly ventilated attics
Prevention and detection:
- Monitor for large icicles on gutters
- Check attic temperature (should match exterior in winter)
- Improve ventilation to keep attic cold
- Inspect for water stains after freeze-thaw cycles
- Consider heat cables or improved insulation
Spring/Summer Leak Indicators
Storm-related damage:
- Inspect after heavy rain or wind storms
- Look for displaced shingles
- Check for debris damage from falling branches
- Examine for hail impacts (small dents in shingles)
- Monitor for leaks appearing after storms
Growth-related issues:
- Mold and mildew visible on roof surface
- Moss or algae growth (holds moisture, promotes deterioration)
- Lichen growth creating gaps between shingles
- Insect activity creating small holes
- Animal entry points (raccoons, squirrels)
Fall Inspection Focus
Seasonal vulnerabilities:
- Leaves and debris clogging gutters and valleys
- First heavy rains expose existing weak points
- Temperature fluctuations stress flashing
- Inspect thoroughly before winter weather arrives
Post-hurricane or high-wind checks:
- Visual inspection immediately after severe weather
- Document all visible damage for insurance
- Check for loose flashing and shingles
- Inspect interior ceilings and walls for water entry
- Monitor attic conditions over following weeks
Professional Roof Inspections
When to Hire a Roofing Professional
Signs requiring professional assessment:
- Visible water damage in attic or interior
- Roof over 15 years old (age-related deterioration)
- After significant storms or high winds
- When buying or selling a home
- If planning insurance claims
- Persistent musty odors despite ventilation improvements
- Repeated leaks in same area
- Multiple water stains in attic
What Professional Roofers Assess
Complete roof inspection includes:
- Full roof surface evaluation (shingles, flashing, valleys)
- Attic inspection and moisture assessment
- Ventilation system evaluation
- Gutter and fascia condition review
- Photo documentation of all findings
- Written report with repair recommendations
- Priority ranking of needed repairs
- Cost estimates for repairs
Inspection cost: $200-$500 depending on roof size and complexity
Value of professional inspection:
- Expert identification of leak sources
- Prevents costly damage from missed problems
- Often required for insurance claims
- Helps plan maintenance budget
- Extends roof lifespan through preventative repair
Creating a Roof Inspection Schedule
Monthly Inspections (From Ground and Attic)
Easy monthly checks:
- Visual exterior inspection with binoculars
- Quick attic scan for new staining
- Gutter clearing and inspection
- Post-storm damage assessment
- Monitoring known problem areas
Seasonal Deep Inspections
Spring (March-May):
- Comprehensive attic inspection
- Check for winter damage and ice dam issues
- Inspect exterior thoroughly
- Clear debris from roof and gutters
- Plan summer maintenance
Summer (June-August):
- Post-storm inspections
- Check attic ventilation function
- Monitor for mold or mildew growth
- Repair identified problems before fall rains
Fall (September-November):
- Clear gutters and downspouts
- Remove leaves and debris from roof
- Final inspection before winter weather
- Address ventilation issues
- Prepare for winter leak prevention
Winter (December-February):
- Monitor for ice dam formation
- Document winter leak locations
- Check attic temperature and moisture
- Plan spring repairs
- Document any emergency weather damage
Preventative Maintenance to Avoid Future Leaks
Regular Maintenance Tasks
Annual gutter maintenance:
- Clean gutters twice yearly (spring and fall)
- Remove debris preventing proper drainage
- Repair separation or damage
- Ensure downspouts direct water away from foundation
- Install gutter guards to minimize debris
Roof surface care:
- Remove moss, mold, or algae growth
- Trim tree branches overhanging roof
- Remove accumulated debris
- Address shingle damage immediately
- Reapply sealant to flashing every 3-5 years
Ventilation optimization:
- Ensure soffit vents remain open and unobstructed
- Verify ridge vents function properly
- Maintain proper attic airflow
- Clean HVAC ventilation ducts
- Avoid blocking vents with attic insulation
Age-based replacement:
- Replace shingles reaching 20-25 years old
- Update flashing older than 15 years
- Upgrade ventilation in older homes
- Install new sealant and caulking
- Consider complete roof replacement if numerous problems exist
FAQ: Early Roof Leak Detection
Q: How can I tell if a water stain is from an old leak or an active one? A: Old stains appear brownish and very dry. Active leaks show darker, wet-looking stains and may have water droplets visible. Press the area—active leaks feel damp, while old stains are completely dry. After heavy rain, observe which stains are darkened by new moisture.
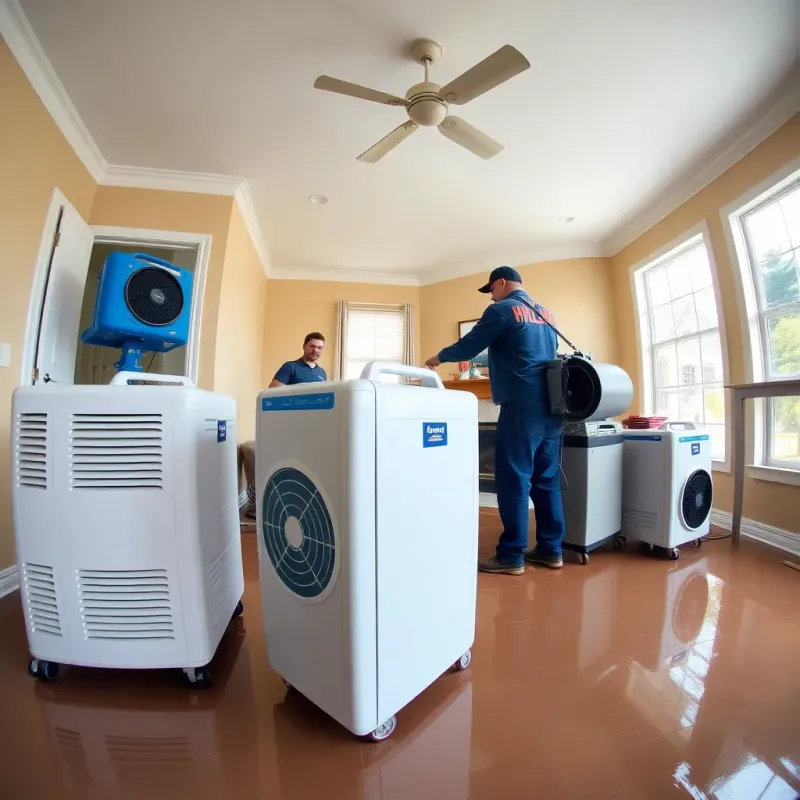
Q: What should I do if I discover a roof leak? A: First, minimize further damage by placing buckets under drips. Document damage with photos. Call a roofing contractor for inspection and estimate — see our guide on fixing a leaking roof causing water damage. Contact your homeowner’s insurance to report the damage. Avoid walking on wet attic insulation. Begin water damage mitigation if needed.
Q: Can small roof leaks fix themselves? A: No. Small leaks only worsen with time and weather exposure. A small hole today becomes a major problem after winter freeze cycles, heavy rain, or wind events. Addressing leaks quickly is always more cost-effective than waiting.
Q: How much does roof leak repair typically cost? A: Simple flashing repair: $200-$500. Shingle replacement (small area): $300-$800. Comprehensive leak repair with water damage restoration: $1,000-$5,000+. Early detection dramatically reduces costs by preventing structural damage.
Q: Should I hire a roofer or a water damage specialist? A: Roofers address the leak source. Water damage specialists address water intrusion damage. For roof leaks, start with a roofer. If water damage is significant, also hire restoration specialists for mold remediation and structural drying.
Conclusion
Catching roof leaks early requires vigilance and regular inspections. Regular attic visits, exterior examinations, and attention to seasonal warning signs help you identify problems before they become catastrophic. When you notice any warning signs—water stains, mold growth, soft wood, or exterior damage—take immediate action.
Professional roof inspections provide expert assessment when DIY methods are inconclusive. By combining regular self-inspection with professional oversight, you can protect your roof investment and prevent the costly water damage that neglected roof leaks cause. Start inspecting today, and you’ll catch problems when repairs are still affordable and damage is minimal.
Disclaimer: This article is for informational purposes only and does not constitute professional advice. Every water damage situation is unique. Always consult a licensed contractor or restoration professional for your specific situation. If you’re dealing with an emergency, contact your local restoration company immediately.